

Whether you’re a traditional pitmaster who’s curious about pellet grills, or a barbecue beginner with a shiny new Rec Teq or Traeger, most will agree that pellet smokers are a bit of a different animal.
Brimming with convenience, and loaded with cool gadgets like temperature probe to app notifications, or cell phone alarms set to buzz you when that brisket is ready to wrap, pellet grills make smoking meat accessible to anyone.

That being said, the pros of having a barbecue computer feed your fire, and smoke your meat, come with a few quirks to be aware of and this tutorial will take anyone through the entire process of smoking a brisket on a pellet grill.
For those of you who understand the basics, click ahead to the chapter you’d like to read…
Table of Contents
- How To Choose A Brisket
- Making Sense of the Grades Of Brisket Available
- Why do we trim a brisket?
- What To Trim On A Brisket (Pellet Grill Method)
- Should You Use Rub On a Brisket?
- Preparing your Pellet Smoker for a Barbecue
- Temperature To Smoke Brisket On A Pellet Grill
- The 1st Part of the Cook: Smoking the Brisket
- How To Wrap Your Brisket: The Right Way
- Wrapping the Brisket with Butcher Paper Correctly
- Smoking Brisket Through The Stall
- Should You Let Your Brisket Rest?
- How Long Should You Let Brisket Rest?
- More Brisket Help…
- What Sides Are Served With Smoked Brisket?
How To Choose A Brisket
Each step in smoking a brisket on a pellet smoker is important, but choosing the right brisket may be the most important step.
I’d even say after selecting the right brisket, that other steps in the process are more forgiving of mistakes. (If you maintain your smoker at a constant temperature of 225 degrees Fahrenheit /107 degrees Celsius.)

Let’s start with the beef brisket itself.
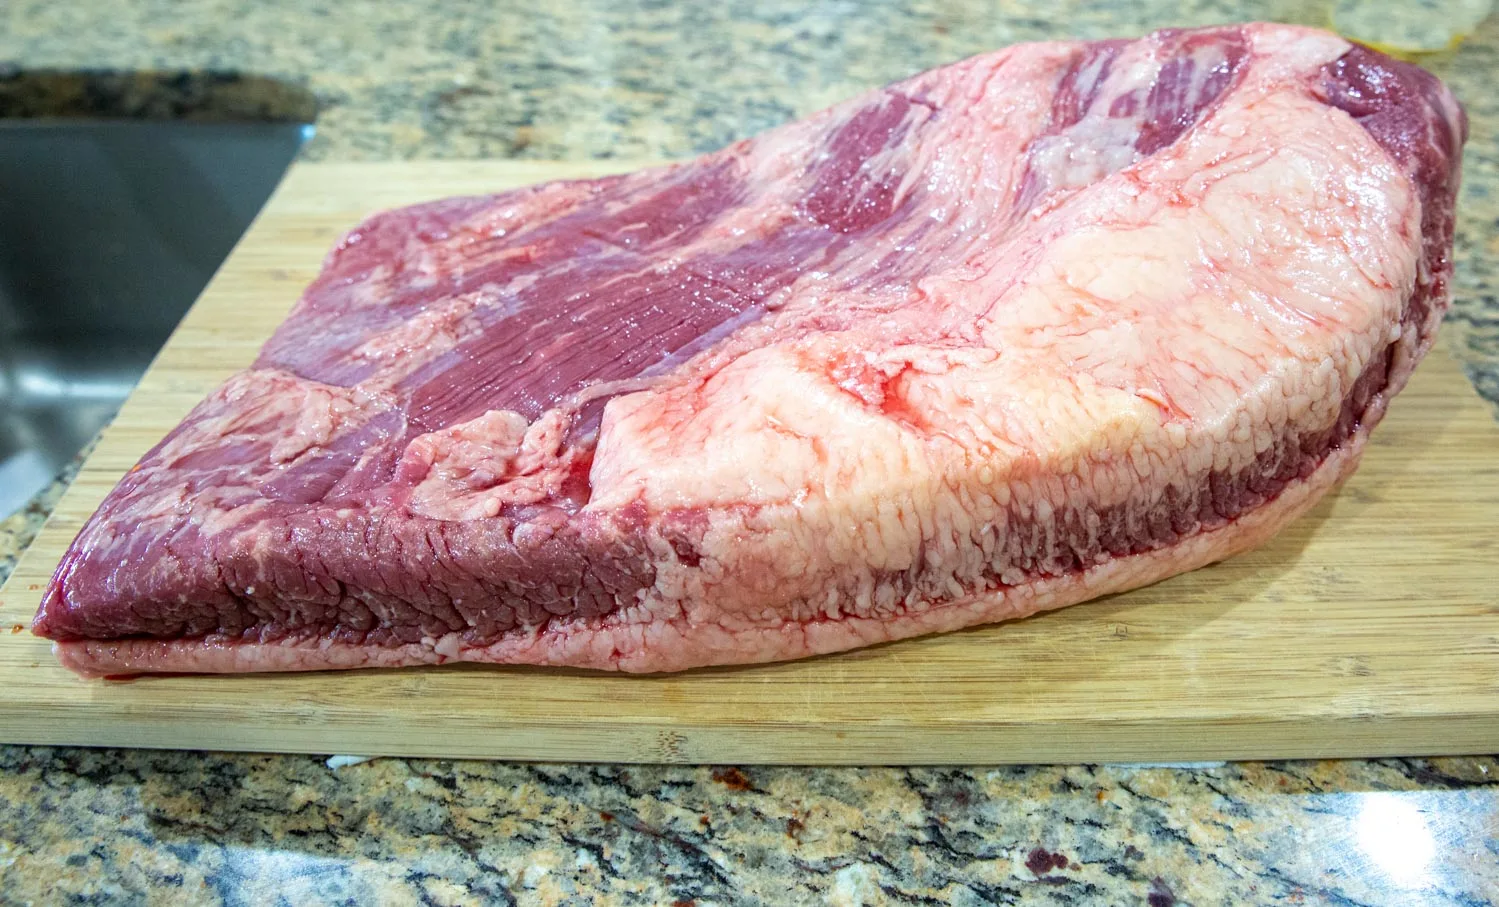
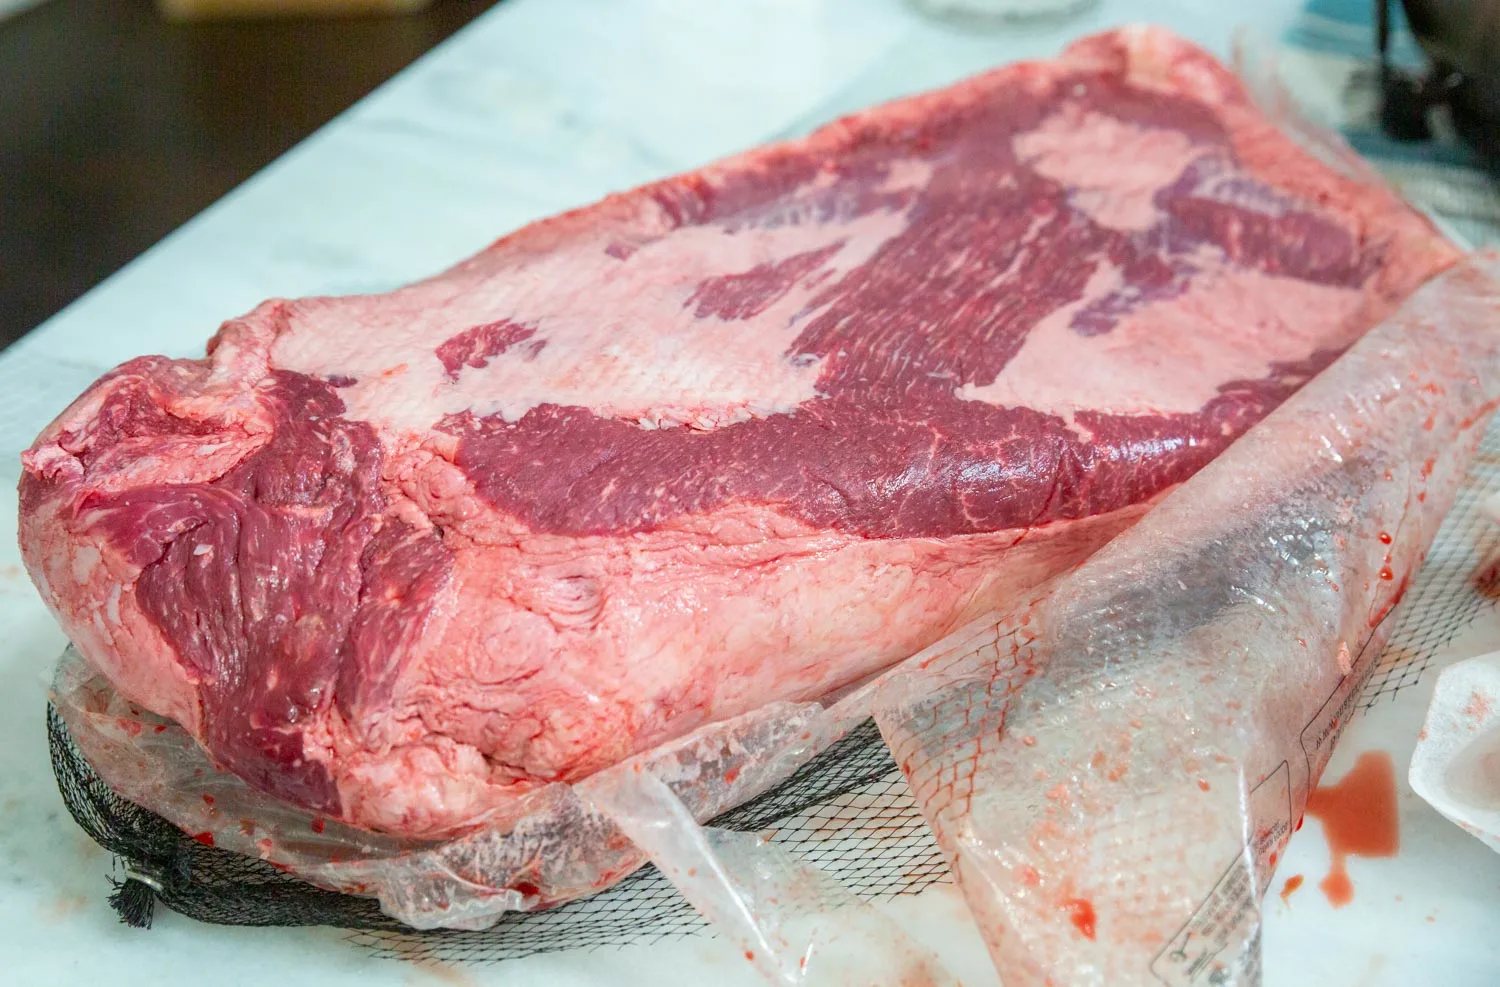
You want to make sure that you get a whole brisket. You’ll also hear this called a “whole packer brisket” or a “full packer brisket” if you’re speaking with a pitmaster that smokes beef often. All that means is a whole, ordinary-grade brisket packed and sealed in plastic.


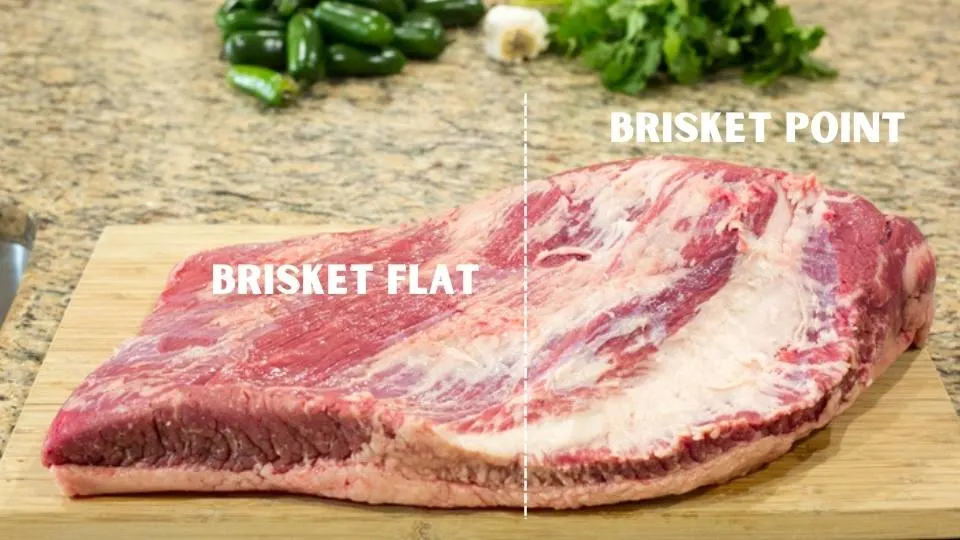
In your local grocery store or butcher shop, you’ll have some choices in brisket cuts… It will almost always be between a brisket flat and an entire brisket.
The brisket flat is the lean side of the brisket and looks like a thin or flat end, you can’t miss it. This cut of meat has very little fat and easily dries out if not following the right cooking method.

If you want to experiment with smoking the brisket flat, we will be posting a recipe and method for that in the near future, but if this is your first brisket it’s a good idea to wait to cook a flat until after you’ve gotten some experience under your belt. (The juicy, fatty parts are much more forgiving!)
Making Sense of the Grades Of Brisket Available
Next, you’ll need to determine the grade of brisket you’re interested in cooking. There are technically 3 grades of beef brisket– (but I say there are 4).
Going from least to greatest- Select, Choice, Prime, and Wagyu, and the better the grade, the more intramuscular fat there will be.
Intramuscular fat is the small lines of fat running between the meat in the interior of the roast. This is what we refer to as marbling because it resembles the veins in marble.
The more intramuscular fat, the juicier the brisket (because as fat breaks down it flavors the meat and provides juiciness).


The photos above may be able to give you a sense of the difference of fat and marbling on the lowest and highest tiers of brisket, but the grades go beyond fat content and fat distribution. High grades should taste richer and have better flavor according to experts in the field.
Select grade has the least amount of intramuscular fat in it, and Wagyu has the highest amount of intramuscular fat in it.
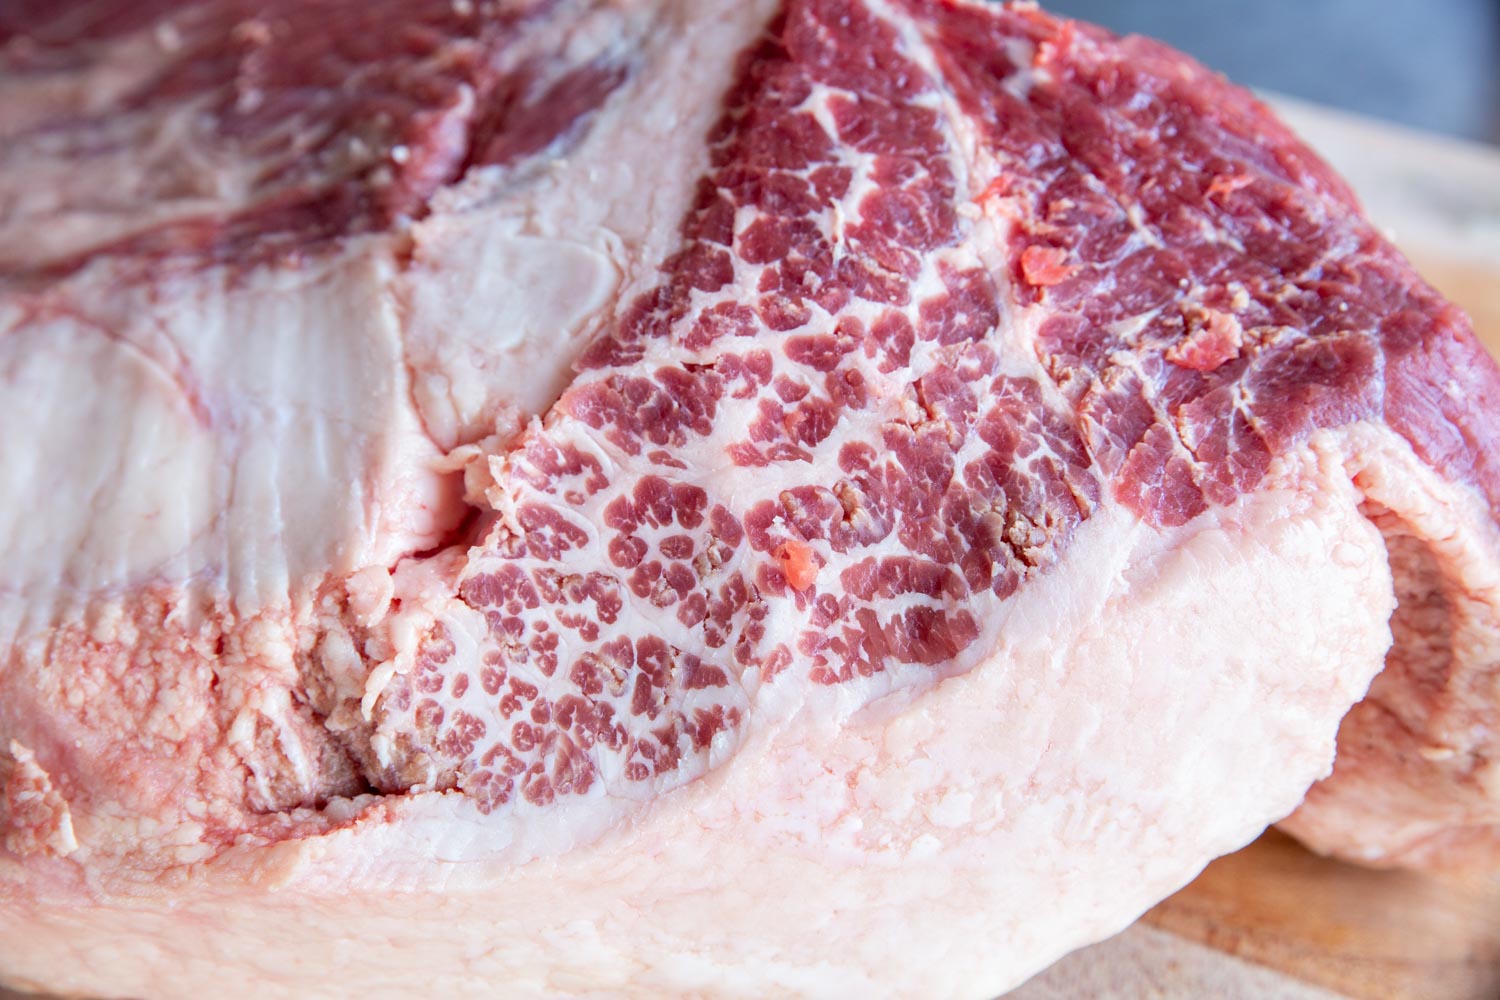

When you hear someone say a piece of beef has excellent marbling, they’re referring to these small lines of extra fat running through the beef itself. The most flavorful brisket you’ll ever eat is a Wagyu brisket because the beef has been bred to contain this extreme level of marbling…they will also be the most expensive.
If you want the most perfect smoked brisket you’ll want to go with a Wagyu brisket. We get our Wagyu briskets through Snake River Farms, a real pitmaster and championship barbecue favorite for Wagyu and Angus Beef.
You’ll see they carry items like 44 Farms beef, Black Angus Prime Steaks, and Wagyu grade briskets shipped to your door in freezer boxes. Allegedly, people like Bobby Flay and Myron Mixon exclusively use beef in this arena. (At Snake River Farms website my code “AE5P3822” will get you 5% off.)
And, of course, you will pay more for a Wagyu brisket versus a Select, Choice, or Prime Brisket. If we can’t get a Wagyu brisket because they’re just unavailable, we just get a Prime brisket from Costco, and last we will choose a choice or select brisket.
(However, through the magic and mystery of brisket science, 2 of our best briskets have been with choice grade.) Only you can make the choice of what is right for you at this time.

What Size of Brisket to Choose
Next, you’ll want to look at the size and shape of the brisket. Size is an easy one because your main goal is to choose the brisket that will feed the number of people you’re feeding.
The general rule of thumb is about 1/2 lb per guest. For example, if you have 20 guests coming over you’ll buy a 10 lb brisket. And if you want to make sure you don’t run out or you want leftovers, get a 13 pound brisket (because everyone is going to absolutely love this smoked brisket recipe!).
For the shape of the brisket, your best-case scenario is to have the brisket be the same thickness at the brisket point and flat. Basically, the same thickness throughout. What you’ll see more often when you smoke brisket is a thicker point and a thinner flat. No worries though, just get it as even as you can.
(Links are affiliate links to products we think are helpful and we may receive a small commission, at no cost to you, if purchased.)
Why do we trim a brisket?
Once you’ve picked up your whole brisket we will trim it! By trimming the brisket we do two things.
- Remove the excess fat and silver skin from the top of your brisket, which will not render down but will make a mess of your pellet grill.
- Expose the meat to smoke to get good penetration for a smoky flavor your guests will go nuts for.

What Do You Need To Trim a Brisket?
To trim your brisket you’ll need:
- Sharp Knife
- Cutting Board
- Paper Towels
- REALLY COLD BRISKET
The paper towels are for wetting and putting underneath your cutting board, so your cutting board doesn’t slide around while you are trimming. They’re also for patting dry the brisket after you take it out of its package.
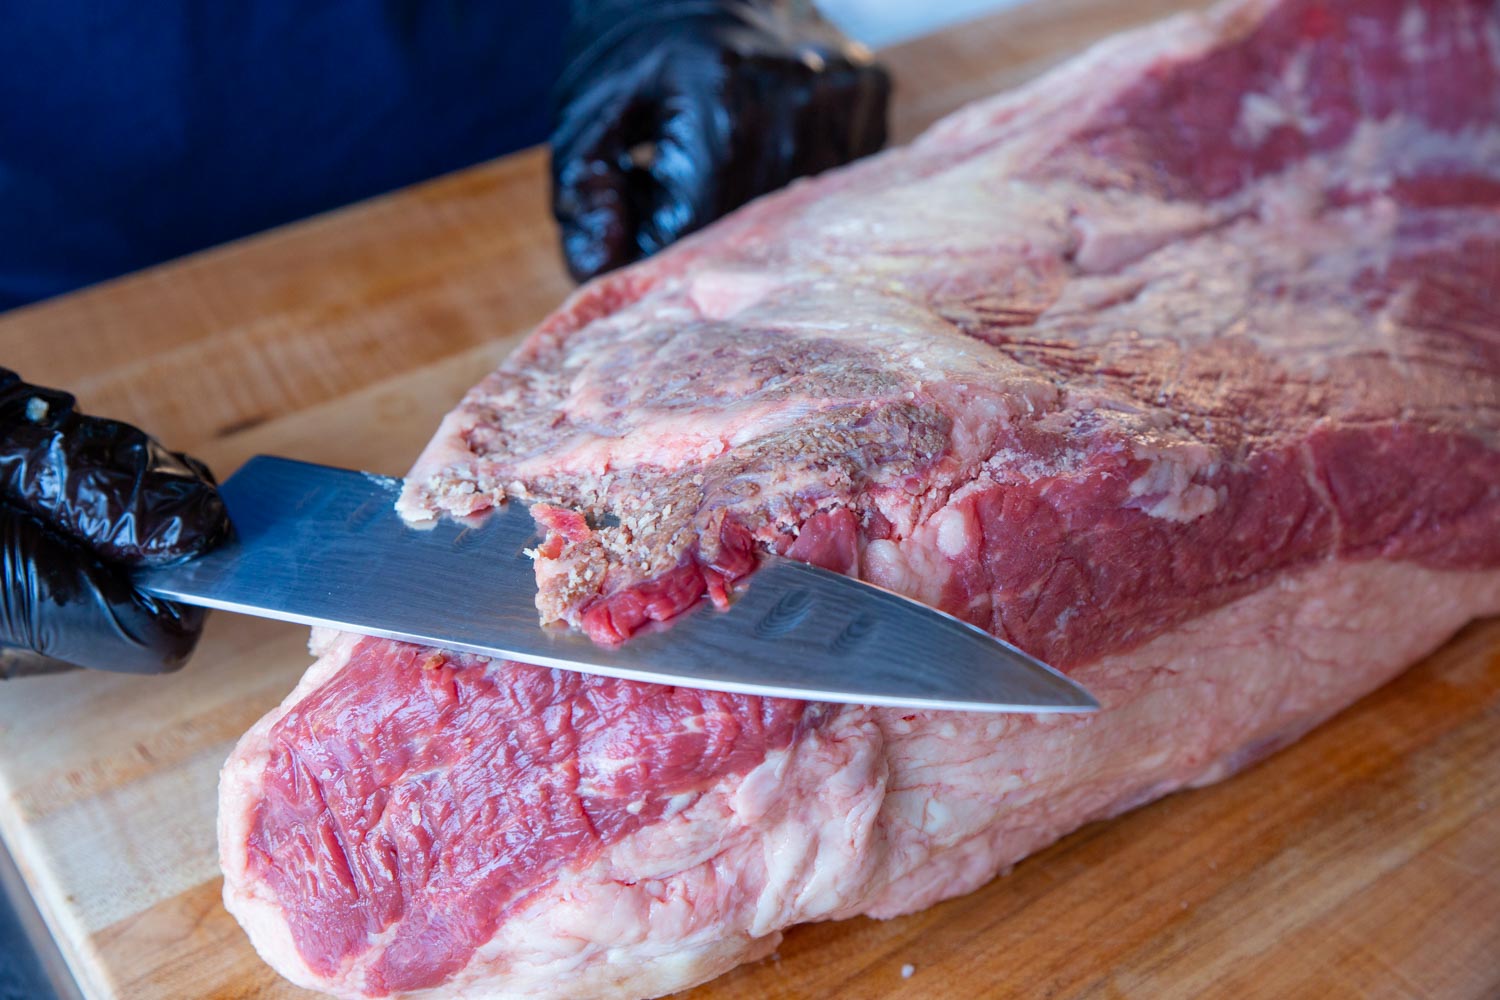
Make sure your knife is very sharp. This is the knife sharpener we use and recommend. Some people use meat slicing knives and some use chef knives. We prefer our Japanese chef knives because they’re extremely sharp and very easy to maneuver versus a long slicing knife. A lot of people don’t know this but a sharp knife hurts way less than a dull knife if you happen to have a mishap. If you need help choosing the right knife I wrote a whole article on chef favorites here.
Chill Your Brisket Before Trimming (Easy Pro Tip)
And here is your pro tip for trimming your brisket… Place it in the freezer for about 30-45 minutes after you pat it dry. This is the best way to trim your brisket because as the meat cools down, it will become more firm and easier for you to handle and slice through.
Trust me, we’ve trimmed a brisket at room temperature (sliding around a cutting board), and let’s just say it’s a nightmare to handle and it will add a lot of time to your trimming process. This is the only time during the cooking process where cold fat is preferred.
What To Trim On A Brisket (Pellet Grill Method)
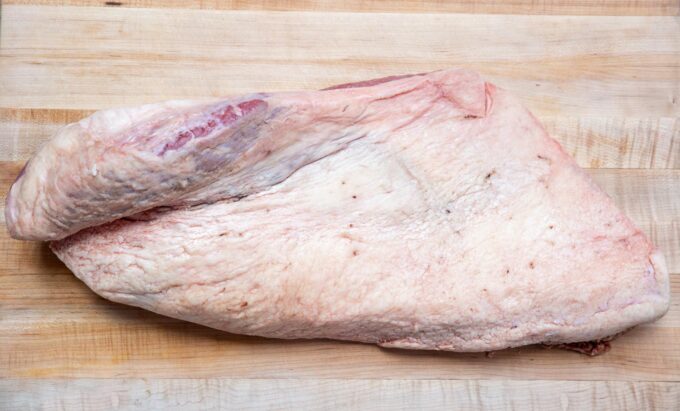


The Fat Side (FAT CAP)
There are different ways to trim your brisket, but a specific method is best for a pellet grill (and a different method is best for an offset smoker).
Smoking on a pellet smoker is amazing, but it has this one flaw–there is a heat source below the brisket where the igniter fires up to create smoke from the pellets. A small amount of radiant heat exists and heats the brisket from below and I don’t care what your pellet grill company says, most of them have this problem.
Because of this radiant heat, a brisket smoked on a pellet smoker should be trimmed specifically to prevent this heat from becoming a problem.
Some people prefer to trim the fat cap side (the side of solid fat) which is easily identified because it’s covered entirely white with fat, hence the name. This is the side that you hear the great debate over “fat side up or fat side down” when placing the brisket on the grates of your pellet smoker.
We believe that it can be trimmed slightly (but doesn’t really have to be) and that the brisket should be placed fat-side down on the smoker.
We recommend either not trimming the fat cap at all, or trimming minimally, leaving a layer of fat (at least 1/4″), because that’s the side that will protect your brisket from the heat source.
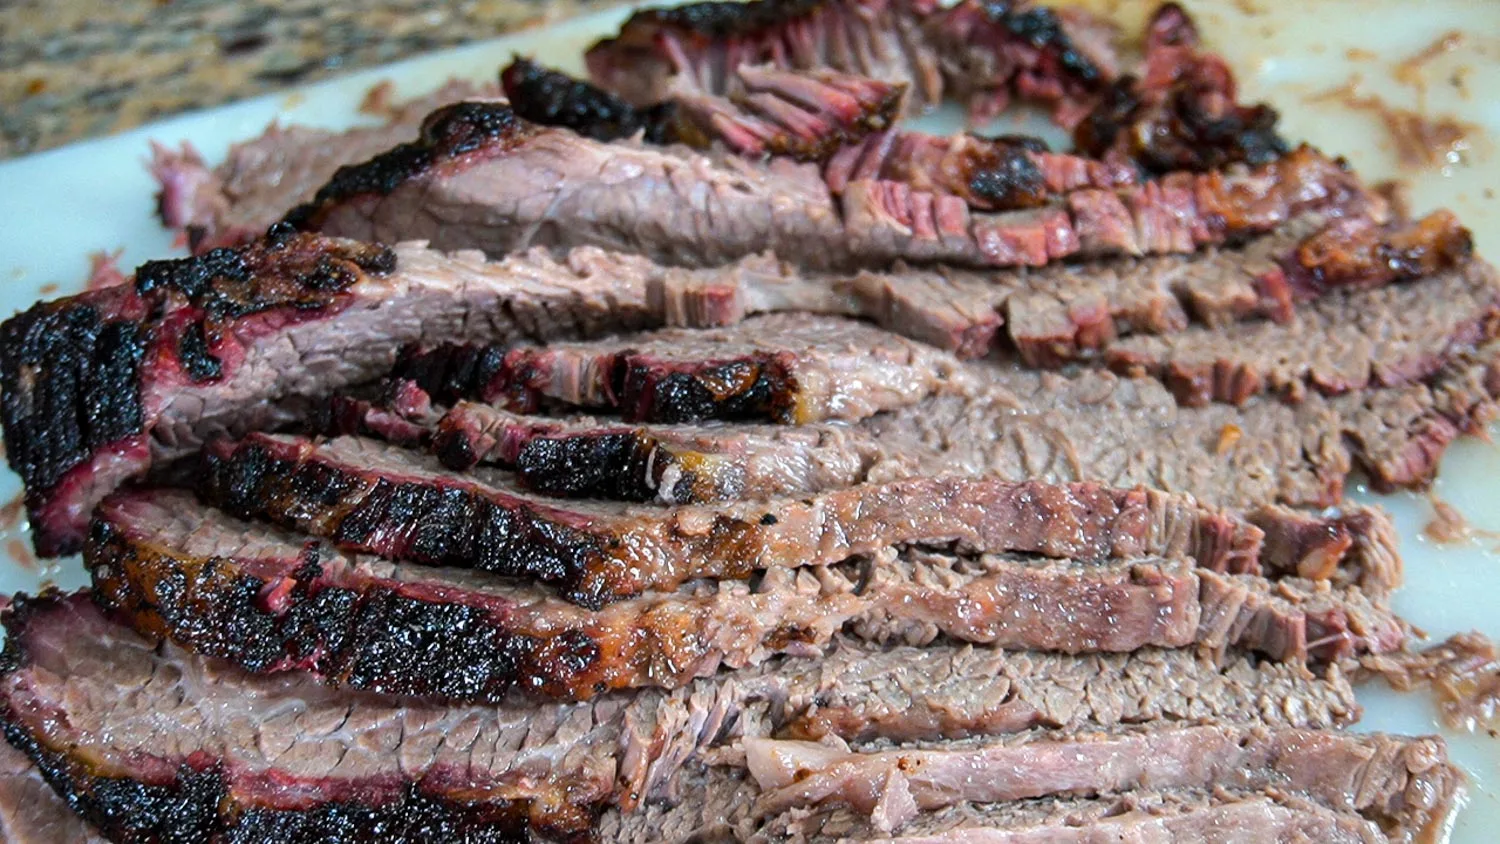
After a long smoke, we just run our hands along the bottom and the entire fat cap falls right off. (You’ll see this in the video and also on our how to slice a brisket post.)
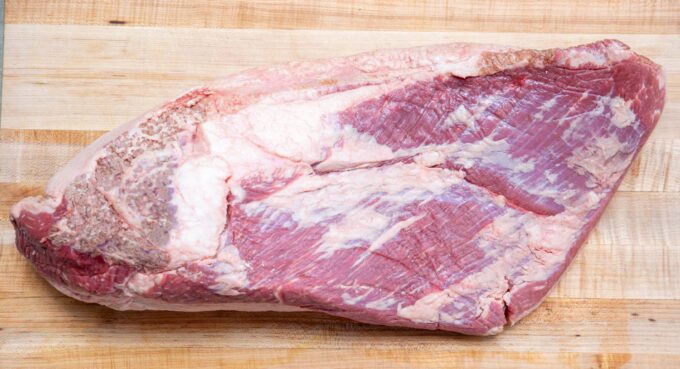
The Meat Side
For the top or beefy portion of the brisket, you’ll want to cut off the silver skin and any hard fat so that you expose as much of the brisket surface as you can so you get an amazing and flavorful outer crust. We call the outer crust “meat candy” because it is so rich and flavorful.
The silver skin will look like a cloudy surface on the meat and will not render or break down no matter how long you cook it. So get rid of it.
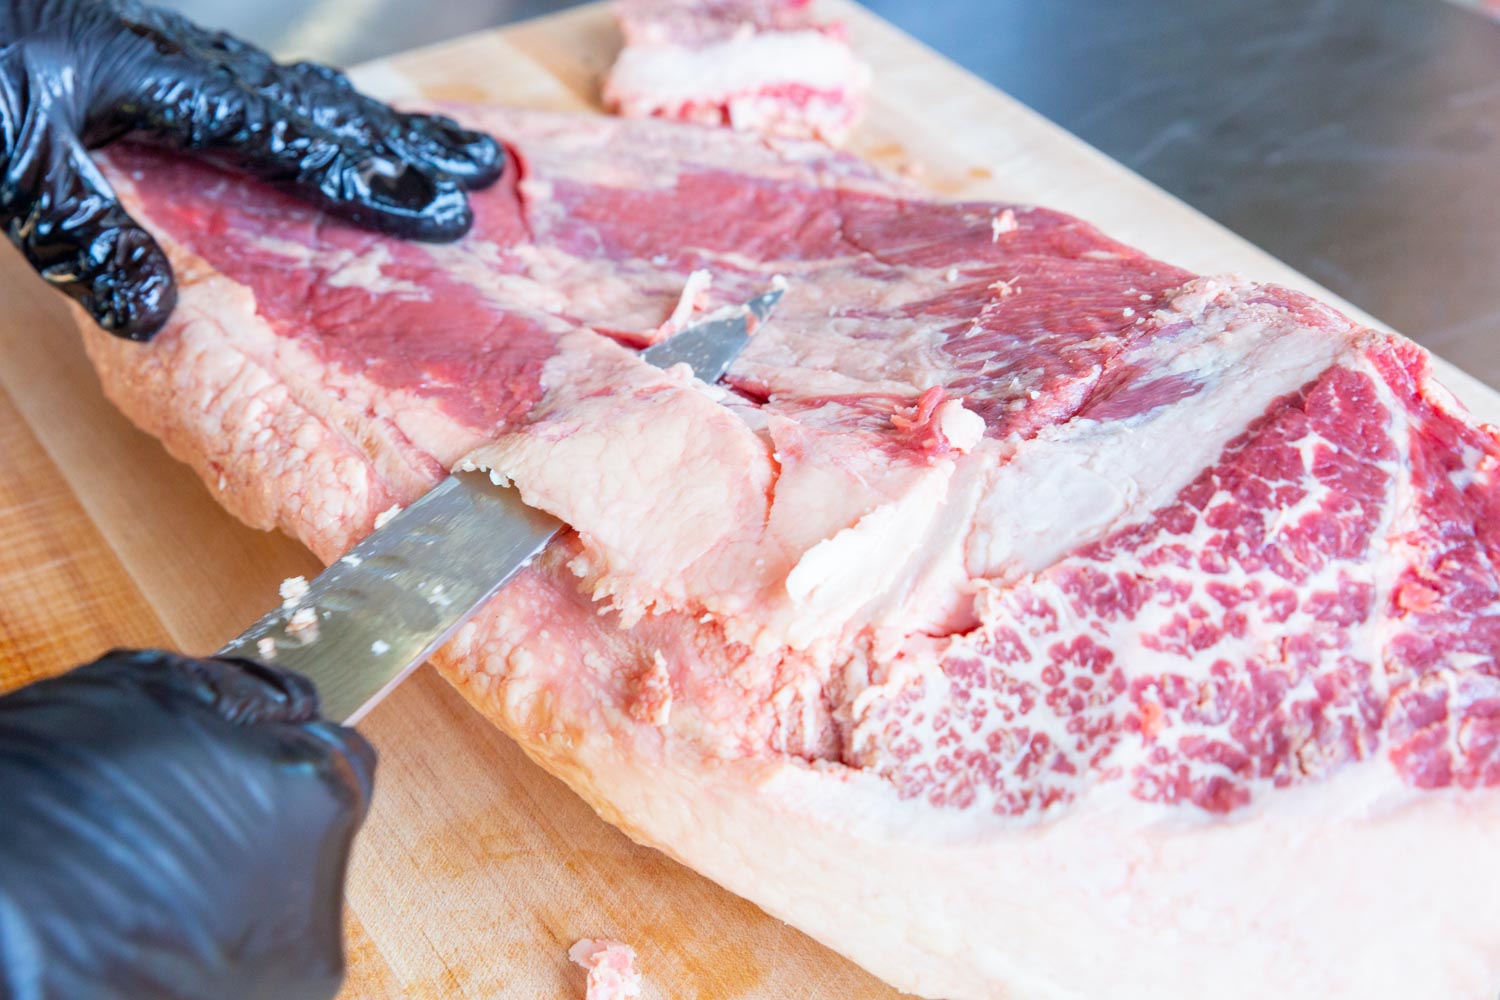

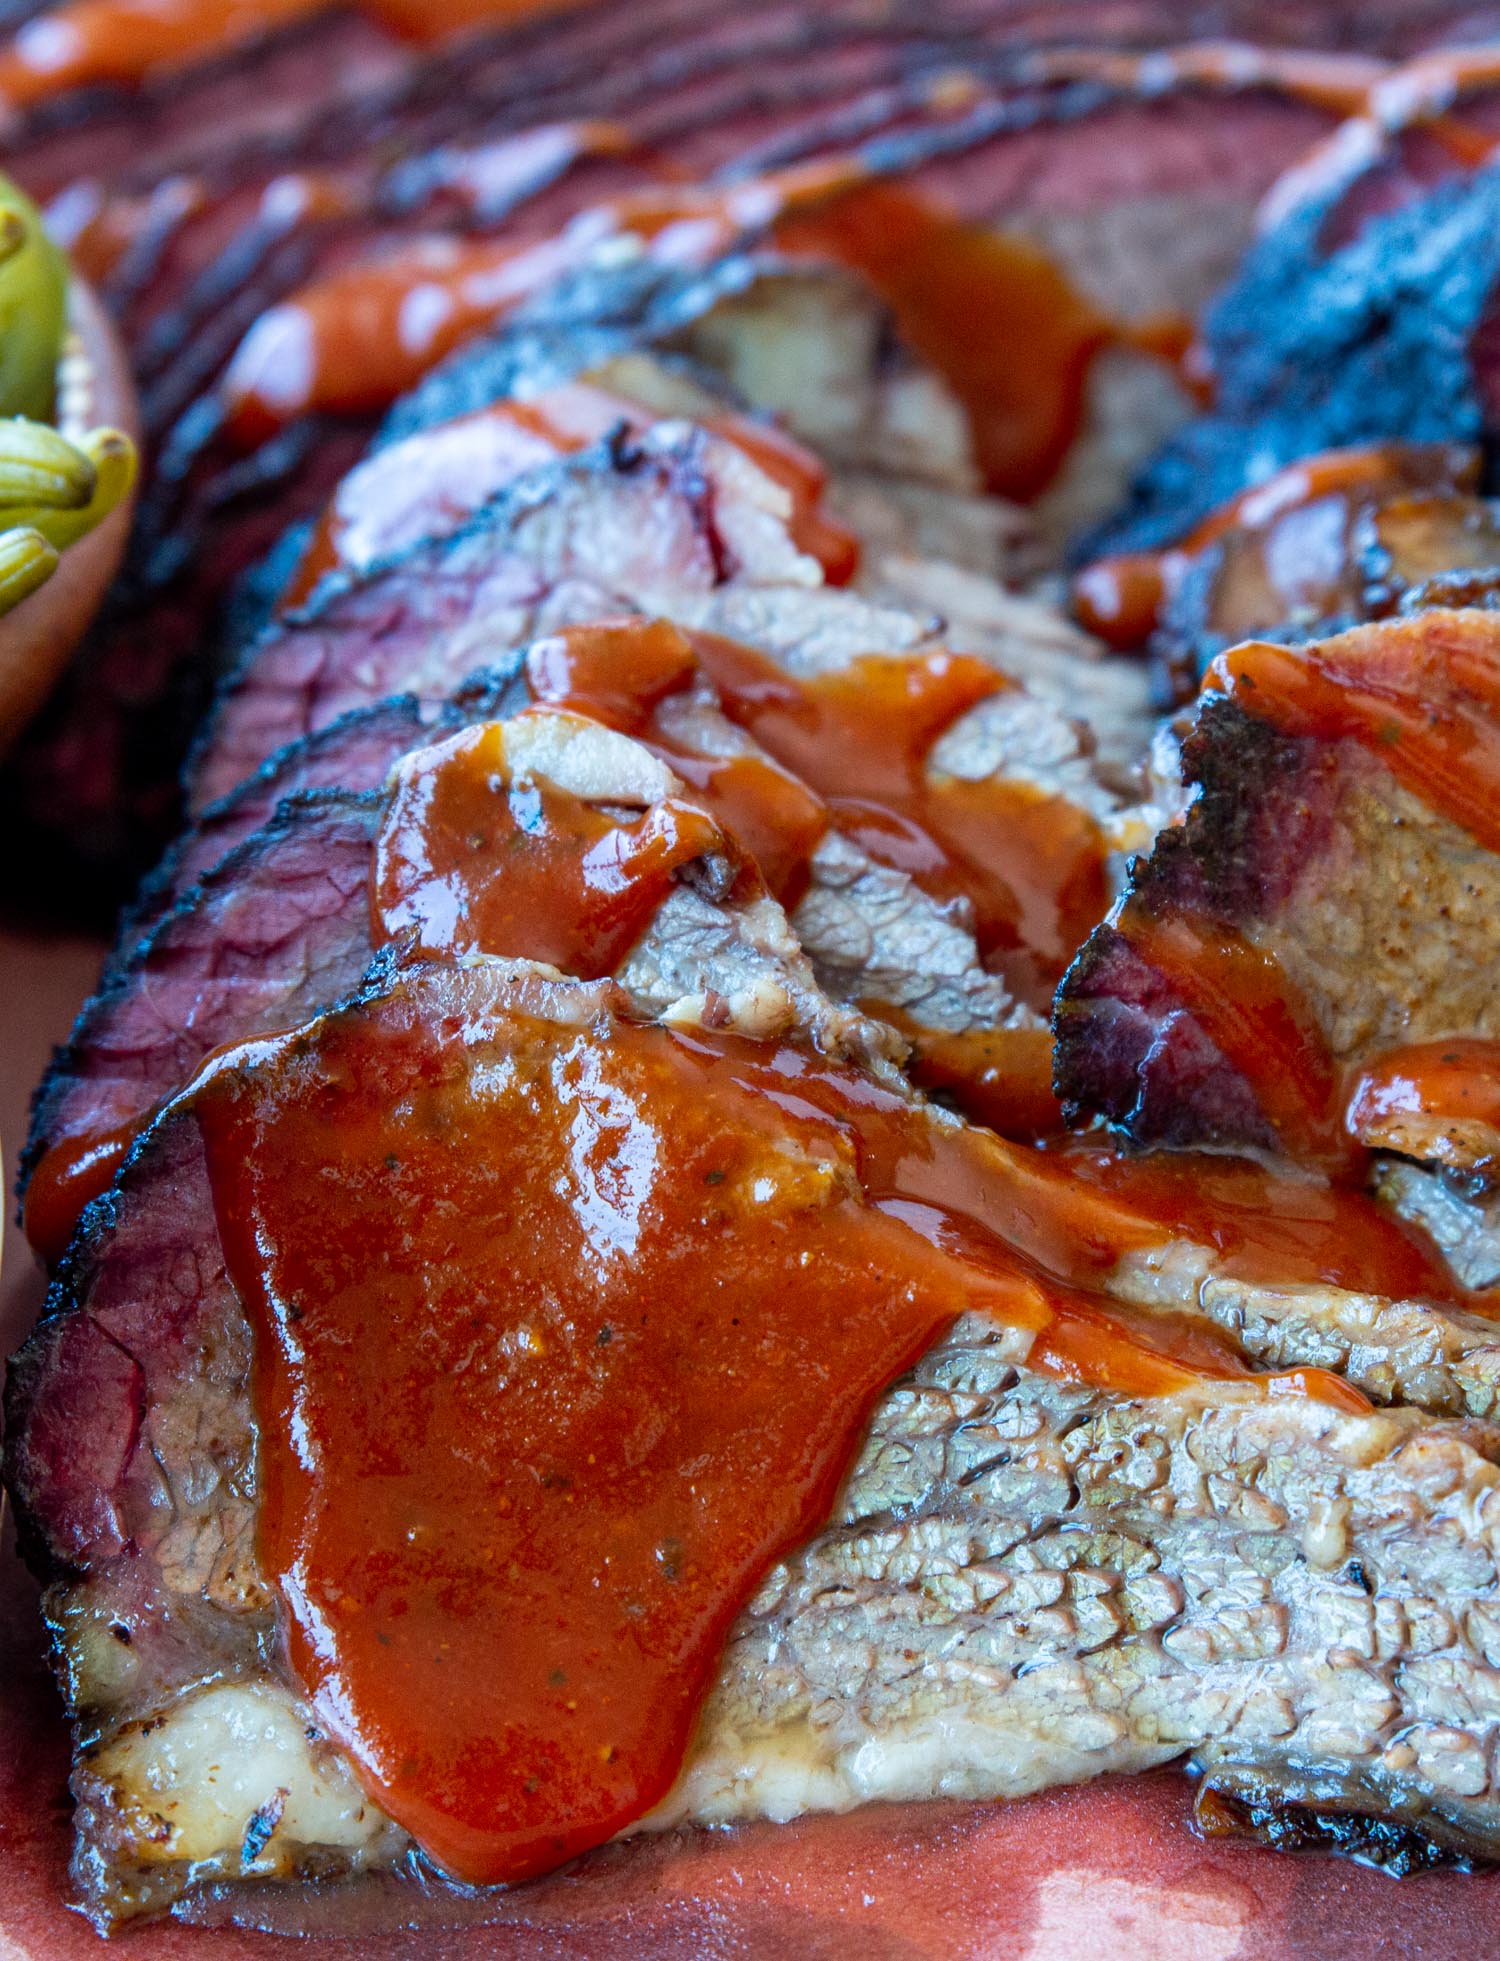
You’ll know the hard fat when you feel it because it will be very tough. Slice that off as well and by the time you’re done with trimming, you’ll have a large amount of brisket surface area for the smoke to penetrate and create the most amazing bark and a nice smoke ring.
Should You Use Rub On a Brisket?
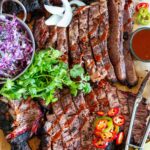
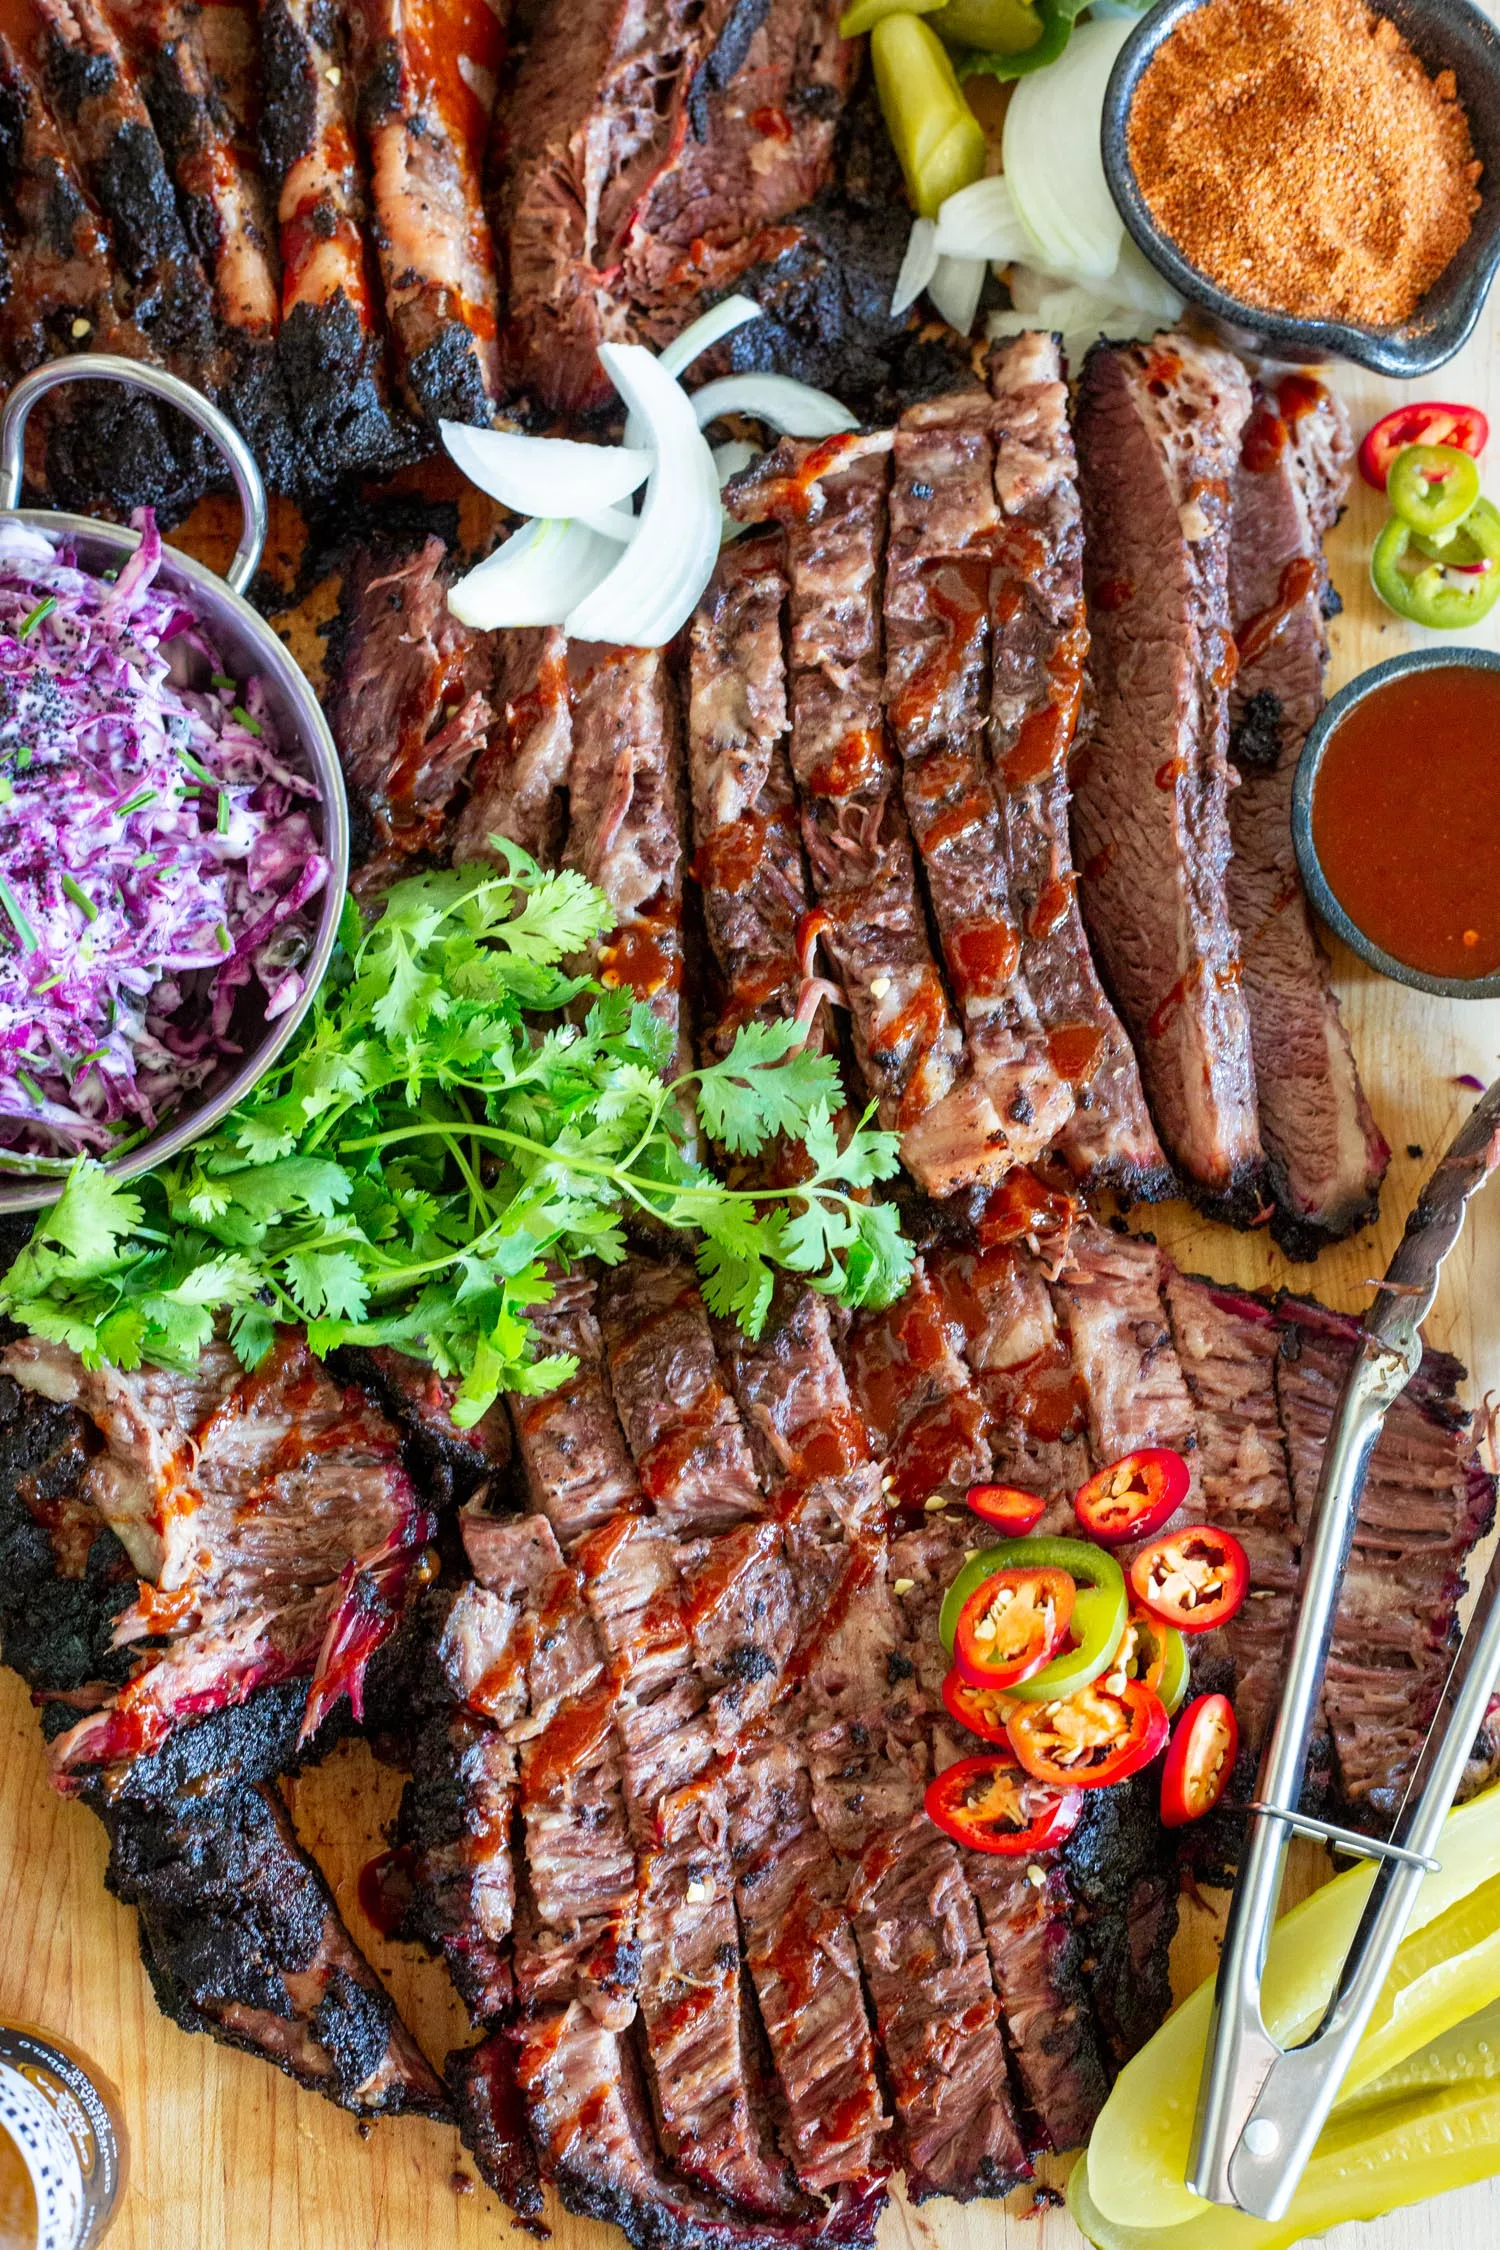
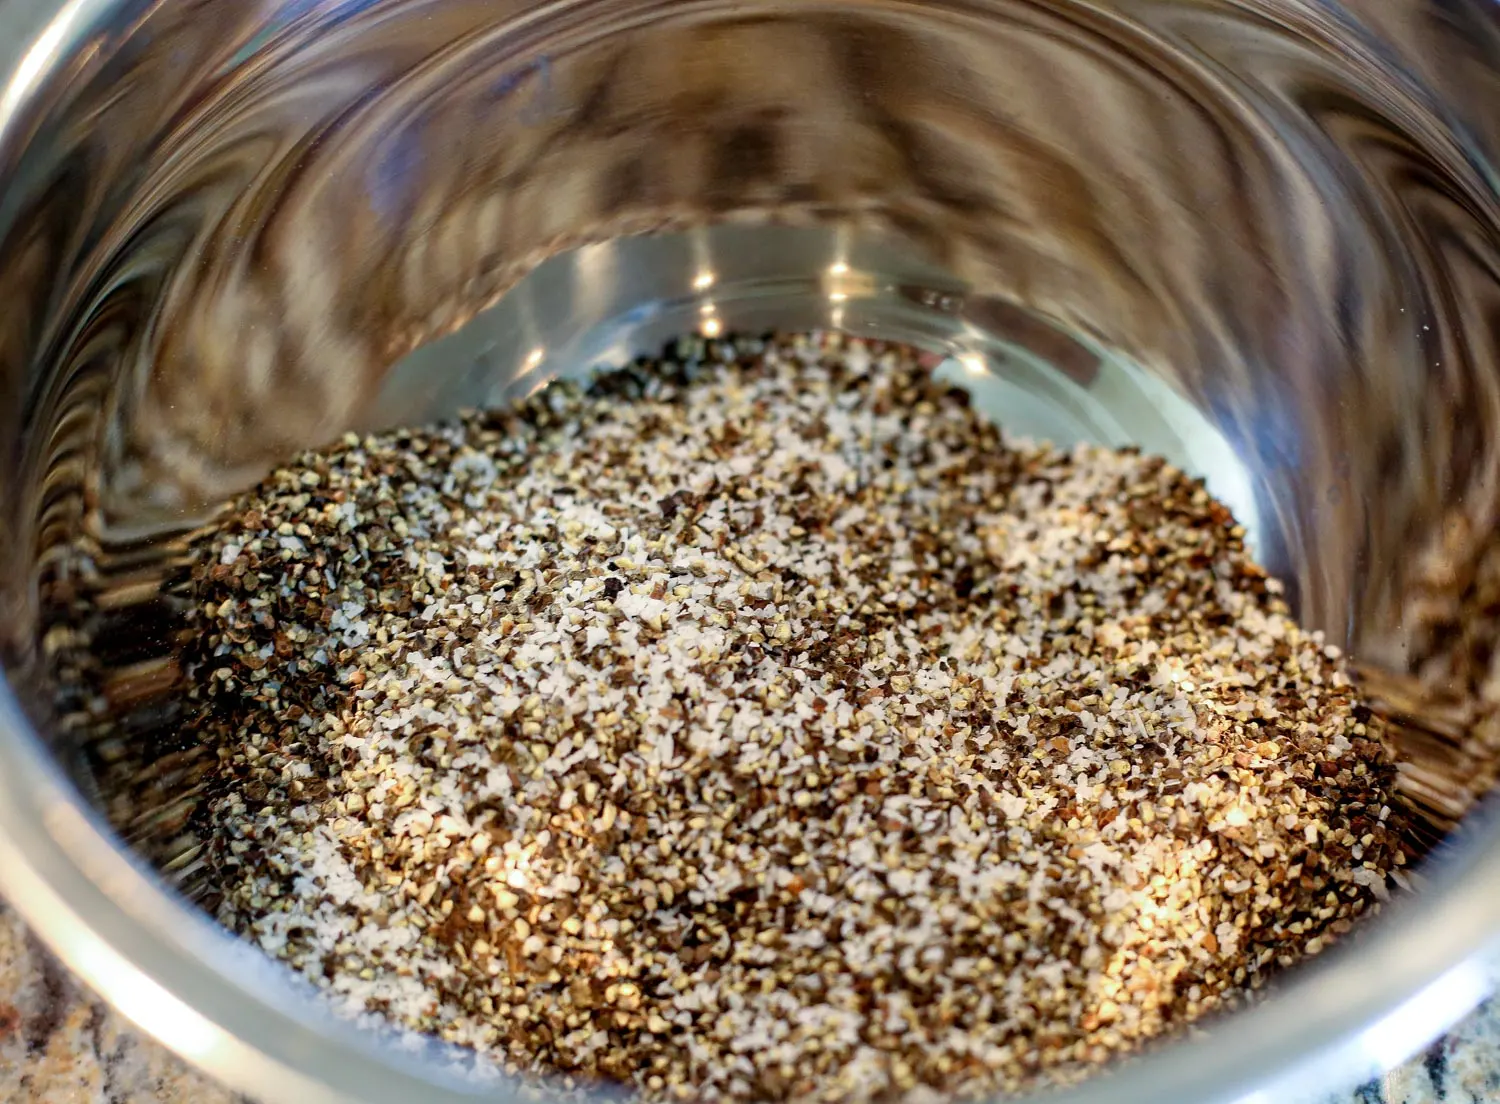
Yes, you should use a rub on a brisket whether using a simple Dalmation Rub (kosher salt and coarse grain black pepper), a packaged brisket rub from your favorite brand, or a homemade brisket rub–brisket flavor is enhanced with a rub and helps create a nice bark. Here is the recipe for our award-winning brisket rub.

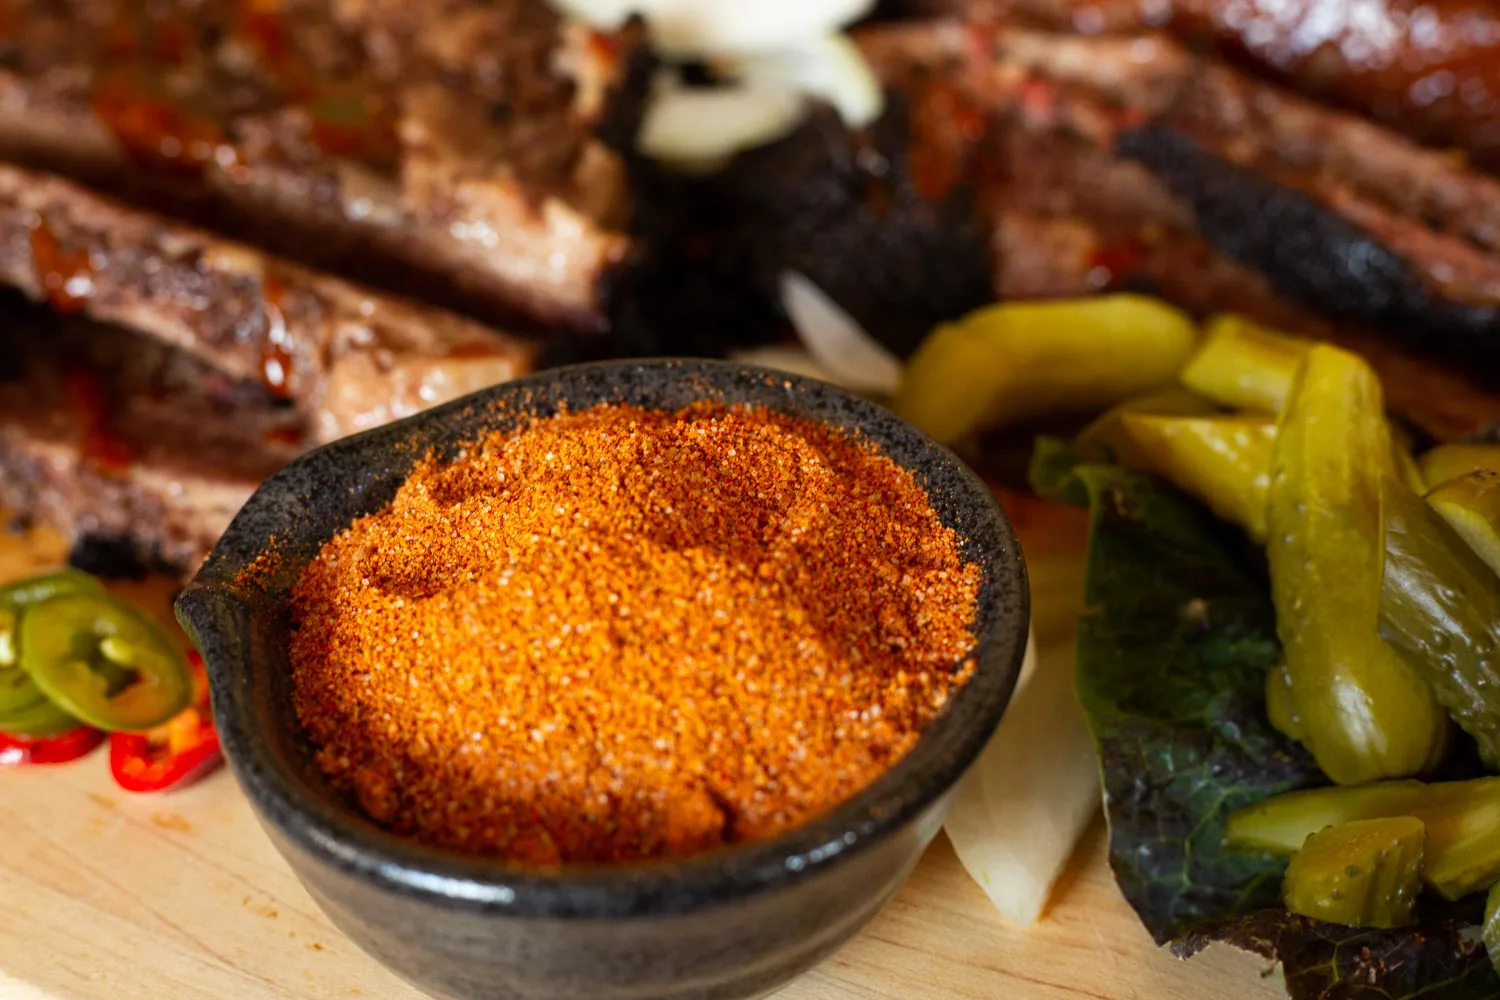
A dry rub for brisket is a spice rub consisting of spices like brown sugar, kosher salt, black pepper, garlic powder, onion powder, and any other spice your heart desires. This is another instance where it comes down to personal preference and what flavors you enjoy. It takes a few briskets to figure out what you like best.
We use different rubs depending on what we’re in the mood for. If we are in the mood to be brisket purists and really taste the flavor of the beef itself, we’ll go with Texas-style brisket rub which consists of equal parts kosher salt and black pepper. (This rub combination is called a Dalmatian Rub because it’s black and white like a dalmatian pup.)

Other times we’ll want more flavors and either add garlic and onion powder to our Texas-style brisket rub or we’ll use any number of store-bought spice rubs with ingredients such as brown sugar, paprika, jalapeno powder, and other flavor profiles.
That’s the great part about rubs, you can do something different each time until you’ve narrowed down exactly what your family likes.
The last and most important thing you need to know when it comes to your dry rub is just how much rub you need to put on your brisket before throwing it on the pellet smoker. I don’t like to just say, “it’s going to be no more than 1-2 tablespoons of rub”, because you and I are not going to be able to spread our rub evenly with a tablespoon. We’d guess it’s usually about 1/4 c. – 1/2 c. depending on your choice of rub.
I will say this though, you don’t want to engulf and completely cover your brisket. If you do cover your brisket in its entirety, you’ll have a lot of spice flavor on the outside, but the smoke won’t penetrate past the rub. No smoke flavor sort of defeats the purpose of bbq.
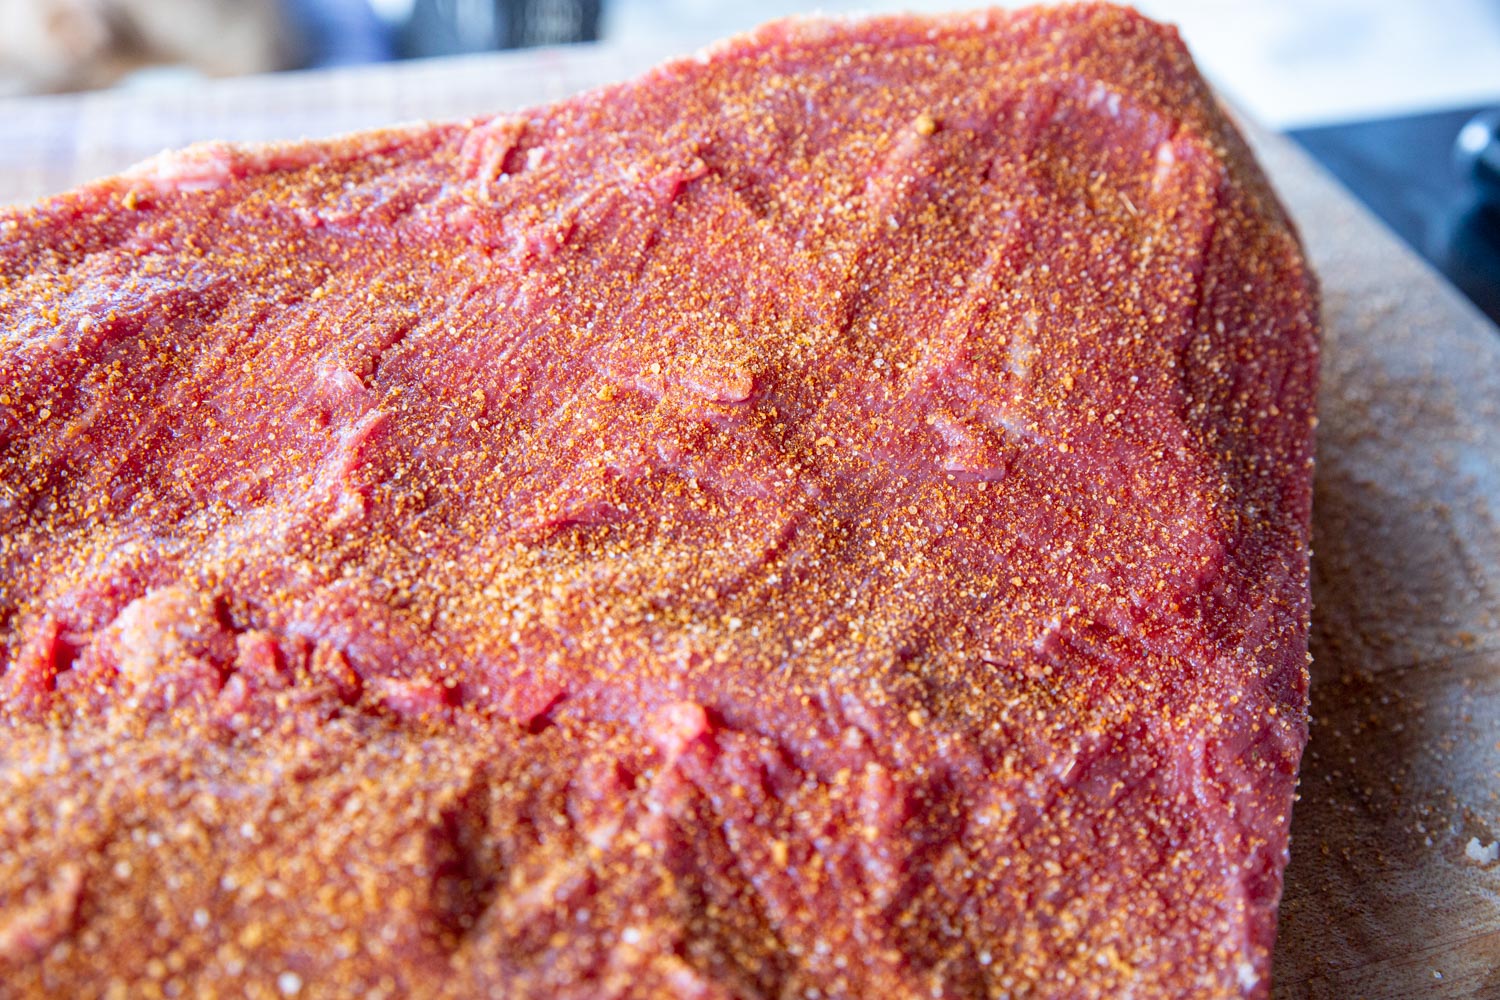

To put it simply, you want to be in between stingy and overly generous when sprinkling your rub on. Watch the video on this post and make sure to sprinkle your rub on using a spice container with large holes.
Do You Use A Binder On Brisket?
No. A binder is not necessary on brisket. No oil, no mustard, just sprinkle the rub directly on the meat.
Preparing your Pellet Smoker for a Barbecue
Prepping your pellet smoker is one of the easiest steps in this whole process. You only need wood pellets, an aluminum foil pan, and the knowledge of the temperature you intend to smoke your meat.
Wood pellets are the source of heat in your pellet smoker so having enough to get you through your entire cook, which can be around 1-1.25 hours per pound of brisket, is very important.
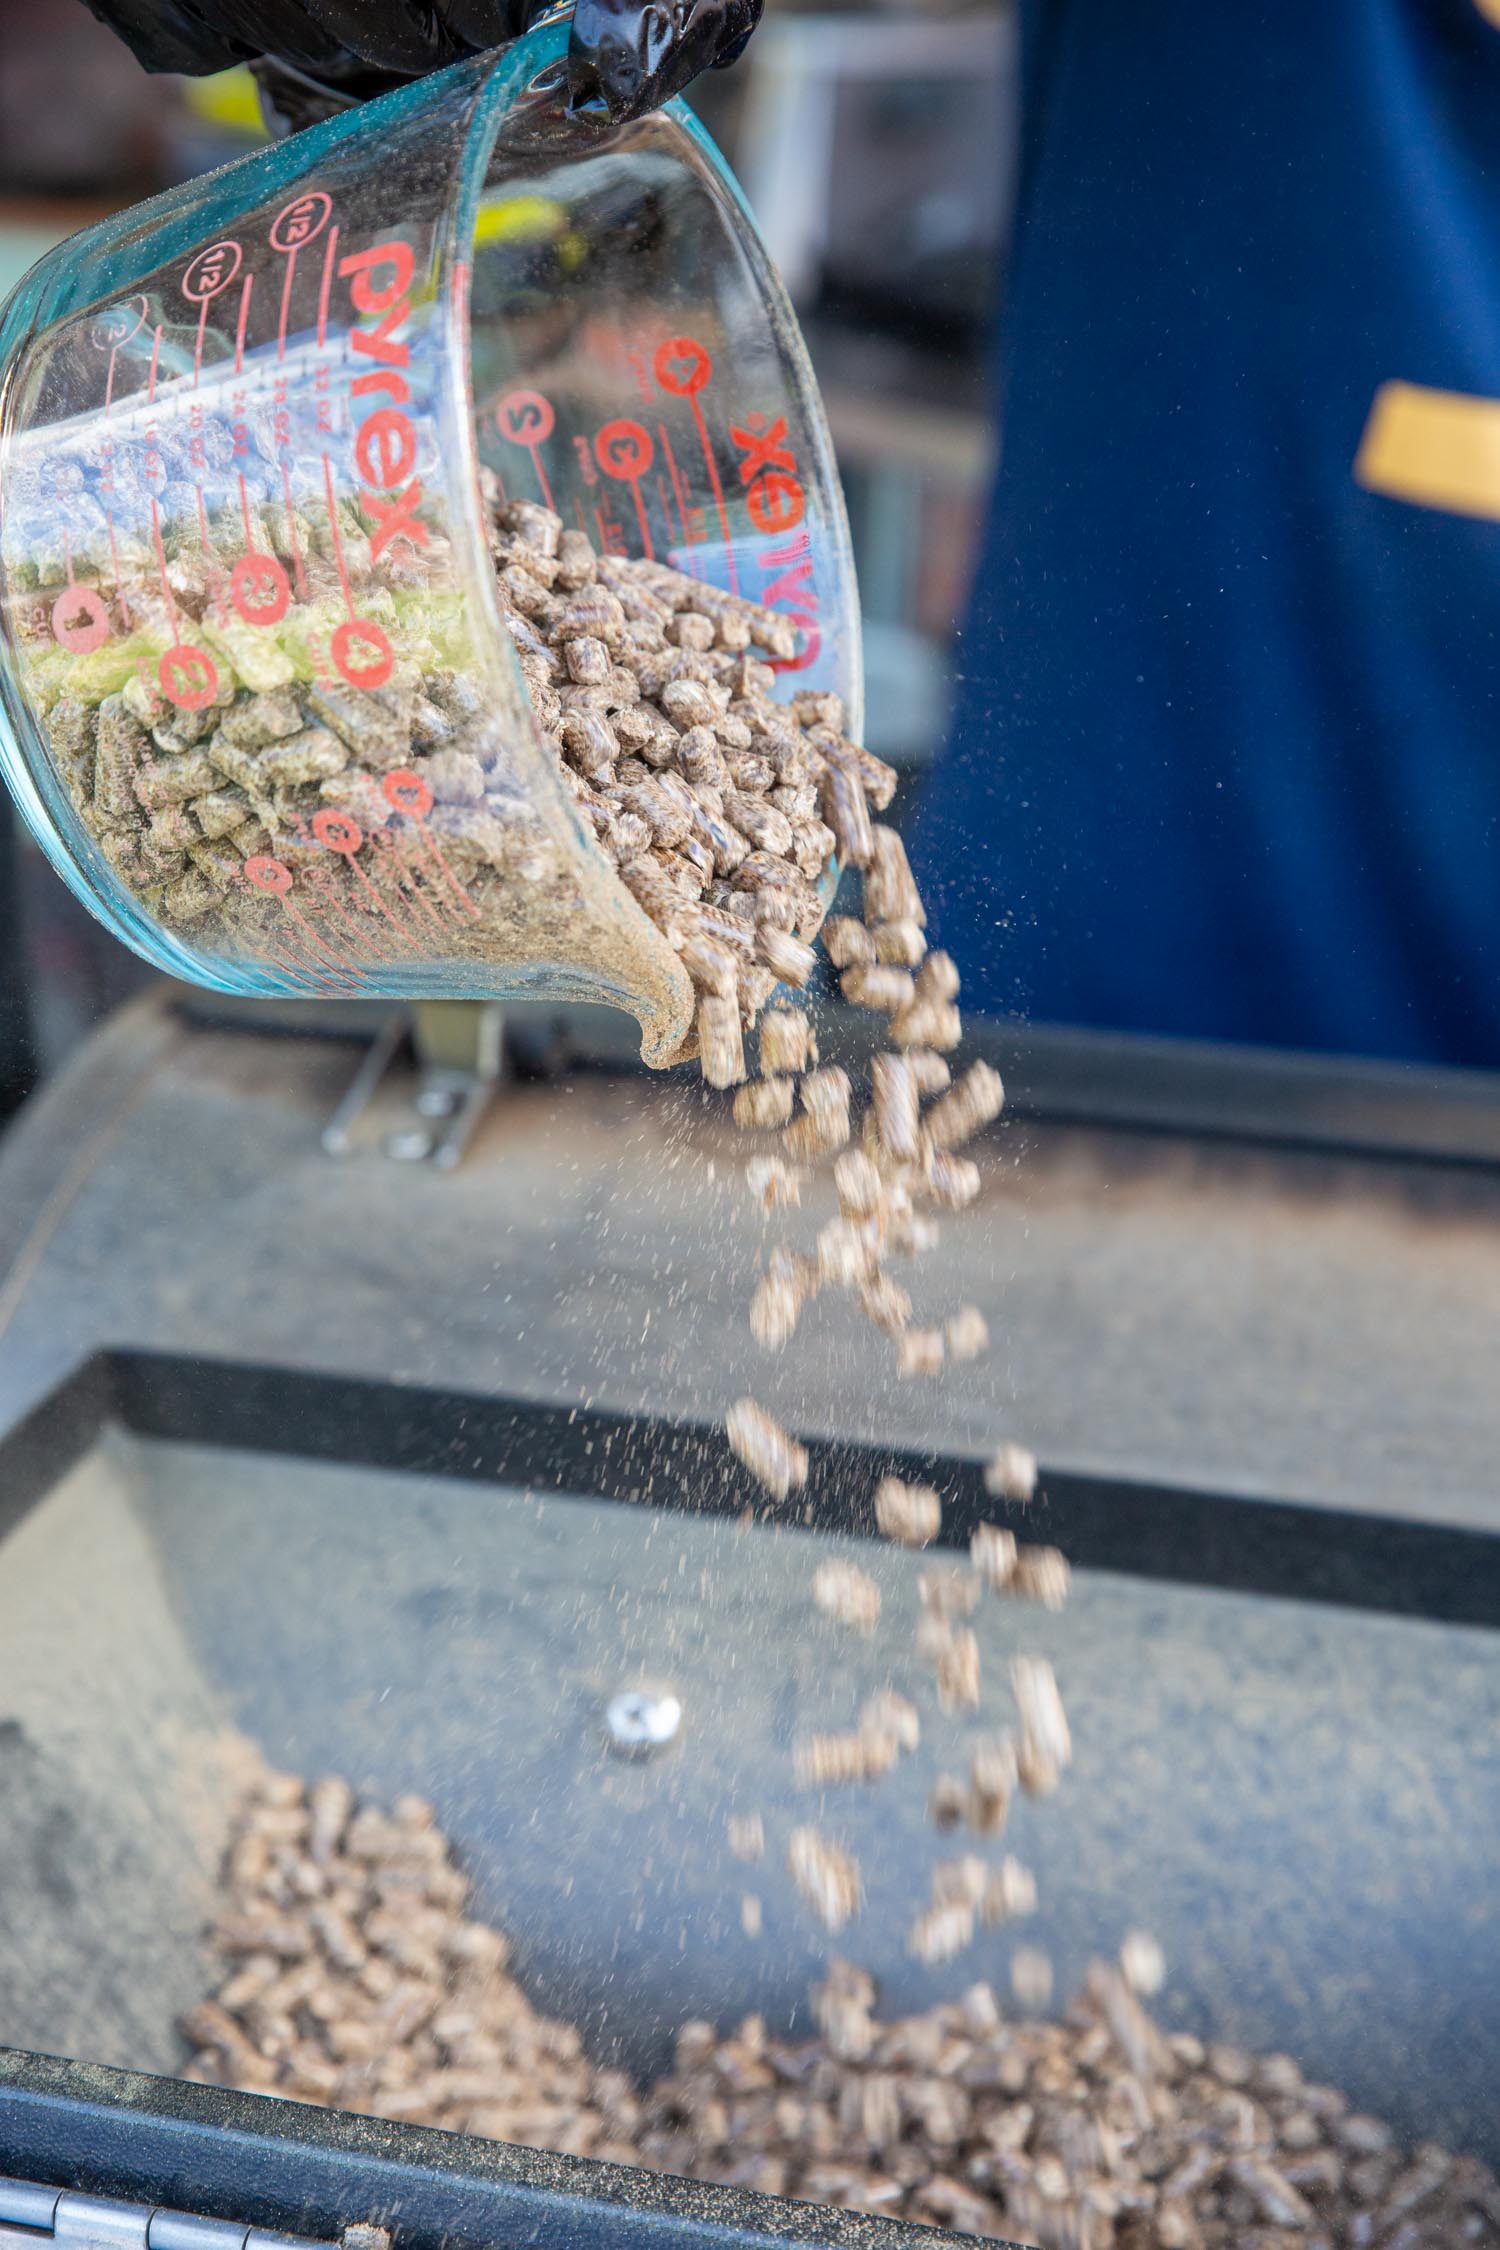

Since we’re smoking at 225 degrees, our pellets will burn at a rate of about 1 hour per pound, so keep an eye on your pellet hopper and make sure it’s always filled if you’re stepping away for a while.
We’ve used all sorts of brands including Pit Boss, Rec Teq, Camp Chef, Lumber Jack, and others, and they all work just fine for us. Here is a link to all of the wood pellets on Amazon with reviews from other pitmasters.
The Great Water Pan Debate
There is a great debate online about whether to use a water pan in a pellet smoker or not. I prefer to use one due to the fact that I want my brisket to cook as close to 225 degrees as possible and a water pan helps avoid temperature fluctuations. It also helps smoke molecules adhere to the meat. I wrote a whole article on that right over here.
Temperature To Smoke Brisket On A Pellet Grill
Now for the smoking temperature. We’re going to smoke at 225 degrees because we want a lower temperature for low and slow cooking that will give us the most time for the connective tissue in the brisket to break down.
The reason a higher temperature doesn’t result in tender meat is because the connective tissues in the brisket meat don’t have enough time to break down. As a result, the brisket will turn out less tender if you try and go “hot and fast” with it.
We tried hot and fast brisket and it takes a very specific and expensive set up which most people don’t have…Bottom line is, don’t do it. Just trust us that hot and fast doesn’t work with most home set-ups.
The 1st Part of the Cook: Smoking the Brisket
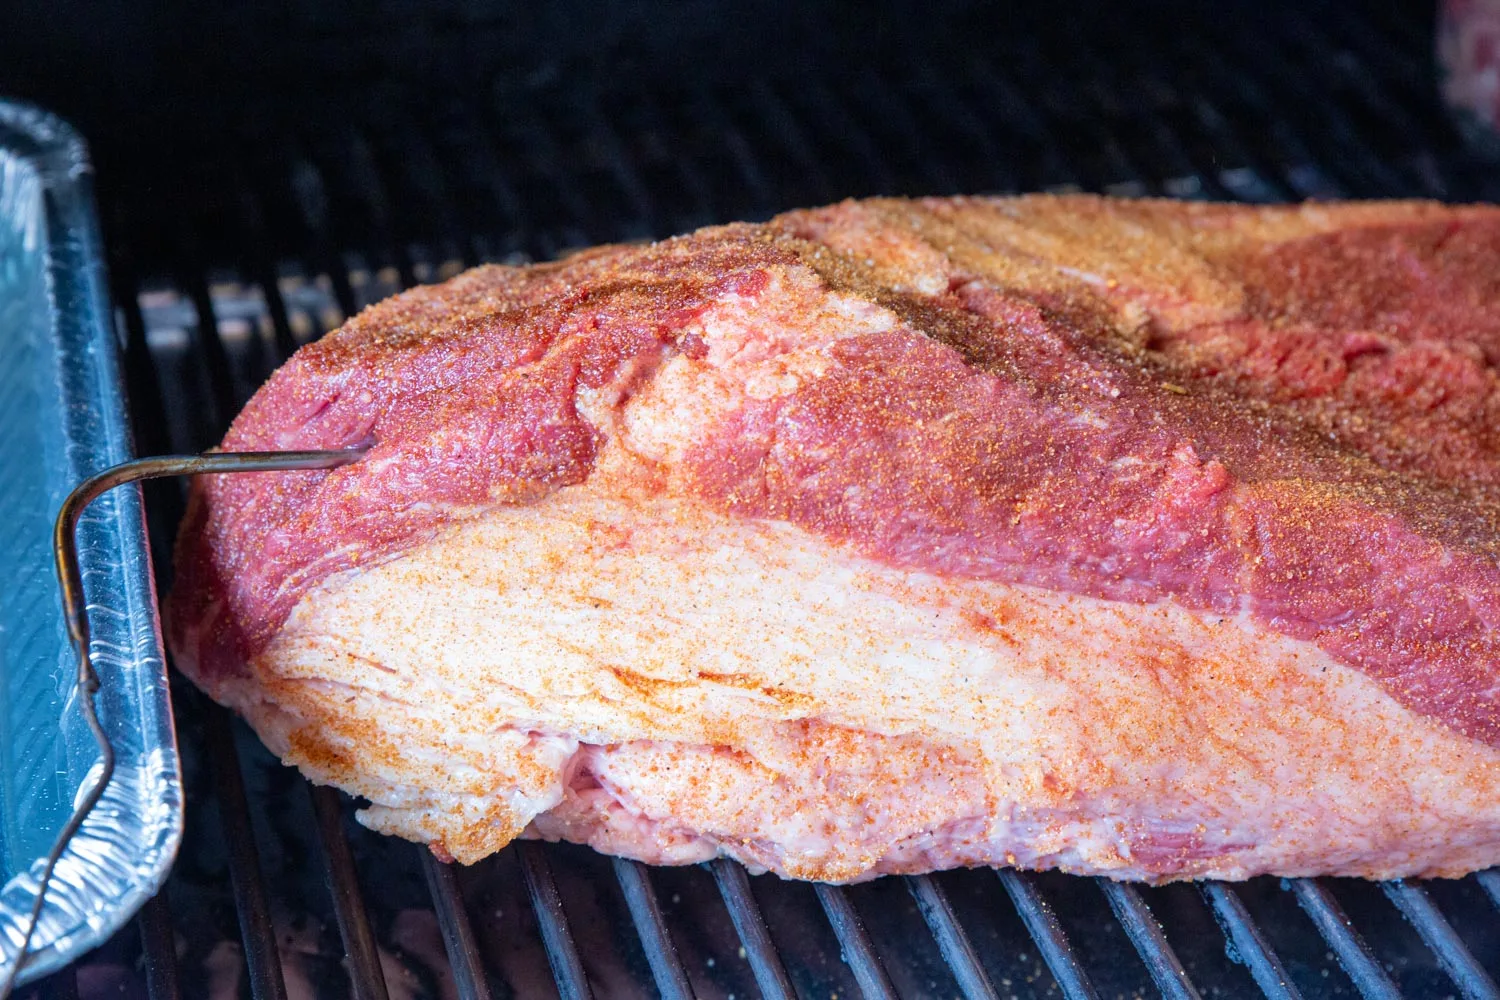
Now it’s time to put all of your hard work and preparation to good use and put that brisket on your pellet smoker! When you put your brisket on, make sure it’s between your water pan and the smokestack so that the humidity can flow all around your brisket.
Once you lay your brisket fat side down on the grill grates the only thing you’ll need to do is insert a temperature probe into the thickest part of your brisket. Most pellet smokers such as Traeger, Rec Teq, and Camp Chef will have a built-in meat thermometer to monitor the internal temperature of the brisket and display it on a screen.

If your pellet smoker doesn’t have one and you want one, we absolutely love our Meatermade Thermometer, in which a wireless probe is inserted into the meat and communicates with an app on your phone, allowing you to monitor the process with cool graphs and notifications!
It works for a lot of other cool meat cooking projects too, like roasting prime rib in the oven, and grilling perfect ribeyes! Check it out here. (You get 10% off by clicking through our partner link.)


And then you wait a pretty long time (at least compared to grilling a steak), for your brisket to reach an internal temperature of 170 degrees. Once it has hit 170 degrees, we’ll take it out and wrap it.
This is commonly referred to as the Texas Crutch. Just like crutches help someone get from point A to point B, the Texas Crutch does that same. It assists your brisket in getting past “the stall” more quickly while keeping your brisket juicy on the inside!
Now before you get to wrapping, I’ll tell you that we’ve tried to go different directions and wrap our brisket at 170 degrees, 180 degrees, and not wrapping at all. Although all of them produced tasty brisket, we found that once the internal temperature reaches 170 degrees, it has the best combination of bark and juiciness.
Some folks choose to never wrap their brisket. You’ll get better bark but most of our briskets turned into beef jerky. We suggest this could be related to the radiant heat in a pellet grill.
How To Wrap Your Brisket: The Right Way
When wrapping your brisket there are 2 main methods, wrapping with aluminum foil or with peach butcher paper.
A little bit of advice from a professional chef (and hear me out on this) don’t waste your time with aluminum foil. Aluminum foil is great for wrapping up leftovers and putting them into the fridge for protection. It’s great because it’s a solid material, nonporous, meaning it won’t let any air in or out.
A brisket is full of moisture, and as that water evaporates off during the cook, it gets trapped in the impenetrable layer of aluminum foil and steams your brisket. That’s what you absolutely, positively, do not want!
Too much steam/water will destroy the bark you’ve spent so many hours creating and with it the epic flavor it provides! If you use aluminum foil to wrap your brisket, then many times you are left with a brisket resembling a glorified pot roast.
When we smoke a brisket on a pellet smoker, the goal is to use dry heat, so the smoke can roll all over the brisket and penetrate it enough to give it that sought-after smoke ring and tons of flavor.
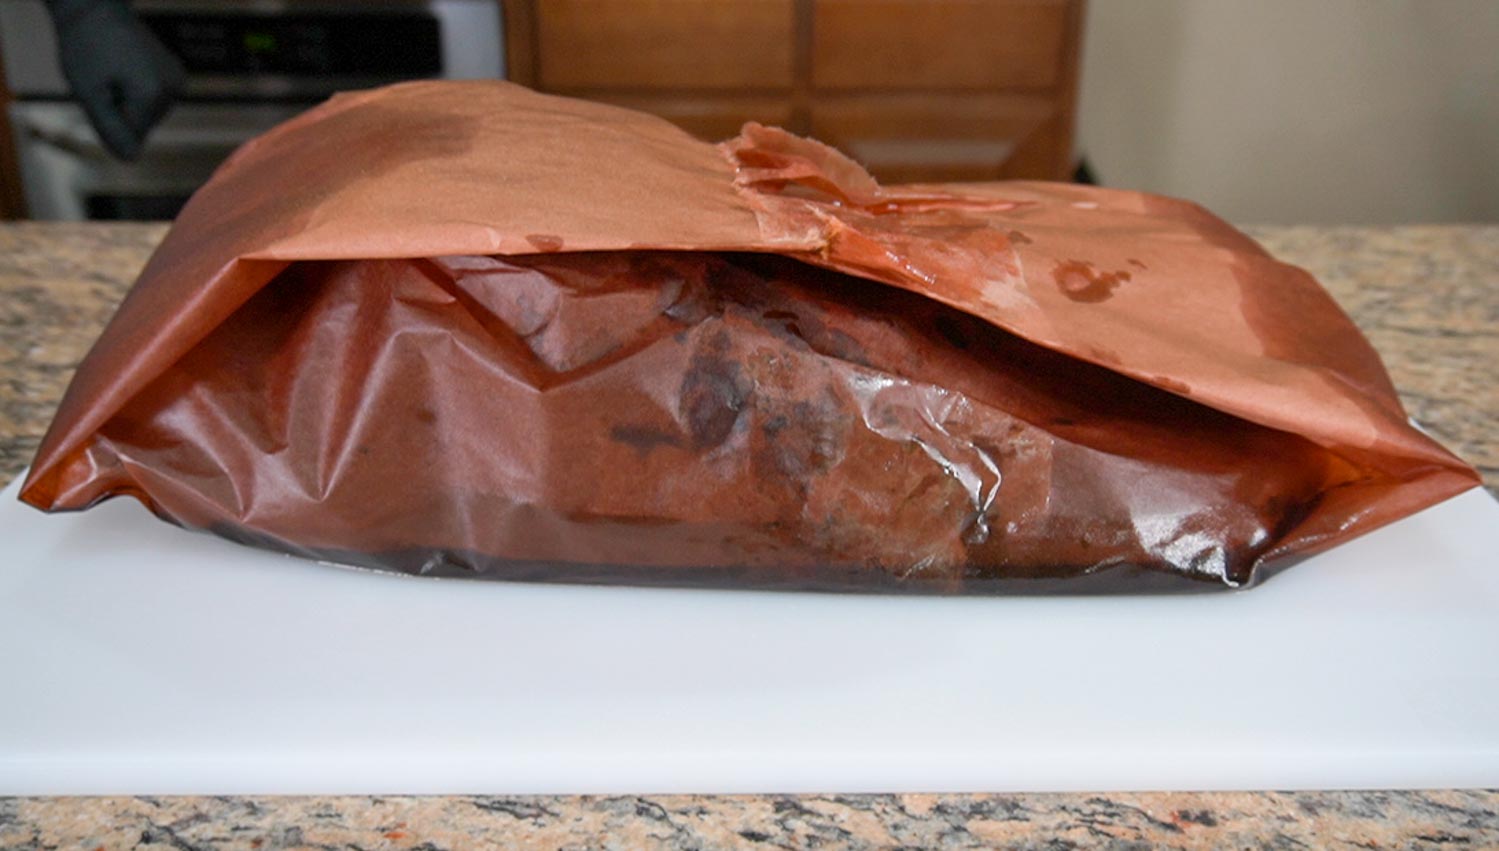
We’ve achieved the best results when using a peach butcher paper, because it allows your brisket to breathe while insulating it just enough to help it push through the stall, keeping the brisket nice and juicy.
If you are buying a roll of butcher paper for your first time make sure to get one that has a box it comes in. Many just come with the butcher paper on a spool and there is no easy way to store it. I recommend this one.
Wrapping the Brisket with Butcher Paper Correctly
We double-wrap our briskets. To begin you’ll lay out a long piece of peach butcher paper for the first layer that’s typically 3 times the length of your brisket.
Basically, you’ll break it into 1/3s with your brisket being in the middle third and fold the other 2 sides over the brisket and seal it as best you can. Don’t worry about creating an airtight seal or anything because the 2nd layer is going to wrap and seal it the rest of the way.
For the 2nd layer, take another long piece of peach butcher paper and wrap it the opposite way where you’re rolling the brisket up in the paper. Then when you put your wrapped brisket back on your pellet smoker you’ll place it fat side down again and use the grill grates to hold the butcher paper in place underneath your brisket. (Again the video on this page is helpful to demonstrate this.)
Smoking Brisket Through The Stall
For this final portion of the cook, you’re just going to let your smoker do its thing and wait for your brisket to reach 195-196 degrees using your probe thermometer. But why not the beloved 203 degrees that most bbq aficionados recommend? I’ll tell you why: carryover heat.
When you cook a brisket to 203 degrees and pull it off, the carryover heat will keep raising the internal temperature to around 210-211 degrees which is beyond what we need.
When your brisket is completely finished, you should be able to slice the flat and lay a piece over your finger and it not break apart. Cooking till 203 and then pulling it, can make your brisket fall apart.
Yes, brisket can be too tender. You want it tender enough to bite through with ease, but not to the point that it falls apart when you’re eating it.
We’ve tested pulling our brisket off of the smoker at 195-196 degrees and the carryover heat helps it get to 203 degrees on the dot. Perfect juicy brisket every time!
But again, you have to test what is best for you and I figure most of the disagreements in barbecue come from the fact that we’re all using different equipment, cooking in different climates, etc.
Should You Let Your Brisket Rest?
Yes, you should let your brisket rest and this is probably the longest rest in the cooking world, 2-4 hours. It’s also the secret to professional, championship-grade brisket.

Letting your brisket rest for the proper amount of time and in the proper environment allows the connective tissues and collagen to further break down and spread that rich flavor throughout your entire brisket, so every single bite will have your guests thinking they’ve died and gone to Heaven.
When you pull your brisket off at 195-196 degrees, wrap it in 1 towel, and then wrap it in 1 more after that. Large, thick bath towels, work best.
We want to insulate it as much as we can to keep the temperature above 160 degrees for as long as possible. At 160 degrees and up, the hardest to render collagens break down and spread through the entire meat giving it a rich, beefy flavor and excellent tenderness.
After you have insulated your wrapped brisket in 2 towels, you’ll want to put it in an ordinary igloo style cooler. This is so popular that there are now coolers designed just for resting barbecue.
How Long Should You Let Brisket Rest?
You should let the brisket rest a minimum of 2-4 hours in the igloo style cooler, well wrapped.
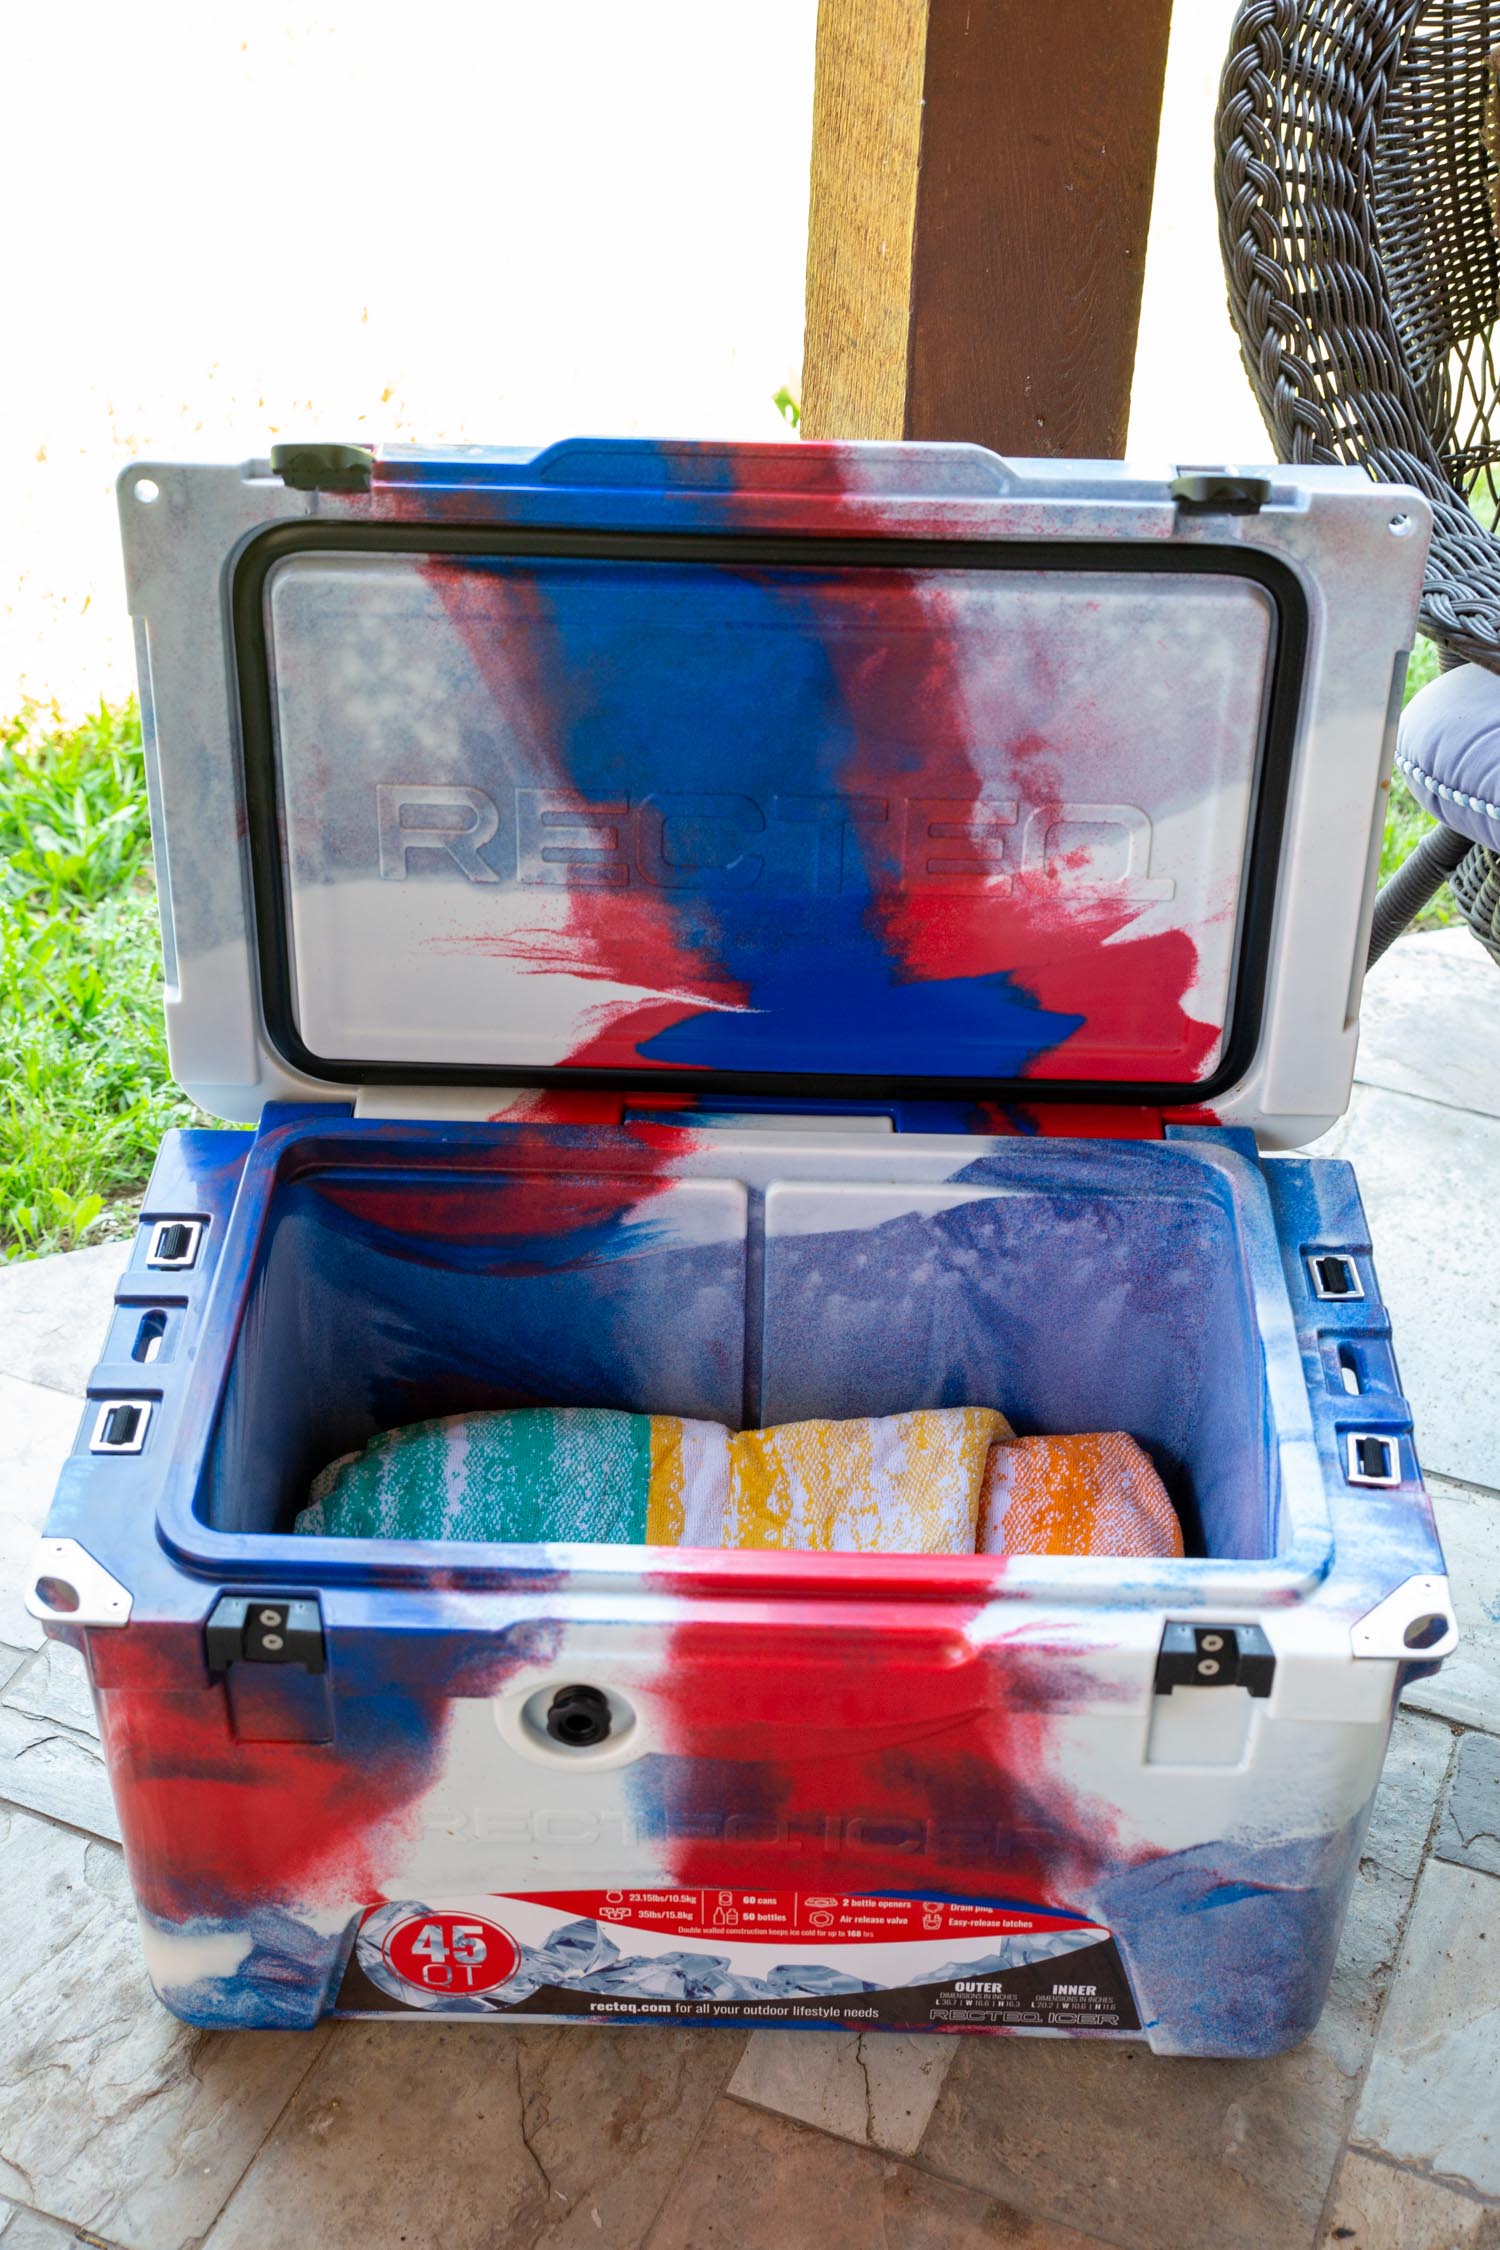

That’s right, not 30 minutes or 1 hour…but 2- 4 hours minimum. By the way, it can go up to 6 hours.
This gives the collagen and any other connective tissues in that big brisket muscle as much time as they need to break down and render throughout the meat. Don’t worry about the brisket cooling down to the temperature danger zone as it absolutely will not cool down that much. If you want to keep an eye on it anyway, use the Meatermade thermometer and app to monitor it.
Do you have to rest it? No. It’s totally edible. I would try and give it a 1-hour rest if you can, but if the neighbors and kids are hungry, go ahead and slice it.
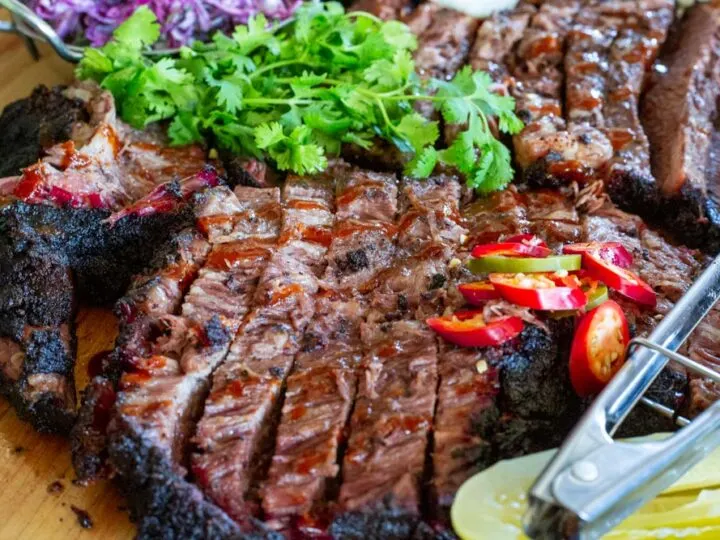
After you’ve read all of this and performed it masterfully, you and your guests/family get to enjoy your work of art and love!

We have an entire post dedicated to slicing brisket the correct way, with a video to make things visual. For more, check out our Brisket School!
More Brisket Help…
- Grand Champion Beef Brisket Injection Recipe (WITH VIDEO)
- Award Winning Texas Brisket Rub (SECRET RECIPE WITH VIDEO)
- Brisket Spray Recipe
- How Long To Smoke a 15 Pound Brisket
- Ultra Juicy Smoked Beef Chuck Roast Recipe
What Sides Are Served With Smoked Brisket?
- Houston Rodeo Blue Ribbon Potato Salad Recipe
- Ultimate Texas Roadhouse Green Beans Copycat Recipe
- Award-Winning Smoked Baked Beans Recipe (with VIDEO)
- Dr. Pepper Barbecue Sauce Recipe
- Corn and Black Bean Salad with Mexican Vinaigrette
Have questions? Need help? Have an addition or a suggestion to a recipe? Drop me a comment below!
If you make this recipe, I would LOVE to see it!
Tag me on Instagram @UrbanCowgirl and use #UrbanCowgirl to be featured. 🙂
Follow us on Social Media using the links below!!

How To Smoke Brisket On A Pellet Grill
Juicy smoked brisket on the pellet grill with lots of meat candy bark, from start to finish! There is no reason your first brisket on the pellet grill can't be magic with this thorough guide and video tutorial from our free Brisket School Series!
Ingredients
- 15-pound brisket (or 1 to 1 hour 15 min per pound, plus a 4-hour rest)
- 1/4 c. of favorite brisket rub
- 1 bag wood pellets
Instructions
- Trim the brisket according to the instructions given within this post, removing silver skin, and extra pockets of fat. For a pellet grill, leave on the fat cap, as we will be smoking fat side down, to protect the brisket from radiant heat from below.
- Sprinkle the brisket with rub where it has a generous coating, but can still breathe. Remember too much rub could make the brisket salty. Any beef rub can be used and we will link our secret recipe.
- Prepare the pellet grill with plenty of pellets, 1 pound per hour of cook time.
- Preheat the pellet grill to 225. Add a water pan if using. (We recommend a water pan.)
- Place the brisket fat side down in the chamber.
- Insert the probe into the thickest part of the meat and close the chamber.
- Smoke to 170 degrees, remove the brisket from the chamber and wrap in butcher paper, 2 coats fully. Leave the probe in the meat and work around it.
- Put the brisket back on the pellet smoker and smoke to 195-197 degrees.
- Remove the brisket from the pellet smoker, wrap in towels, and place it in an igloo style cooler for 4 hours.
- After 4 hours remove the brisket and slice it. (Check out our post for complete slicing instructions.)
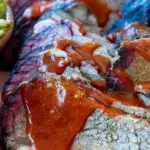
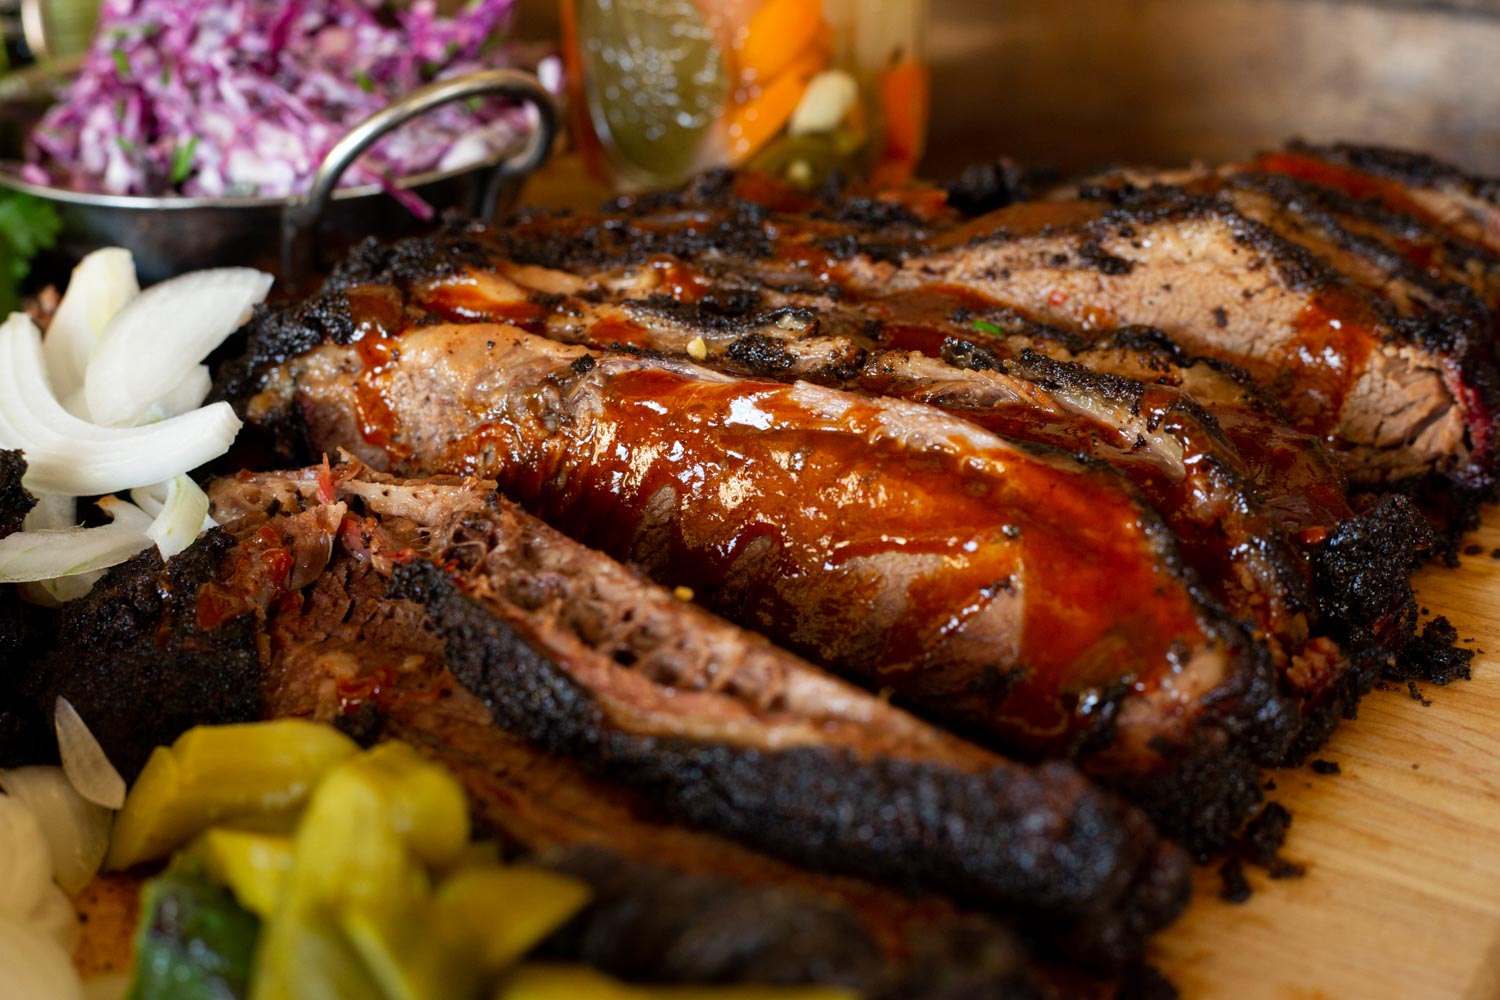
- Enjoy with bbq sauce, onions, toast, pickles, and your favorite side dishes.
Nutrition Information:
Yield:
20Serving Size:
1Amount Per Serving: Calories: 991Total Fat: 63gSaturated Fat: 25gTrans Fat: 0gUnsaturated Fat: 30gCholesterol: 364mgSodium: 165mgCarbohydrates: 0gFiber: 0gSugar: 0gProtein: 99g
This nutritional information is provided as a courtesy as an estimate only. Consult with a dietician for precise estimates. This website makes no claims that the nutritional values listed are accurate.
steve
Thursday 29th of June 2023
I won our brisket competition with your recipe!!! Thanks for making smoked brisket a little less intimidating! :)