One of the questions I get the most from readers, parents, and even magazine editors is, "What can I prepare ahead of time for lunches for myself (or my kids), that is easy, healthy, and tastes amazing?"
Since I spent 10 years of my career as a personal chef, I tend to just share recipes that I used in my own business, and recipes that my family has asked for again and again. These baked chimichangas are a tried and true recipe that everyone loves, and they freeze like a dream if you'd like to prepare a bunch of them and store them in freezer bags.
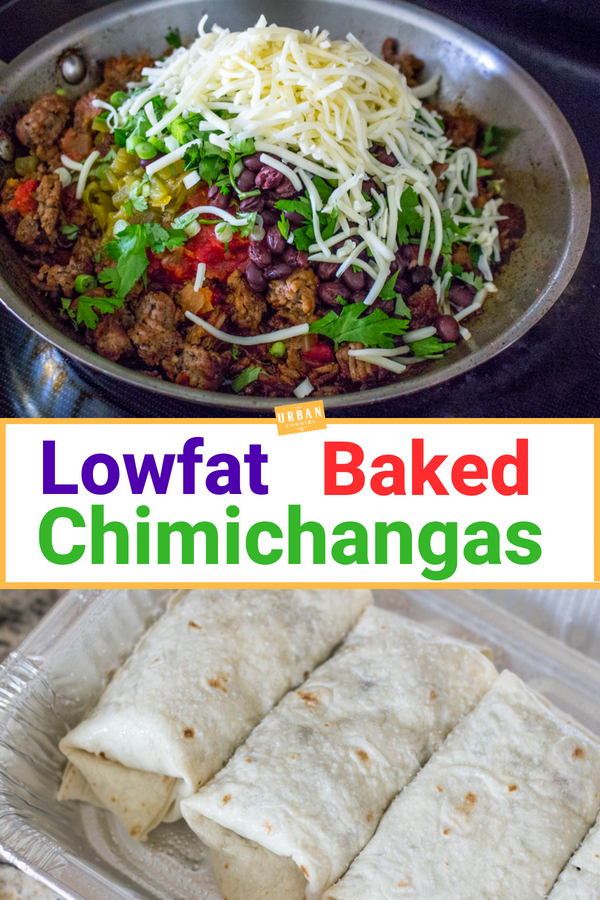
This is a low-fat ground beef and bean chimichanga that you can customize with your choice of cheese, swapping in kidney beans for black beans, grilled chicken for ground beef, green salsa for red salsa, and adding in low fat sour cream... all giving you endless options for a skinny southwest meal that's ready when you are. Let's get started.
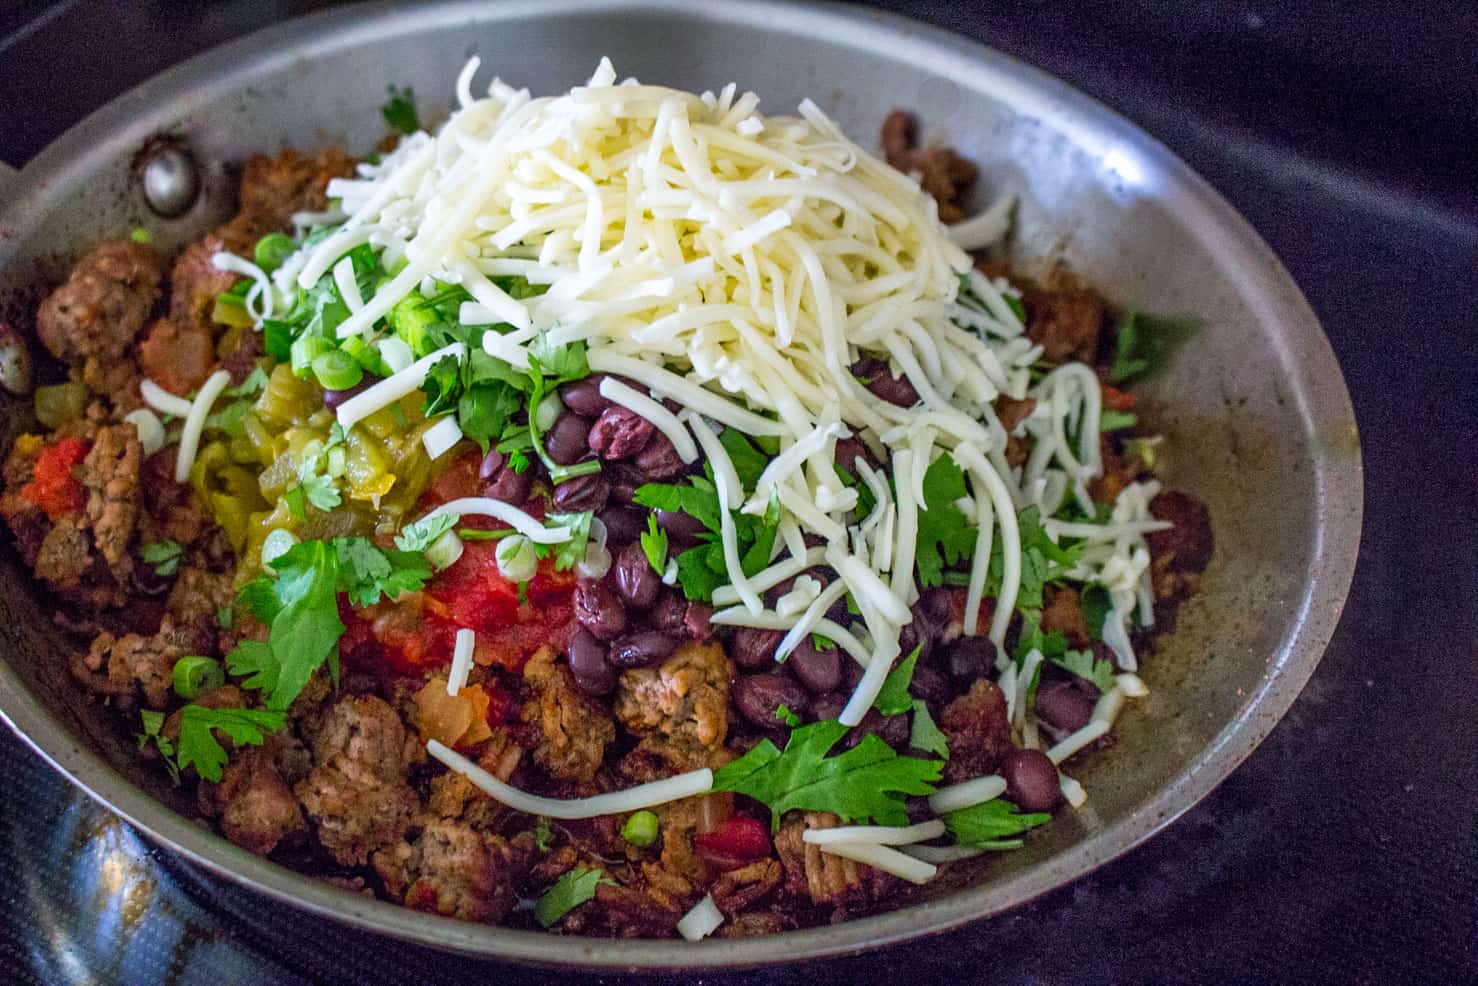
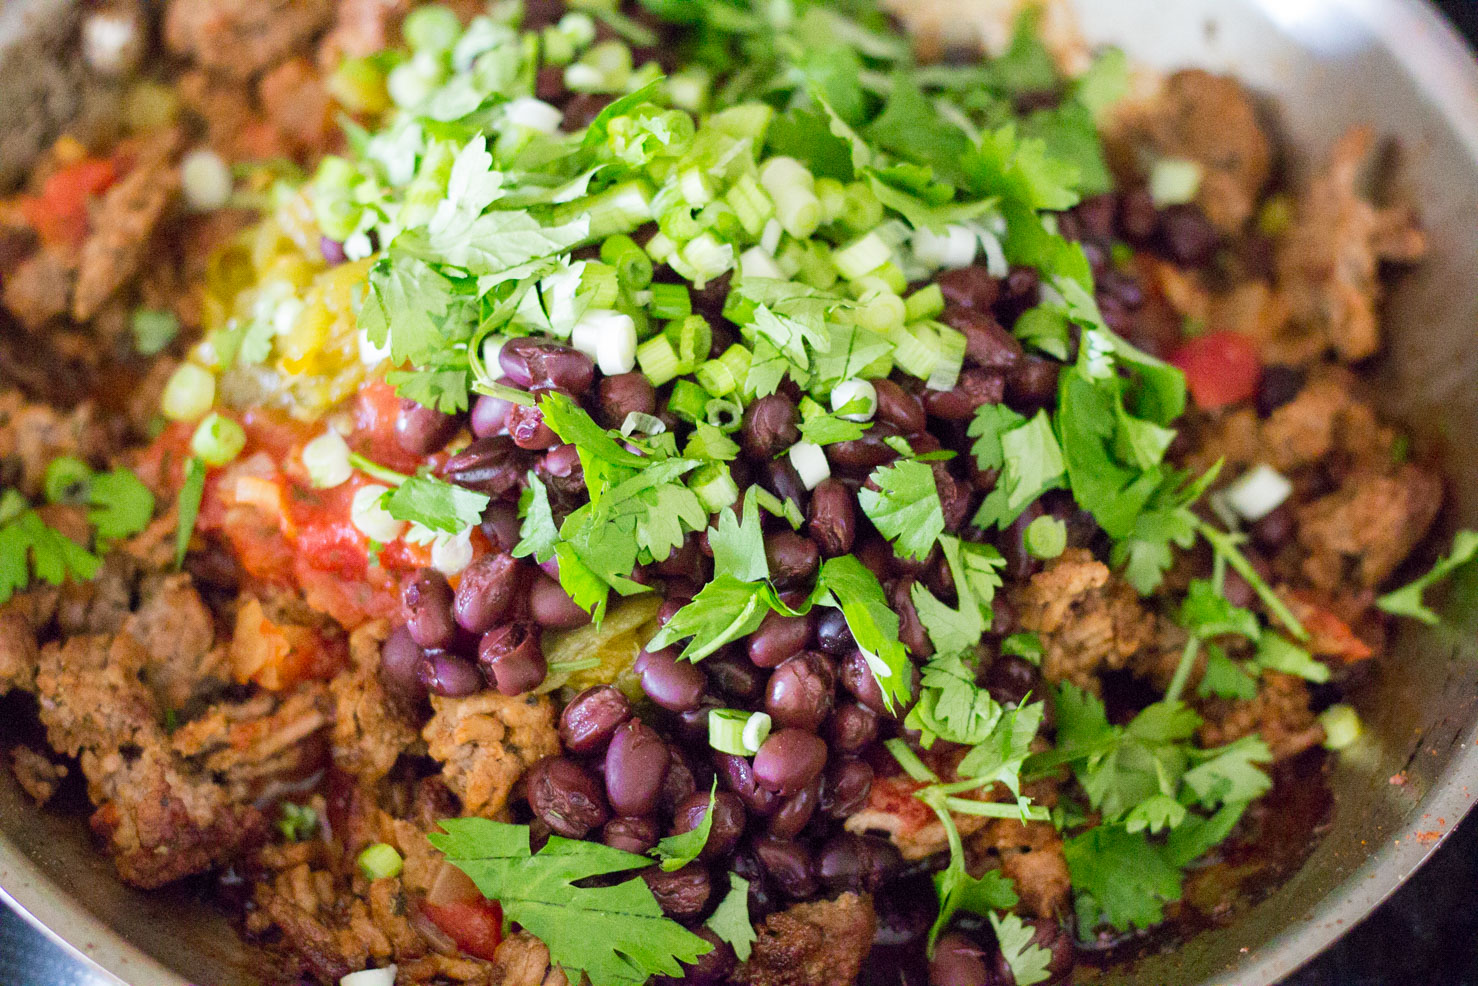
The filling is made quickly by browning ground beef and then adding in all of those extra fillings (don't forget you can't mess up the recipe by customizing). We've enjoyed non-fat refried beans in this filling and the kids thought they looked like their favorite big ole' stuffed burritos from Taco Cabana or Taco Bell. If you decide to add low-fat sour cream, season the filling to your liking and then let it cool 5 minutes off of the stove before adding the sour cream.
Warm the tortillas in the microwave so that they are pliable and will not break as we fold them.
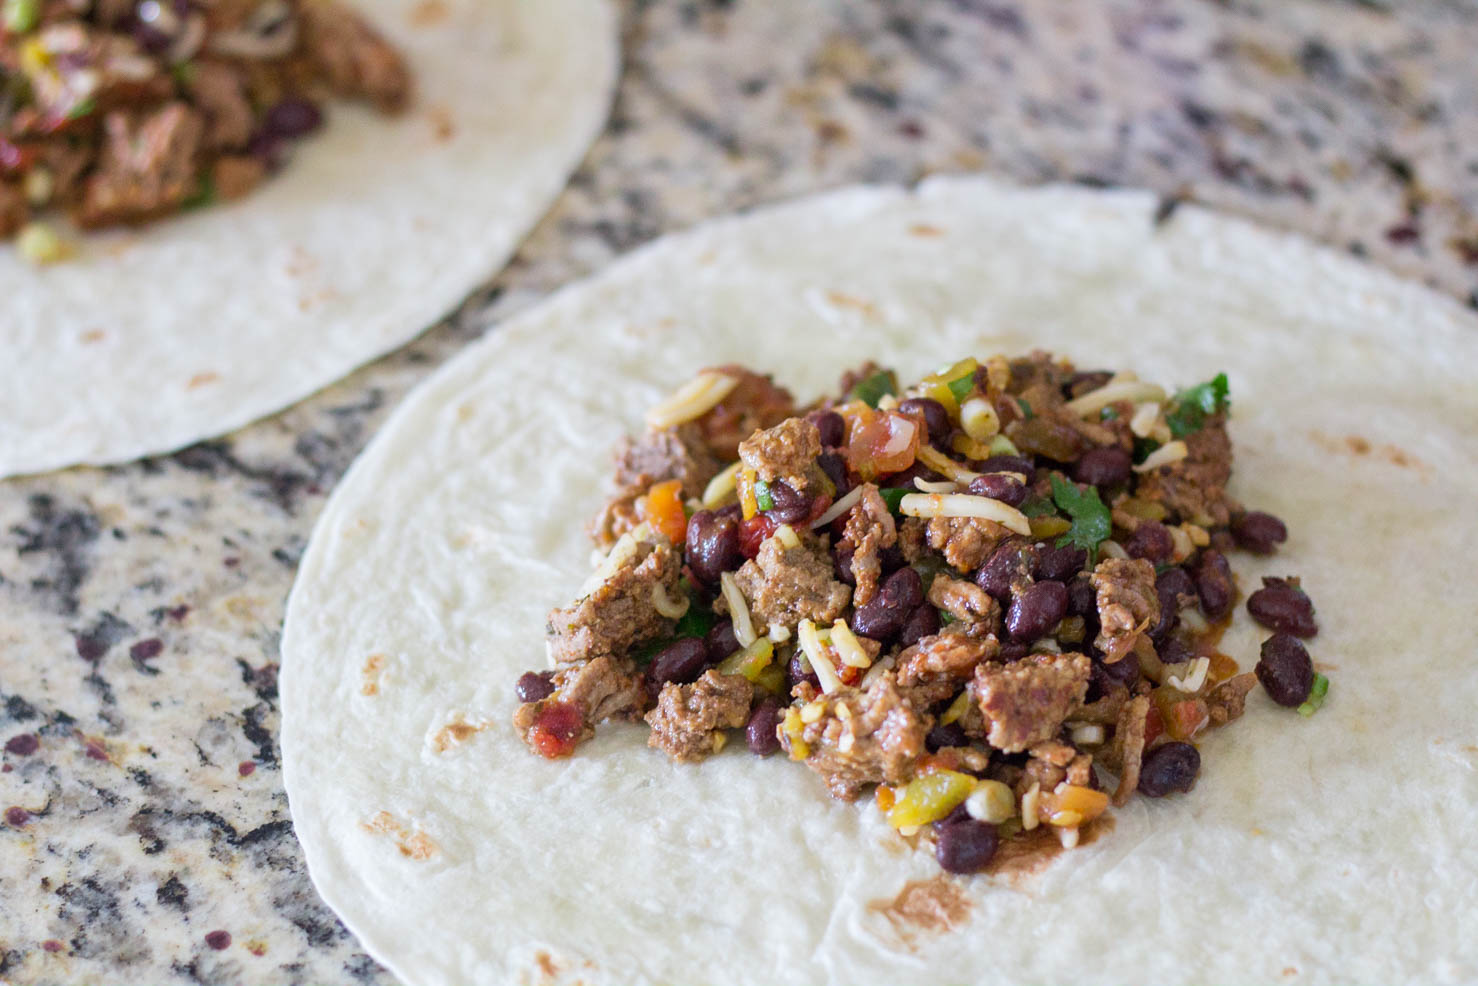
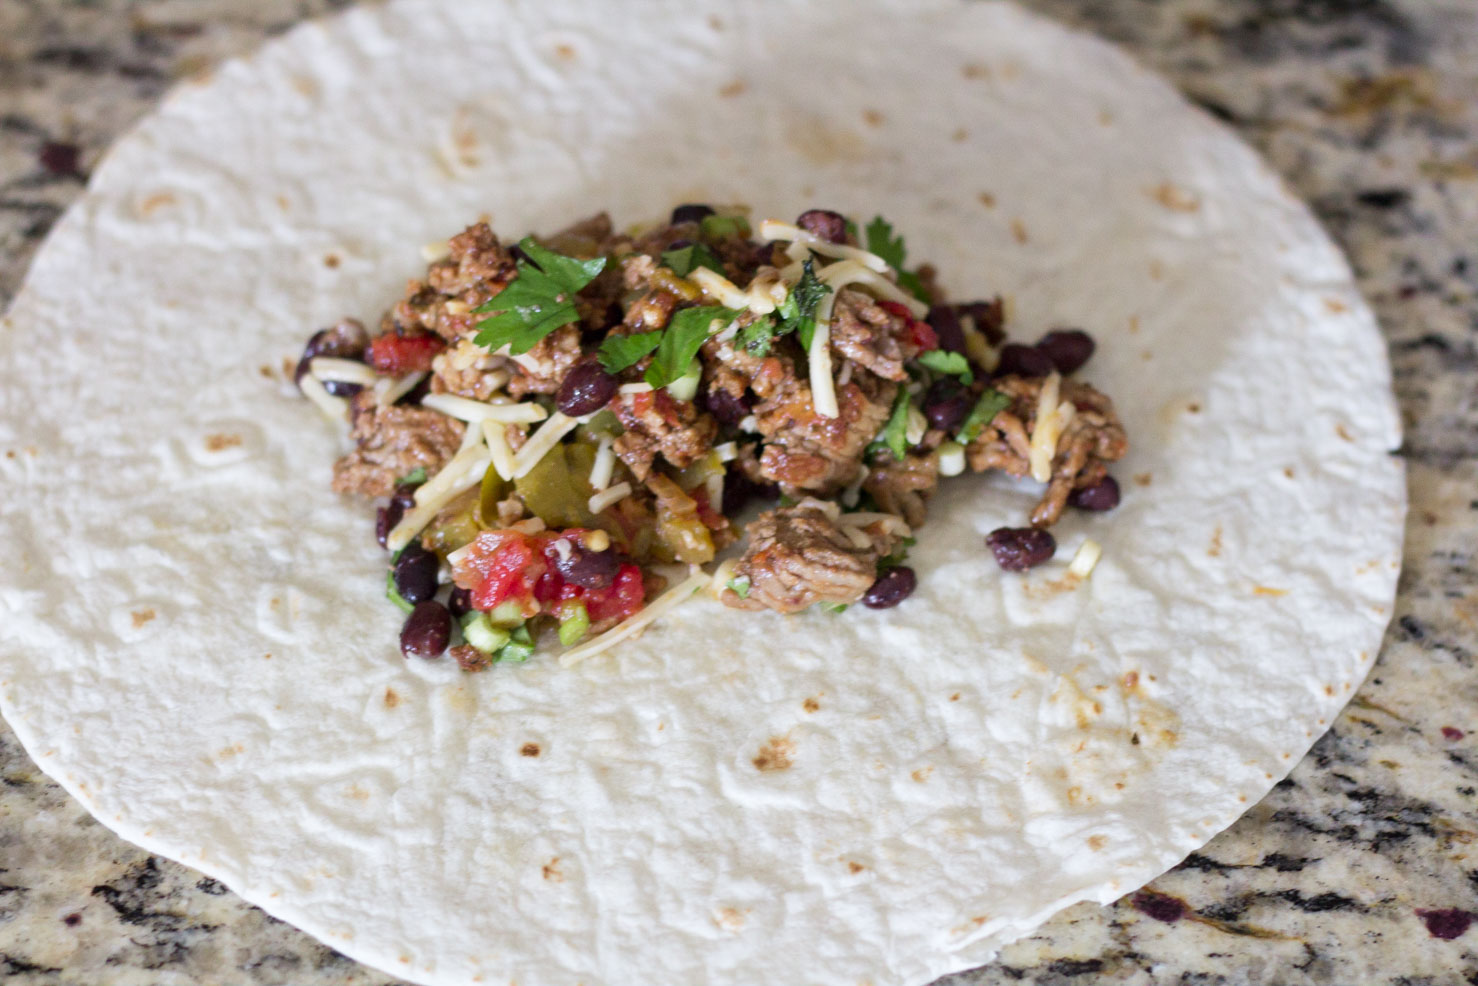
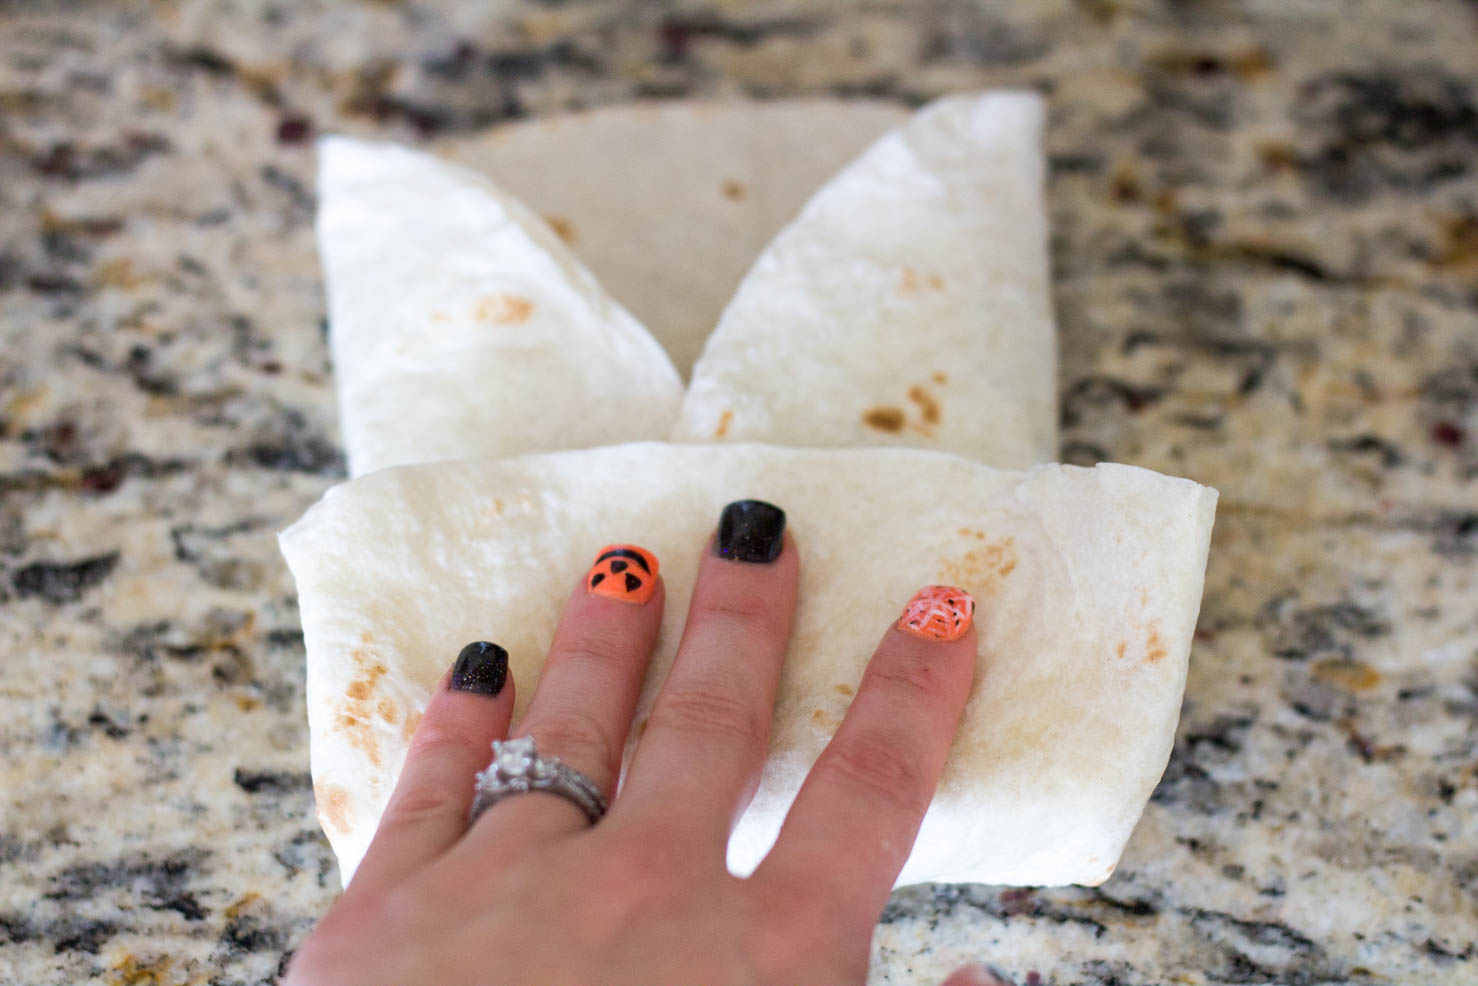
Here is a tip to make things go lightning fast! Find a place in the kitchen where you can lay out all of the tortillas at once. Fill every tortilla with about a cup of filling, you can do more or less depending on how big of a tortilla you were able to score... don't forget you only need little burritos for kid lunches, about 1/2 cup.
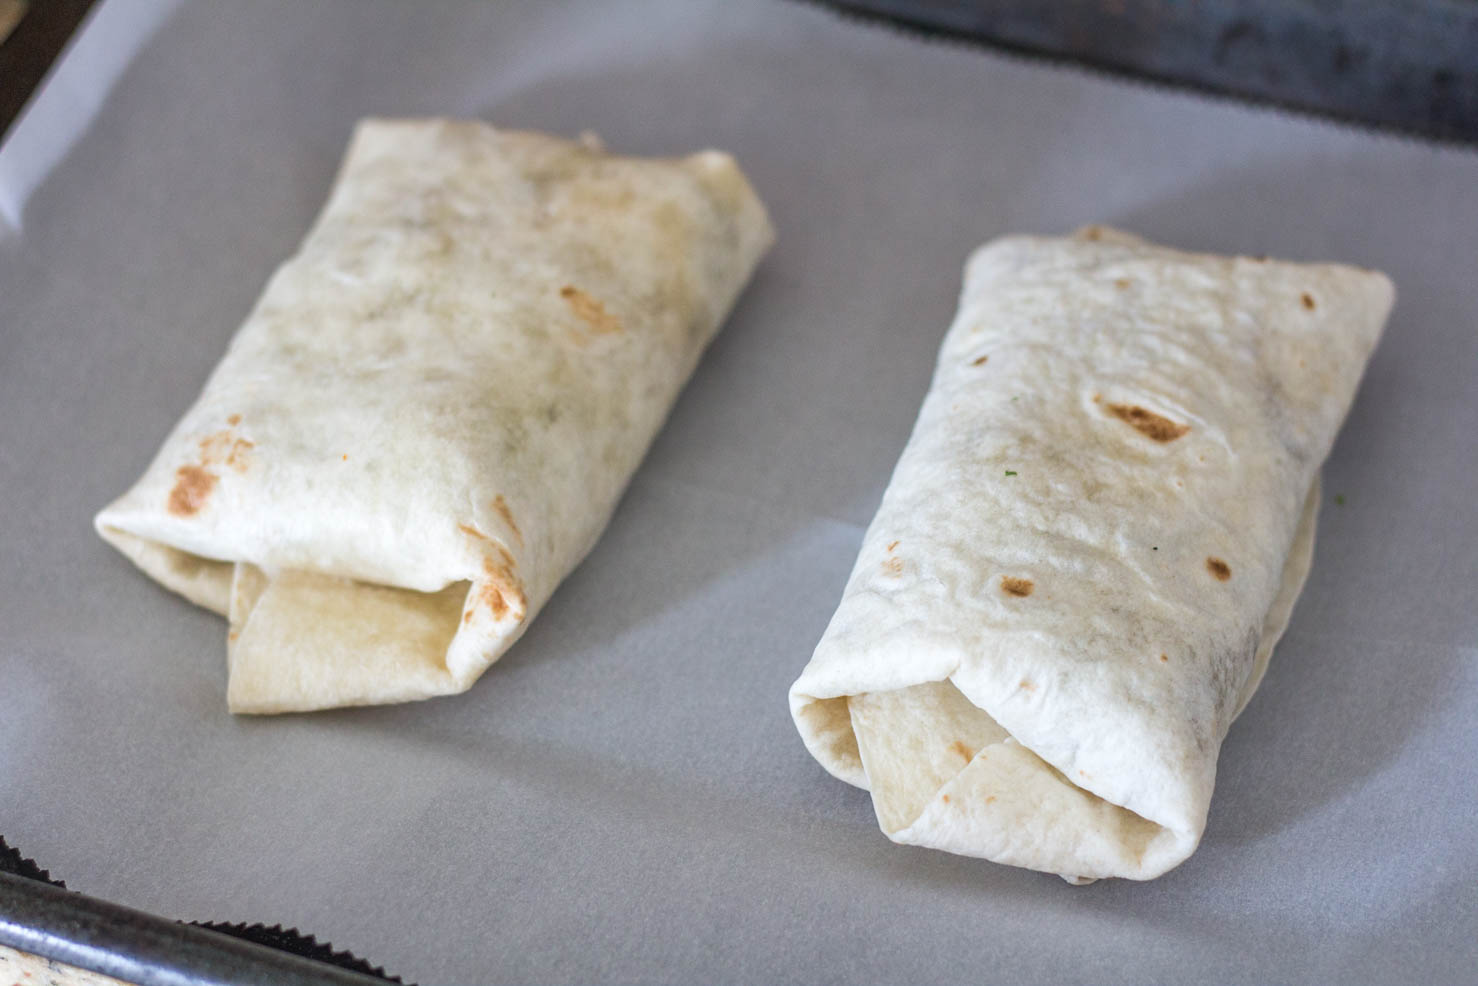
Then roll them into chimichangas in assembly line fashion just like this...
Next...
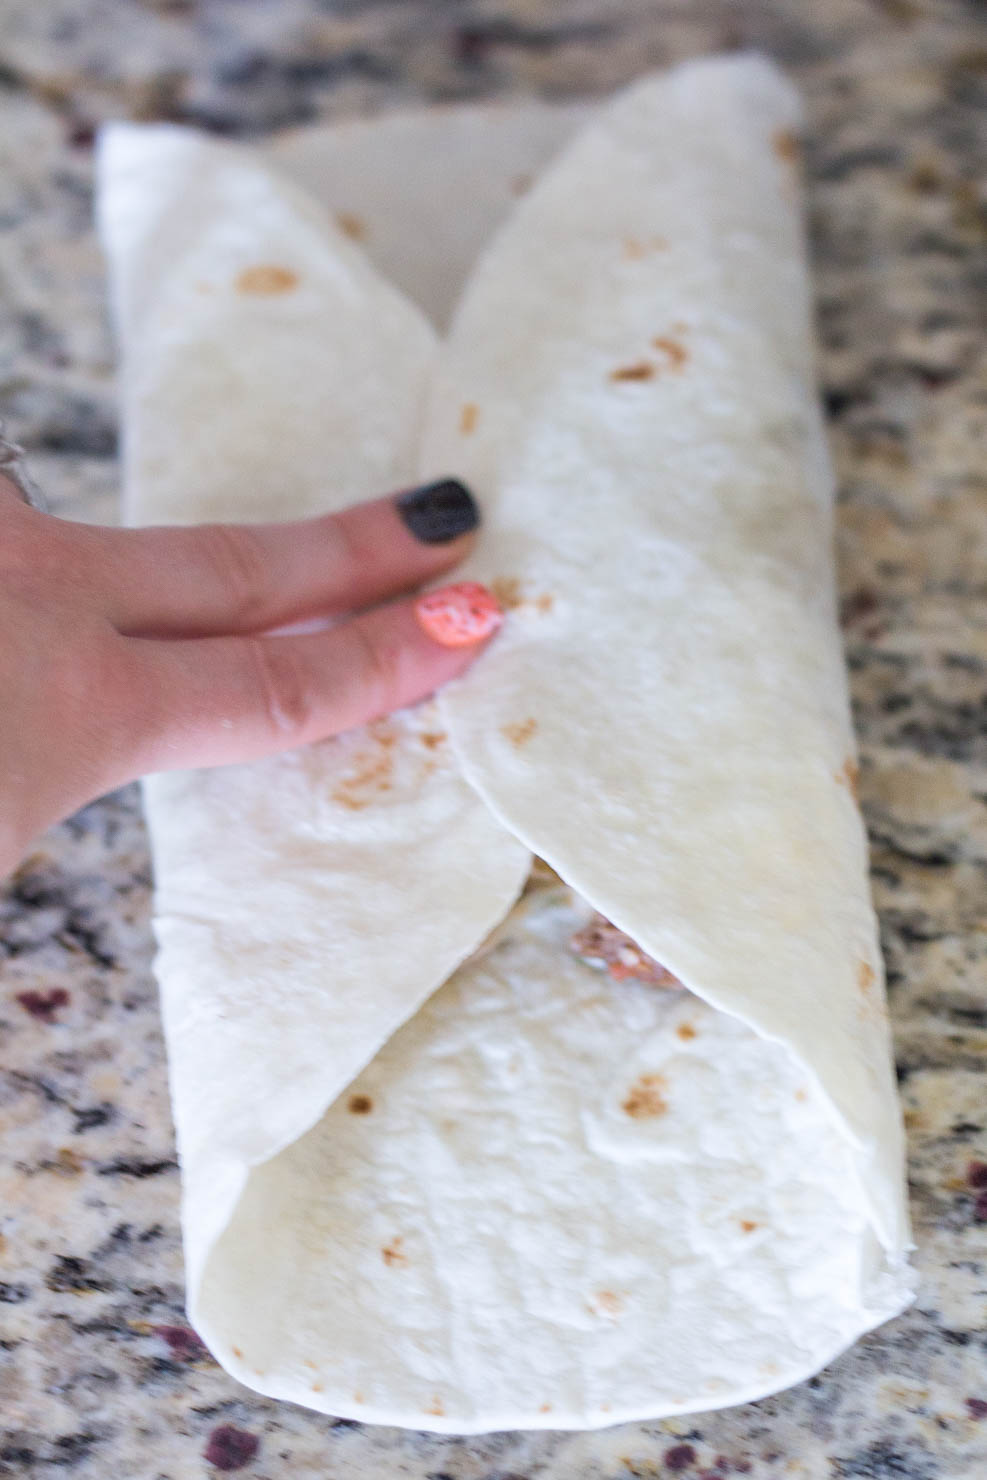
Fold the bottom upwards and away from you. Like my fingernails?! It's Halloween and my little one picked them out. 🙂
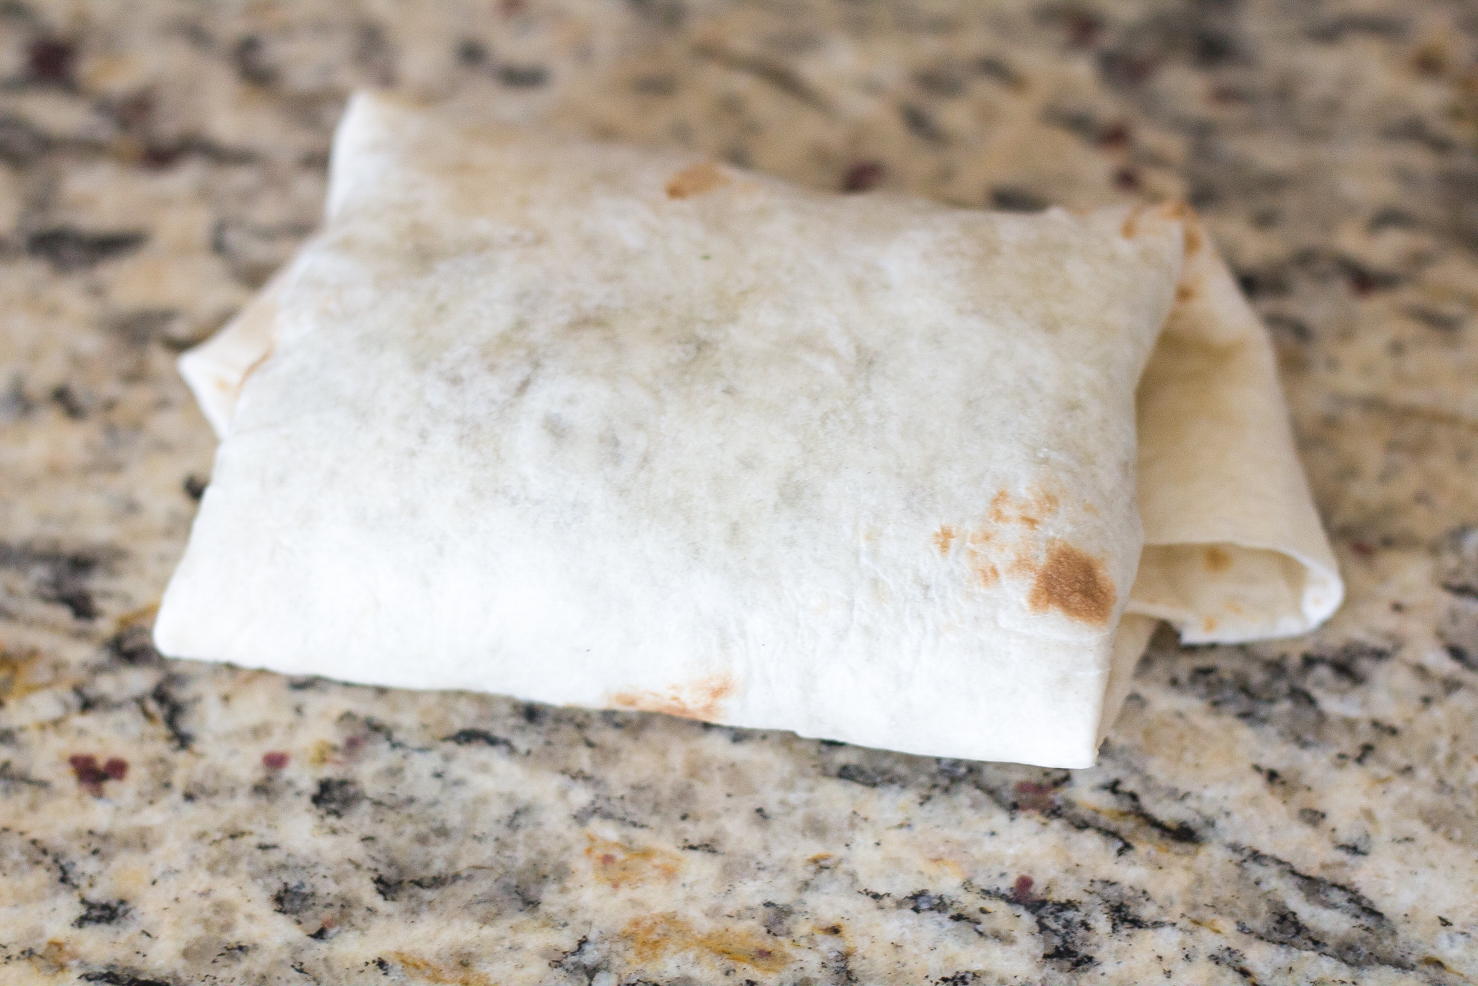
Keep rolling it away from you. Now you have a chimichanga!
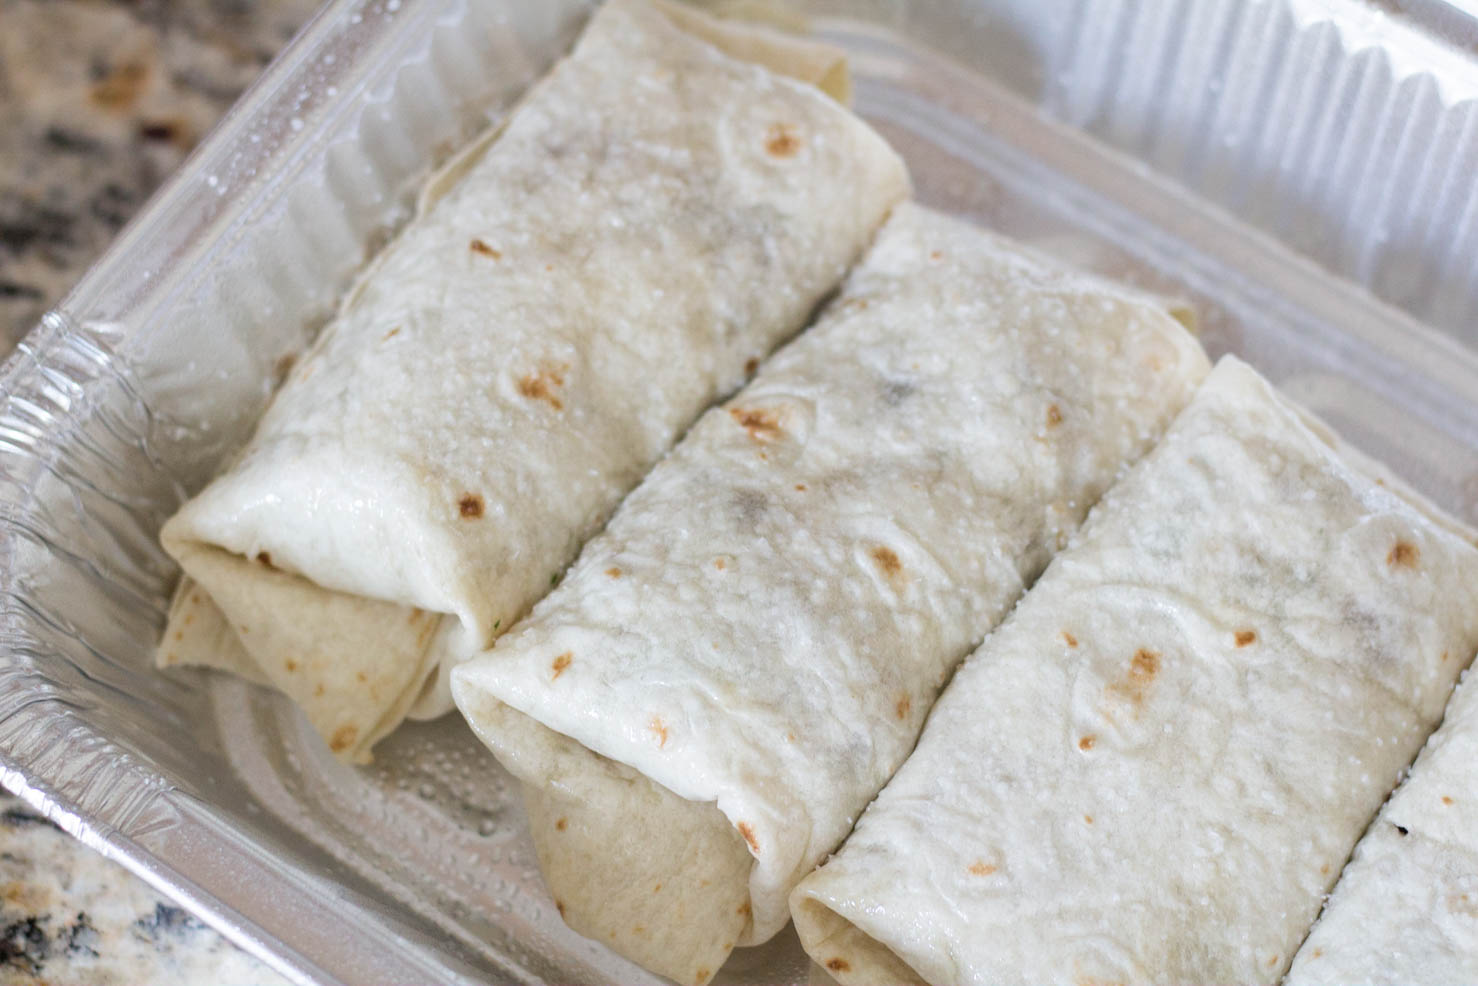
Pans should be sprayed with pan spray and spray the entire chimichanga lightly with whatever spray oil you prefer... I really like coconut oil in the mister bottles. Then sprinkle them with salt.
Pack them into tins for freezing or lay them out on a cookie sheet to freeze them fully before transferring into freezer bags.
The baked chimichangas can be baked from a defrosted state or a frozen state. Whatever is available in your work kitchen will dictate whether or not you can bake these in a toaster oven, or bake them in the morning before you leave for work. They can also be microwaved for kid's lunches (which is technically a burrito but still delish and healthy for your little person). 😀
Bake the chimichangas at 425 for 20 minutes if room temperature (defrosted). For frozen chimichangas Baked them at 400 for 30 minutes.
Here is the recipe for the Baked Chimichangas
If you make the recipe, post it to social media and tag Urban Cowgirl...
I’d love to see how it turns out!

Baked Chimichangas (Meal Prep and Freeze)
Ingredients
- 1 pound ground sirloin
- ½ onion diced
- ½ c. salsa red or green (try my recipes!)
- 4 oz. can mild green chiles
- 1 16 oz. can fat free refried beans or black beans, or kidney beans
- 1 c. freshly grated monterey jack or pepper jack cheese (it’s half of an 8 oz. block)
- Optional stir in: 1/3 c. low fat sour cream
- 12 flour tortillas we like the extra large ones but if you're making these for kids you might get the standard size.
- Cooking Spray I prefer the coconut oil mist
- For Topping-
- Jar of your favorite Red Enchilada Sauce Tomatillo Sauce, Sour Cream, or Chili for the Holidays!
- Traditionally chimichangas can be topped with or laid upon a bed of thinly sliced lettuce tomatoes, black olives, and extra cheese
Instructions
- Preheat the oven to 425 degrees if making these immediately.
For the Filling:
- In a large skillet begin browning the ground sirloin and breaking up the larger chunks with a wooden spoon.
- On a cutting board dice up half of an onion, and begin shredding the Monterey Jack cheese with a cheese grater.
- When the meat has browned and cooked, drain any excess grease and return to the stovetop adding the diced onion. Let the onion cook for about 2 minutes, tossing it as needed.
- Add salsa, green chiles, beans, and cheese. Incorporate these ingredients into the skillet by stirring well and turning the heat down to low until it all melts together.
- On a plate microwave the flour tortillas in 30-second bursts until they are soft and pliable. Line a cookie sheet with foil and spray well with the cooking spray.
- To fill and roll a Chimichangas: Lay the flour tortilla out flat on a clean workspace and fill with 2 large spoonfuls of filling right in the center of the tortilla. To close, tuck in the edges at 3 o’clock and 9 o’clock. Using your thumbs roll 6 o’clock up over the previously tucked edges and roll the entire thing over so that it is now resting on 12 o’ clock. Pick it up gently with your hands or a spatula and place it on the cookie sheet. Repeat with the remaining chimichangas.
- When the tray is full spray all of the chimichangas with the spray oil and sprinkle with salt and pepper.
- Place in the preheated 425-degree oven on the middle rack for 15-20 minutes.
- Bake the chimichangas until they are golden brown and crispy. Serve with your favorite toppings!
- ** Chimichangas are the perfect grab and go freezer snack. Freeze the prepared chimichangas solid, wrap in foil, and place in a freezer baggie. Each chimichangas can be baked as needed, or microwaved after removing the foil. Bake at 400 degrees for 30-35 minutes if frozen.
Nutrition


Leave a Reply