Tallow is rendered beef fat that is shelf-stable, high-heat friendly, and insanely useful for pan-frying, smoking barbecue, and making flaky crusts. It’s considered one of the cheapest “luxury upgrades” you can make in your kitchen, because you’re turning beef scraps into liquid gold.
Tallow works beautifully as a substitute for vegetable oils because it’s packed with rich beefy flavor and holds up to high cooking temperatures without burning.
More and more home cooks are moving away from inexpensive seed oils and choosing to make their own tallow instead. It’s simple, traditional, and a great way to use every last bit of the animal, especially if you already have brisket trimmings or beef fat from the butcher.
Chefs love tallow because it performs better than many modern oils. Unlike olive oil, which can burn quickly at high temperatures, tallow holds up beautifully for searing, frying, and roasting. It contains a balance of saturated and unsaturated fats, and when rendered properly it creates incredible flavor in everything from fried potatoes to cast iron steaks. With just a little time and patience, you can turn simple beef trimmings into one of the most useful cooking fats in your kitchen.
What Is Beef Tallow?
Beef tallow is pure rendered fat from cattle, typically made from:
- Suet (the firm fat around the kidneys — the cleanest, mildest, whitest tallow)
- Trimmings (fat trimmed from brisket, chuck, rib, etc. — still great but can be more “beefy”)
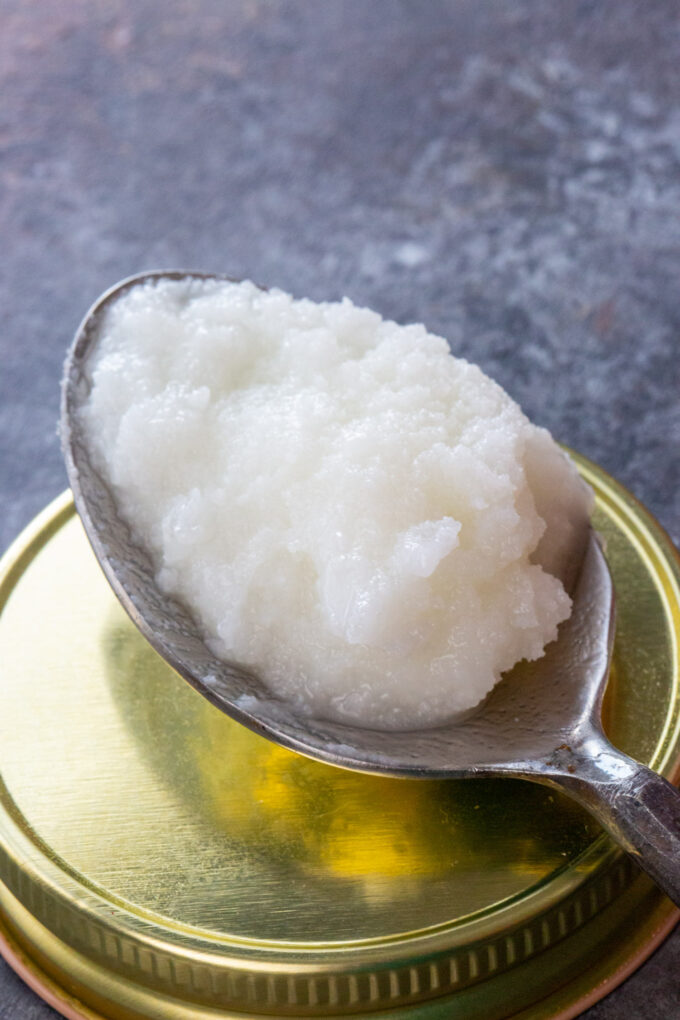
Once melted and strained, beef tallow cools into a smooth, creamy solid at room temperature, very similar in texture to coconut oil. Tallow has the added benefit of a high smoke point, which means it can handle high heat without burning as quickly as butter or many other fats. That matters a lot if you want great browning, crisp edges, or serious frying.
Animal Fats Vocabulary:
- Tallow is Beef Fat
- Lard is Pig Fat
Suet vs. regular beef fat (trimmings)
- Suet: kidney/loin fat, hard + crumbly, very clean render → best tallow
- Trimmings: fat from brisket/steaks/roasts, softer + sometimes “meatier” → still great, just more flavor
Why suet matters
- Renders into the whitest, most neutral beef tallow (less “beefy” smell/flavor)
- Higher quality for baking (classic for British puddings/pastry)
- Great for frying (clean flavor, stable fat)
What to ask for at the butcher
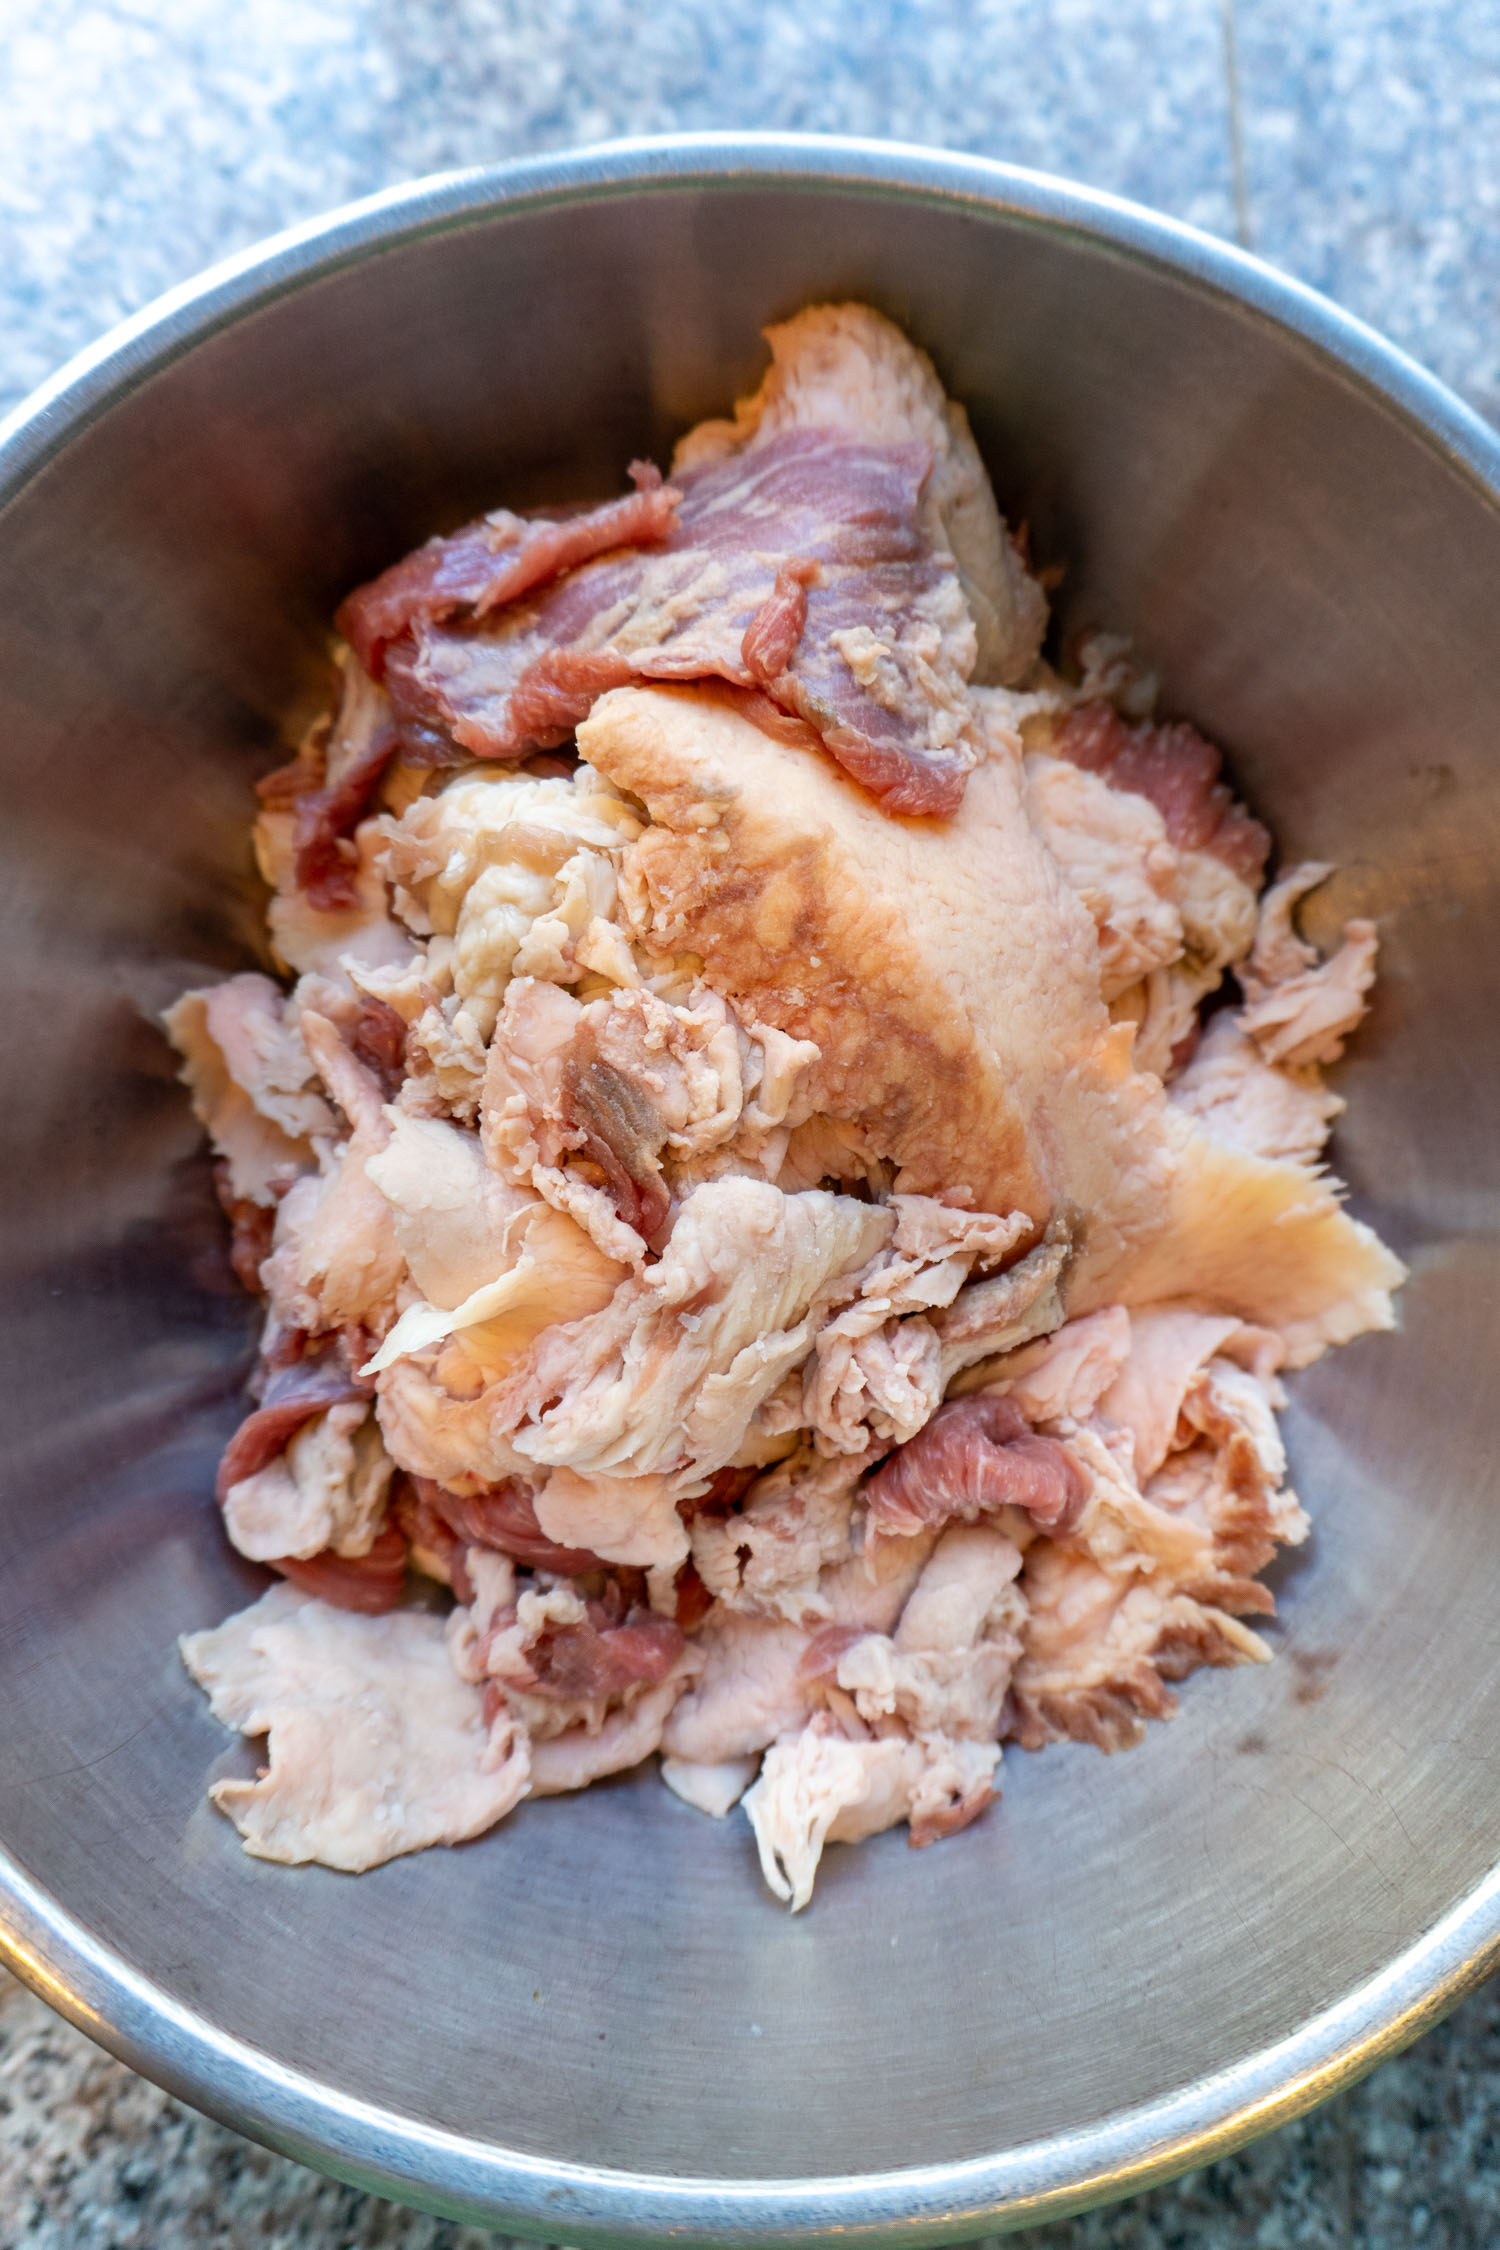
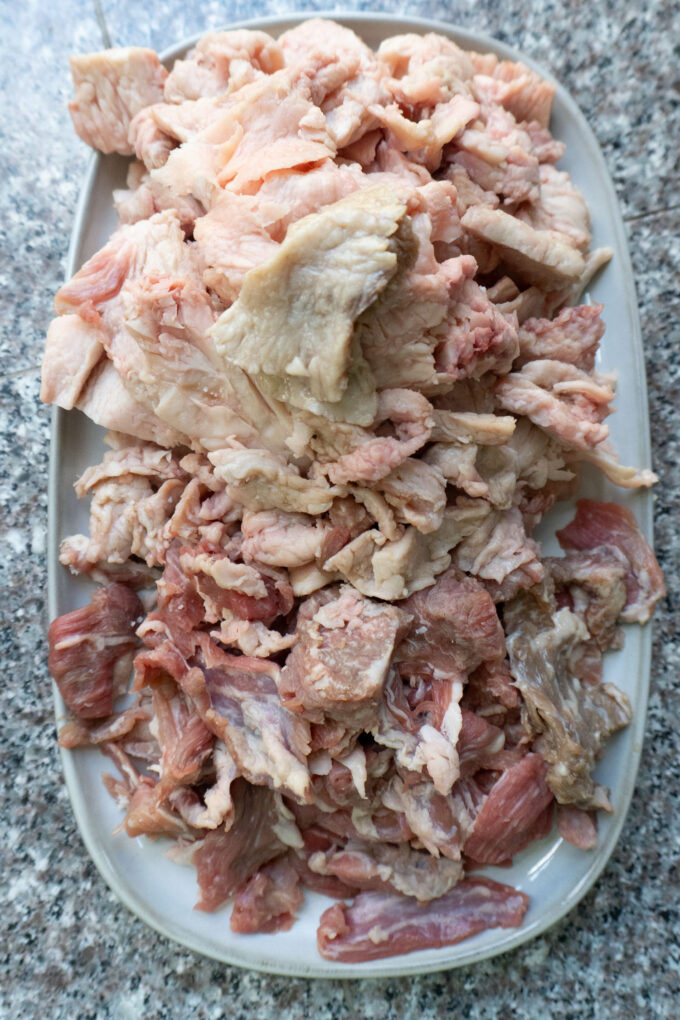
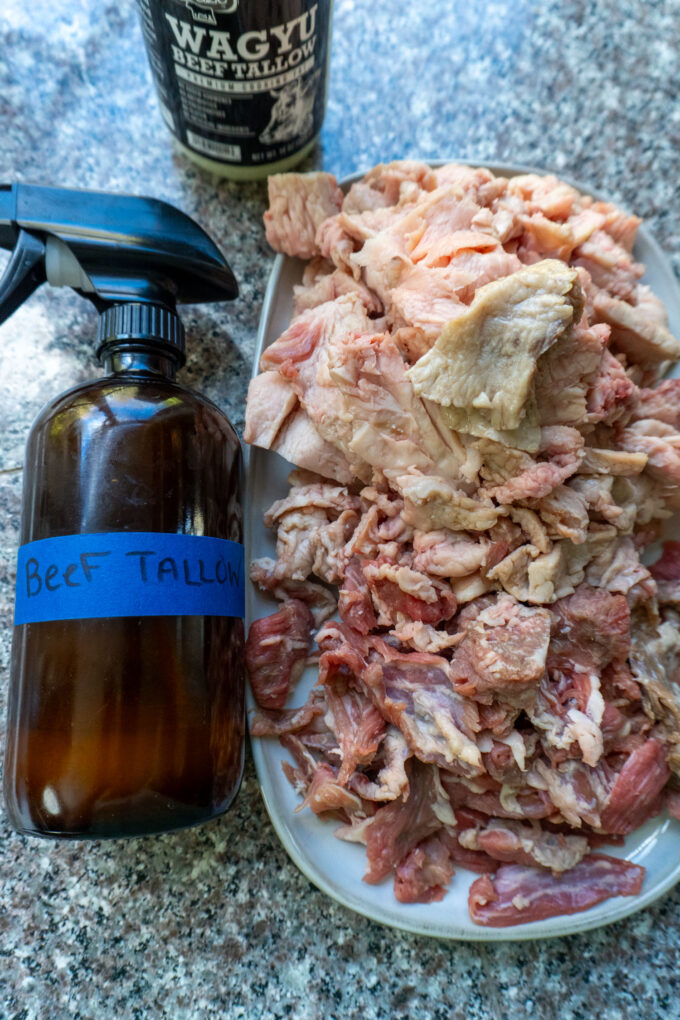
If you’re trimming your briskets and saving the solid fat, you’re already halfway to making homemade beef tallow. The most important step is keeping the trimmings clean. Remove any dark color, blood residue, or bits of much meat before you begin so the final tallow has a clean flavor and good shelf life. The quality of the fat matters more than anything else, so starting with well-trimmed fat will give you the best results.
If you don’t have brisket fat on hand, you can call your butcher and ask for beef fat trimmings or suet. Some people also find packages of fat at the grocery store, especially if they ask the meat department. Suet makes a milder, lighter tallow, while brisket fat produces a richer flavor that BBQ lovers prefer. If you happen to buy beef from grass-fed cows or even split a half cow with friends or family, rendering the fat is one of the best ways to use every part of the animal.
The Rendering Process
Rendering is melting the fat slowly so it separates from any solids, moisture, and impurities, then straining it so you’re left with a smooth, stable fat that is solid at room temperature.
In this post, we use what we have: small pieces of collected hard fat from trimming brisket. You are welcome to use your trimmings or order suet if you prefer a creamy white tallow.
Making your own high-quality beef tallow is a simple method that turns leftover barbecue trimmings into a versatile cooking staple.
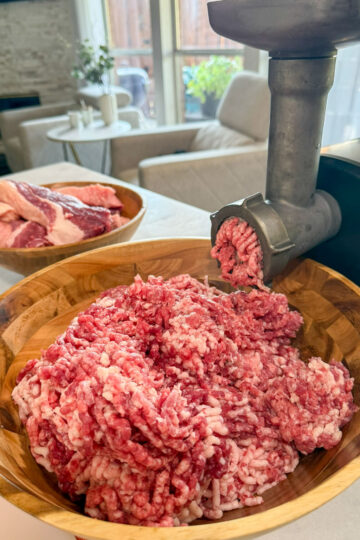
Start by cutting your own fat from brisket or other beef trimmings into smaller pieces, removing any obvious pieces of meat or excess connective tissues. As the fat slowly renders, it melts down into clear liquid fat that can be strained and saved for cooking.
Once finished, the tallow can be poured into a glass container and allowed to cool. Store it in a dark place where it will solidify into a smooth, creamy cooking fat. Properly rendered tallow has a wonderful rich flavor and holds up beautifully to high temperatures, making it perfect for high-heat cooking like roasting vegetables or frying crispy french fries.
Why You’ll Love Cooking With Tallow
- High smoke point → great for frying, searing, and roasting
- Crispier results → fries, potatoes, hash browns, tortillas, you name it
- Less waste → use what you’d normally toss
- Cost-effective → a big jar for the price of… basically nothing
Using Tallow in Barbecue (which we do a lot on this blog)

If you’ve ever smoked a brisket and felt personally attacked by how fast the flat can dry out, you’ve probably joined the sacred spritz club: every 45 minutes, lid up, spray bottle in hand. In the past, we reach for apple cider vinegar because it sounds right: moisture! tang!
But here’s the plot twist—water-based spritzes don’t actually add lasting moisture. They cool the surface and can help bark creation. They can also help with smoke adherence… but they also keep washing and steaming your bark before it fully sets. (I recommend trying both tallow bark and apple- cider-vinegar spritz bark to figure out which bark you prefer.)
Now compare that to what brisket is begging for during the long haul: fat.
When you smoke a brisket, you’re literally watching the best spritz in the world render out of it. That golden liquid tallow you collect from trimmings? That’s not a byproduct—it’s brisket gold. Warm it up, pour it into a heat-safe sprayer, and use that as your spritz. You’re not misting the meat with water… you’re coating it in a micro-layer of flavor and protection that feeds the bark instead of fighting it.
And if you’ve never made your own beef tallow before, don’t worry—this is one of those “why wasn’t I doing this years ago?” kitchen moves. Let’s make it.
How to Use Beef Tallow (The Fun Part)
Here’s where tallow becomes your kitchen personality:
- Roast potatoes: toss chunks with melted tallow + salt, roast at 425°F
- Spritzing brisket: Spritz to encourage bark formation
- Crispy fries: yes, that steakhouse flavor lives here
- Searing steaks: high heat, gorgeous crust
- Cast iron seasoning: makes a slick, durable layer
- Gravy + roux: rich and silky
- Tortillas: a Texas-level flex (just saying)
FAQs
Does making tallow smell?
If you render low and slow, it smells mild. High heat makes it smell like you’re cooking a whole cow in your kitchen.
What are “cracklings”?
The browned little bits left after rendering. Salt them and snack, or feed them to someone who thinks “nose-to-tail” is a personality trait.
Can I render fat from cooked beef?
Sort of, but it will taste more “cooked” and won’t be as clean/neutral. Best results come from raw fat and the final jar of tallow is shelf stable.
The Secret to Clean Tallow: Cut It Small
The smaller the fat pieces, the faster and more evenly it renders.
Best option: partially freeze the fat for 20–30 minutes, then dice it.
Fast option: pulse in a food processor (don’t puree into paste — small pebbles is perfect).
Method 1: Slow Cooker (My Favorite “Set It and Forget It” Method)
This is the most foolproof and least likely to smell up your house.
Step-by-step
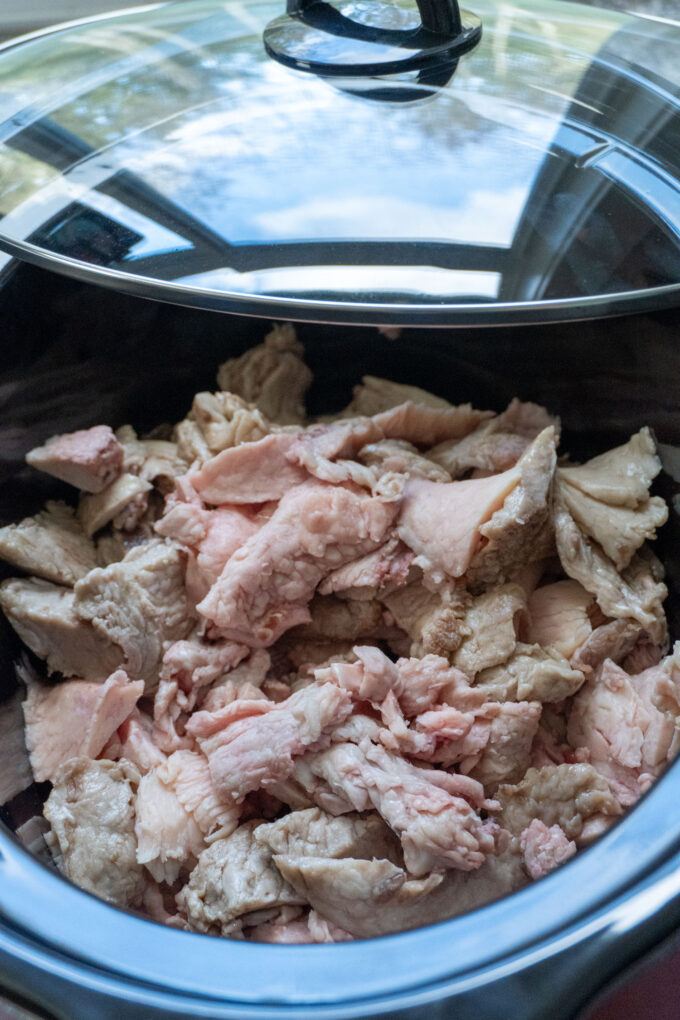
- Add fat to the slow cooker.
Optional: add ¼ cup water to protect against early scorching. - Cook on LOW for 4–8 hours, depending on the amount.
Stir every 60–90 minutes if you’re home. - Watch for the cue:
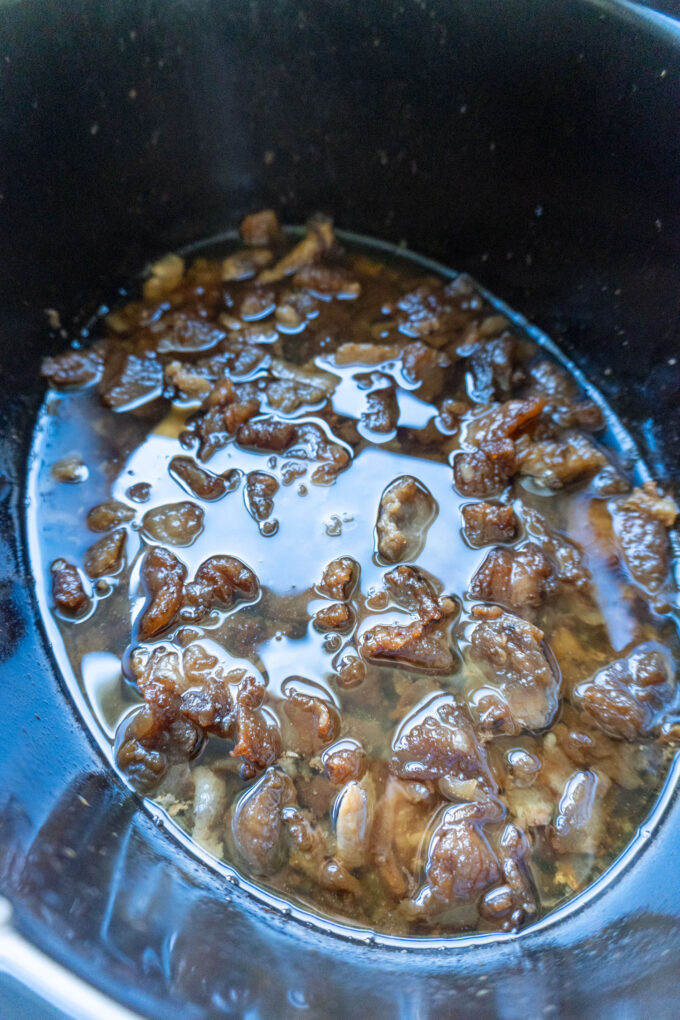
It’s done when the fat pieces (cracklings) look golden-brown and shrunken, and the bubbling slows down. - Strain.
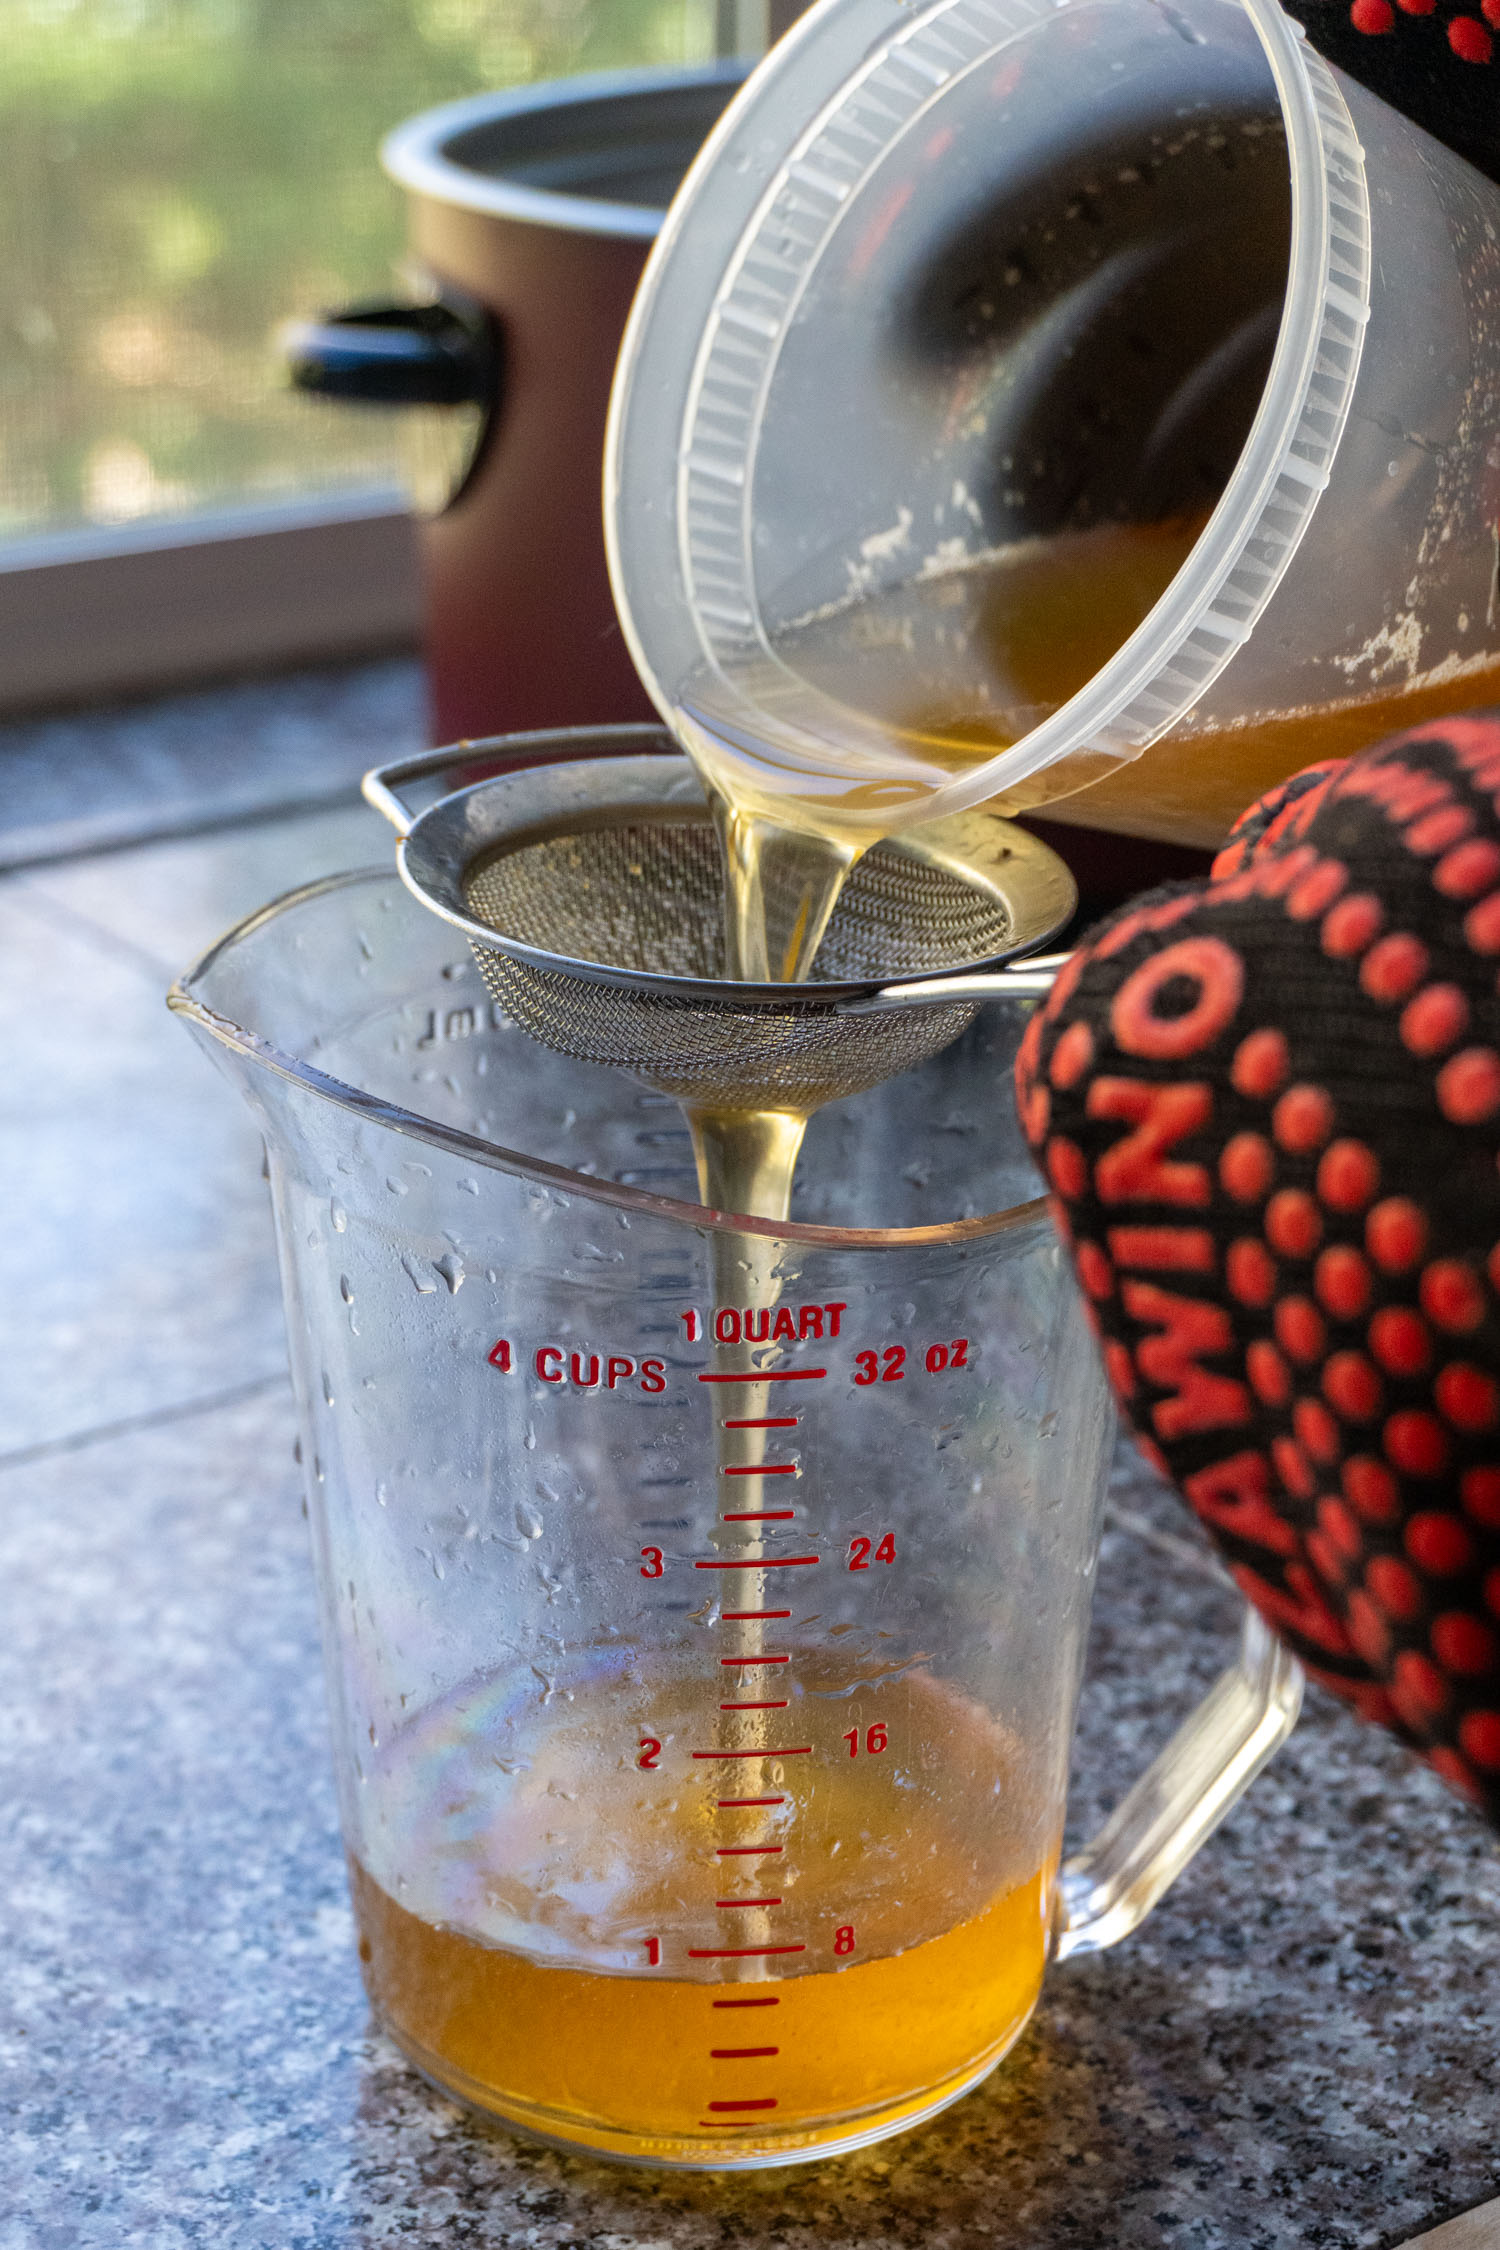
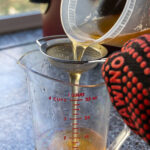
Carefully pour through a fine mesh strainer into a heat-safe bowl or measuring cup.
For extra-clean tallow, line the strainer with cheesecloth. - Jar it.
Pour into clean jars and let cool uncovered until room temp, then lid.

Method 2: Stovetop (Faster, Still Easy)
Step-by-step
- Start low and slow.
Add diced fat to a heavy pot with optional ¼ cup water. - Heat on LOW.
Stir occasionally. You’re melting it, not frying it. - Keep the heat gentle for 1–2 hours, until cracklings are golden and the bubbling slows.
- Strain + jar (same as above).
Important: If it starts to smell “meaty” or darken too much, your heat is too high. Low heat = clean flavor.
How to Get Snow-White, Mild Tallow (Not Beefy, Not Brown)
If you want that beautiful neutral tallow that doesn’t taste like roast beef:
- Use suet when possible
- Keep heat low the whole time
- Stop rendering when cracklings are golden, not dark brown
- Strain twice (mesh strainer + cheesecloth)
- Avoid splashing browned bits into your jars
How to Store Beef Tallow
- Room temp: 1–3 months (cool pantry, clean jar, no crumbs introduced)
- Refrigerator: 6+ months
- Freezer: up to a year
Pro tip: Store some in a small counter jar for daily cooking, and keep your “bulk” jar in the fridge.
How to Make Beef Tallow (For Cooking and Barbecue)
Equipment
- 1 Slow Cooker or Dutch Oven
- 1 Sharp knife
- 1 Cutting Board
- 1 Fine Mesh Strainer
- 1 Cheesecloth (optional but makes it extra clean)
- 1-3 Clean jars with lids
Ingredients
- 2 to 5 pounds brisket fat trimmings
- Optional: a small splash of water
Instructions
Trim the Fat Carefully
- Before rendering, clean up the fat pieces. Remove any dark color, blood spots, or areas with meat attached. The cleaner the fat, the better the final tallow will taste and the longer it will store.
Cut the Fat Into Small Pieces
- Cut the fat into small cubes. Smaller pieces render more evenly and help the liquid fat separate from the solids faster. You can make the fat firmer by placing for 20 minutes in a freezer. This helps with cutting small pieces.
Slowly Melt the Fat
- Place the fat pieces into a slow cooker or heavy pot. If you’re using the stovetop, cook the fat over low heat so it melts slowly without scorching. When using a slow cooker, you can cook it on high heat since the temperature is controlled and the liquid fat won’t burn as easily. As the fat renders, it will slowly melt down and release clear liquid fat, leaving behind small browned bits of connective tissues and pieces of meat that sink to the bottom. (Cracklings)Rendering takes a long time, but slow cooking keeps the fat clean and prevents burning. As the fat heats, it will begin melting and releasing clear liquid fat while the solid pieces slowly shrink. It's best to allow the fat to render while you go about your day, that's why we love the slow-cooker method.
Continue Cooking Until Fully Rendered
- Keep the heat low and allow the fat to render completely. The remaining bits will eventually turn golden and crisp. This process can take anywhere from 3-6 hours depending on the amount of fat.
Strain the Tallow
- Pour the hot liquid through a fine mesh strainer or cheesecloth to remove the crispy solids. This leaves you with clean, pure tallow.
Store the Tallow Properly
- Pour the strained fat into a glass container while it’s still warm. Once cooled, it will solidify into a creamy white fat similar in texture to coconut oil.
- Store the container in a dark place or in the refrigerator to extend shelf life.

Tara says
This was incredibly easy to make and I know it's 100% tallow and not cut with anything else to make some stupid corporation more profitable! LOL