Welcome Back, Brisket Brethren...
Hope you brought your cowboy boots cause today we're going to smoke us a brisket!
For everyone just tuning in, this is Part 2 of our adventure on how to make Aaron Franklin's Brisket recipe. You can find Part 1 where we got all of our ingredients together, right here.
We have already discussed Franklin's cookbook, and his technique, with some additional tips on where I sourced the other required materials.
You'll want to make sure you get caught up before starting Part 2!
In this post, we're going to walk through the trimming of the brisket. I want to note that for these photos I am using a packer brisket, which is an ordinary grocery store brisket —before my ANGUS PRIME brisket arrives!
My concern was that I should be familiar with his specific technique before trying it out on a brisket so pricey, but this recipe turned out so good, I think it would be hard to mess it up!
For the upcoming Urban Cowgirl Youtube episode on this brisket recipe, we'll be showcasing the ANGUS PRIME BRISKET! Yay!
First, you want to get your knives SHARP!! This is my favorite knife sharpener of all time. I was super skeptical when my husband bought it, but now I think it's the greatest thing he's ever bought our family, ever.
It's AMAZING. Knives sharp? Cool. Let's do this.
Step One : Trimming The Brisket
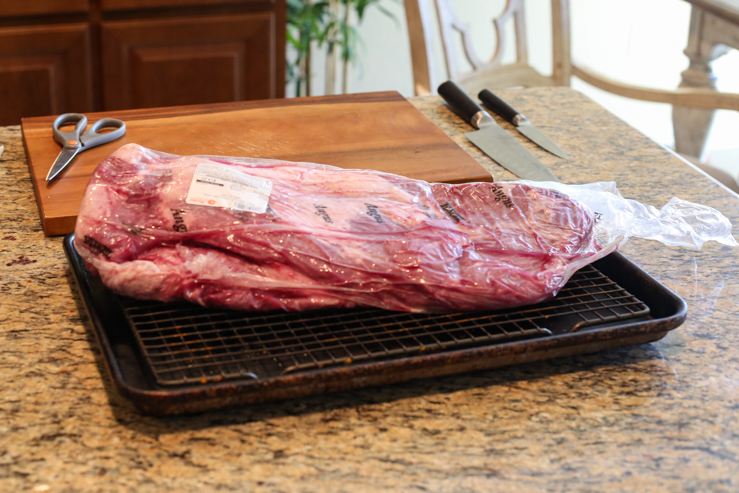
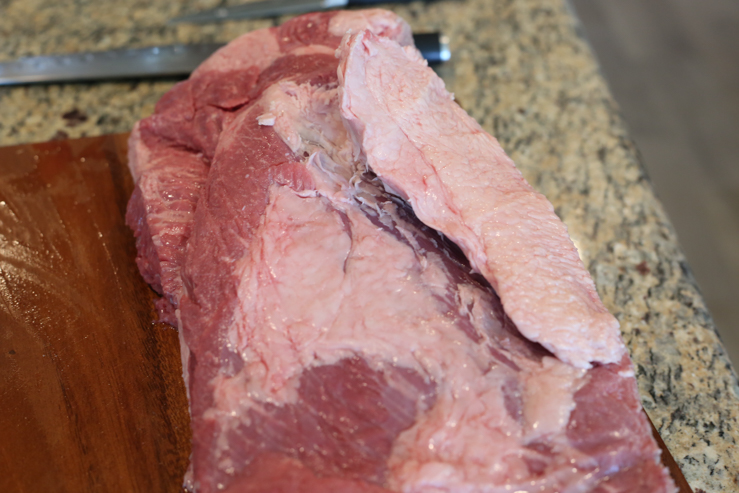
As I mentioned before, this is my exquisite, 8lb. Angus brisket from Market Street. It's worth mentioning that this packer brisket turned out mighty fine! It's no where near the marbling of a prime brisket, but it's also $100 cheaper!
So, I used a packer brisket for the first round of this experiment, and this is exactly what they look like when you bring them home from the grocery store.
Let's open it up!
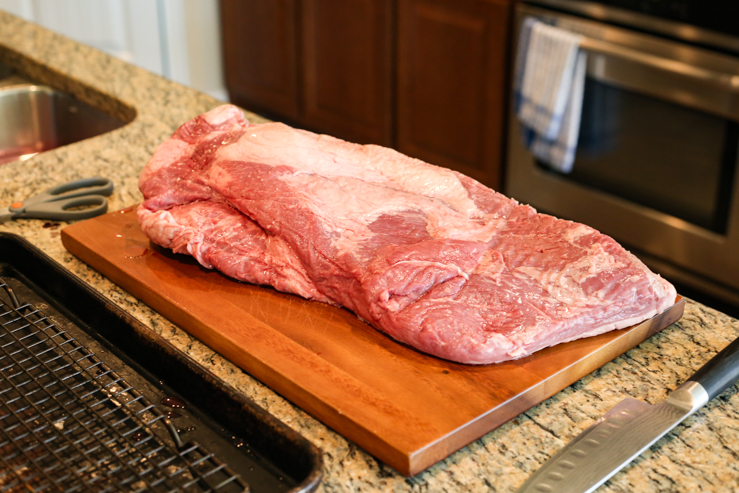
This is what it looks like from the left side. (Above)
Identifying The Point & The Flat...
The flat of the brisket is closest to the knife. (It is flattish.) The point of the brisket is closest to the scissors. (It's more fatty, which means more flavorful.) These are two different types of muscles and occasionally grocery stores will separate them, and sell them separately. We're not going to do that, but it's still a must to be able to identify which side is which if you're going to be in the brisket club.
I wrote my kids a little song to teach them how to identify the different parts of a brisket! Do you remember the childhood rhyme, "This is the church, this is the steeple, open the doors and see all the people?" Here is my version—
This is the brisket point, this is the flat, turn it on one side, you'll find all the fat!
Close it up and give it a roast, serve it with pickles and onions, and toast!
😀 I'll make sure and sing this for ya on the Urban Cowgirl Youtube Channel!
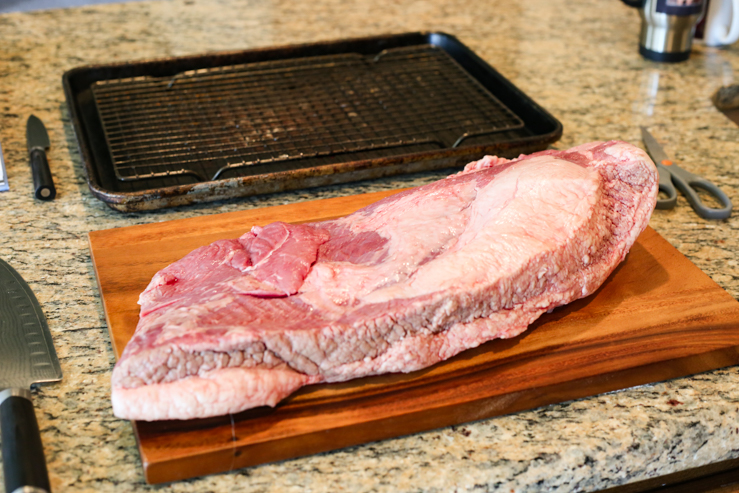
This is what it looks like from the right side. (Above) Can you identify the point and the flat from this side?
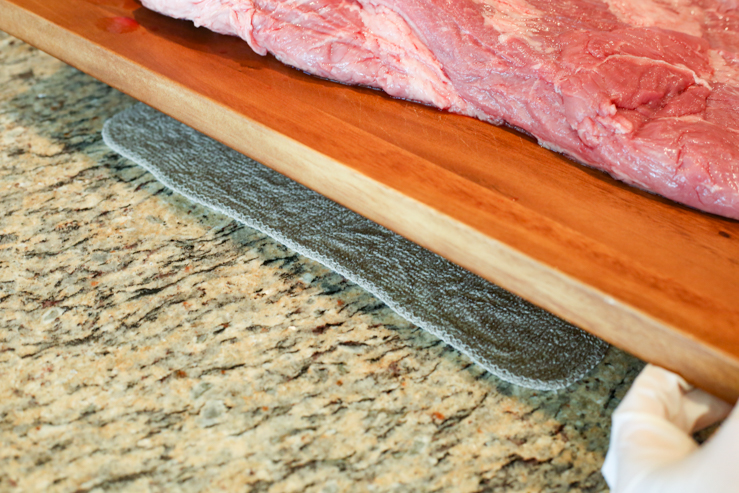
Put a small rag underneath your cutting board before you get started to prevent it from sliding around on you!
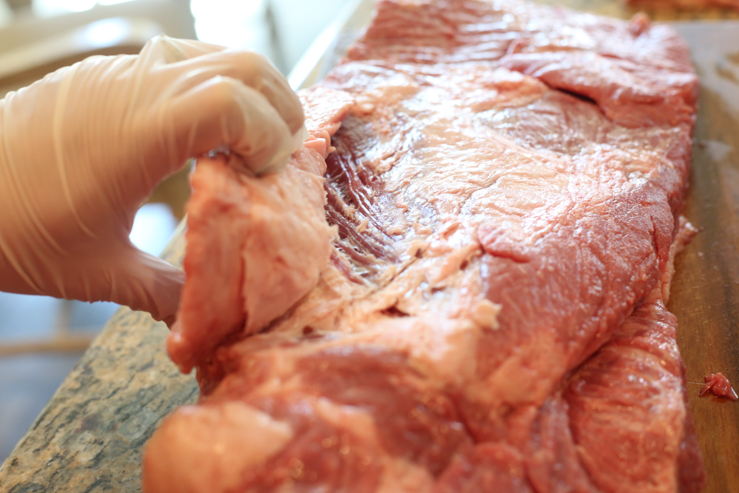
Ok first incision...

So Franklin is a trimmer... and by that I mean he's basically Edward Scissor Hands.
I have never trimmed more meat/fat off of my brisket than I did using his technique. At first, I was worried that this was unnecessary, but after seeing how professional looking the final brisket turned out, I will be doing this every time.
The first cut is from the left side of the brisket (picture above) and it is one thin strip (from top to bottom), intended to give the brisket a nice fine line.
Start at the point and cut down through the flat... it's easier that way.
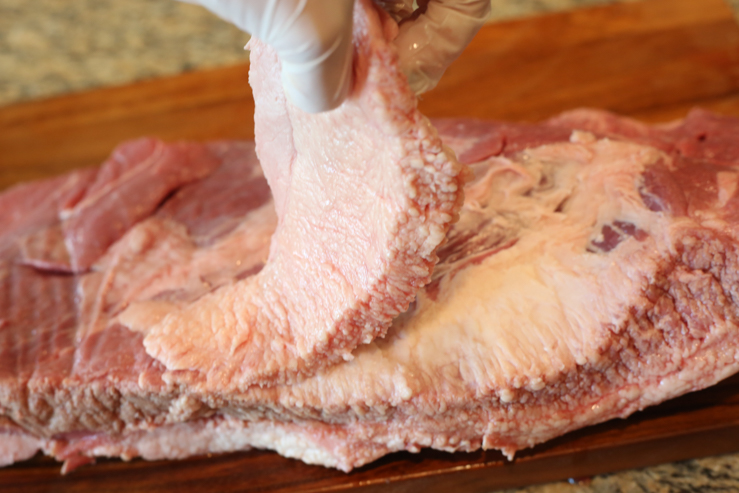
Second Incision - Now we're going to go after this big area of fat over the point of the brisket. I have taken a small pairing knife and cut into the area when the fat meets the meat, and you can slowly start separating it out, intact. (Below)
This is what it looks like when you move to the other side. I am still working on separating the large deposit of fat from the point... when you get a good bit of the way in, Franklin recommends yanking it off.
Almost done...
🙂 🙂 🙂
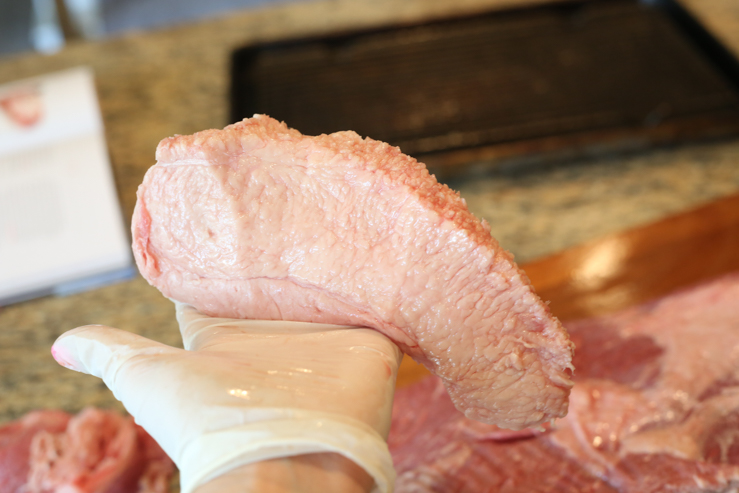
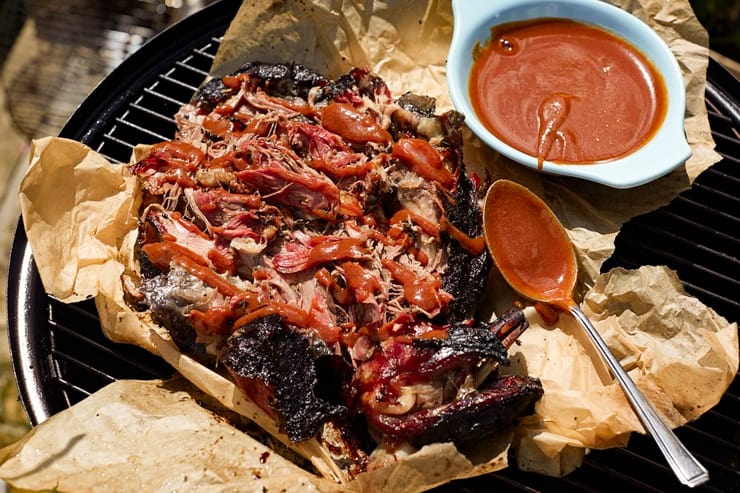
Nailed it! One big piece of fat! You could discard this, but if you're a tamale maker like me I would render it along with the brisket, and add it to your tamale masa! You can freeze rendered fat almost indefinitely. (I will elaborate on this in the Youtube tutorial.)
Now look what we have!
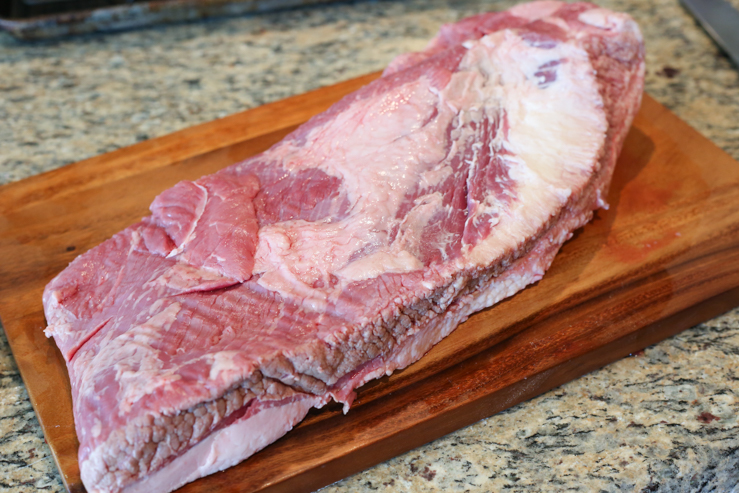
Next we will clean up the gnarly looking edge that looks like it's been in the swimming pool too long, and then flip it over.
This is the fat side! Remember the little song? "Turn it on one side, you'll find all the fat!"
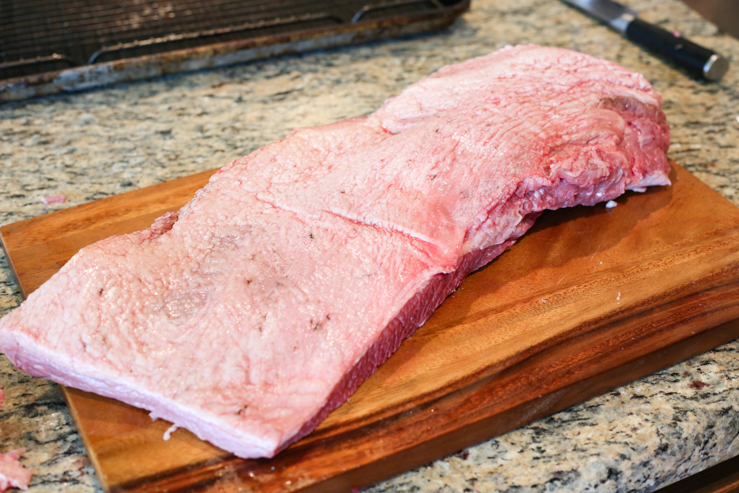
Now you want to trim the fat to 1/4 - 1/2 an inch. I would leave it closer to 1/2 an inch if you are using the packer brisket, because there is less marbling within the meat.
The point is going to be the area where you remove the most fat. Just slice with your super sharp knife, from the edge over (right to left) taking off strips of the gnarly looking fat.
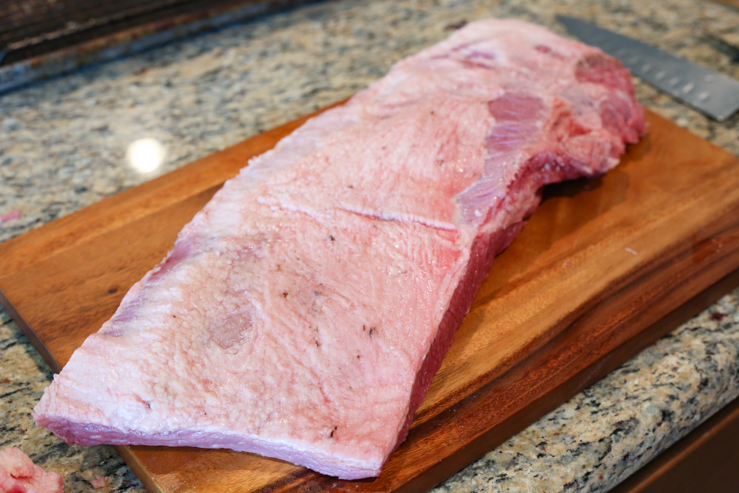
You did it! Great job. I think I took a little too much off the point in my brisket...this is the smallest brisket I've ever made—because it was FOR SCIENCE!
But, you get the idea! Let's head on to PART 3!!!
If you have any questions regarding the trimming portion of how to make Aaron Franklin's Brisket, leave me a comment below and I will get back to you asap!


alan arsht says
Re Texas chili, I am still a bit confused about how much fat to take off. In the Youtube video, you did not discuss it. Should the final trimmed brisket have little fat?
Sarah Penrod says
Hi Alan, you don't have to trim any of the fat off the brisket for the brisket chili recipe. When you sear the meat, most of the fat will liquify and it can be poured off.
I just tell people they can trim the fat a little bit if they want because some people are super mindful of the amount of fat in a dish. Let me know if you need more help. - Chef Sarah